Installing laminate countertops is a rewarding DIY project that can give your kitchen a fresh new look. By following a few straightforward steps, you can replace your old, worn-out countertops without the need for professional help. This guide will provide a clear and concise roadmap to help you successfully complete the installation.
You’ll start by gathering all the necessary tools and materials to get the job done right. Proper planning and preparation are key as you’ll need to measure and make precise cuts to fit the laminate countertop perfectly. Once you have your materials ready and measurements in place, the process of removing the old countertop and fitting the new laminate can begin.
With your laminate countertop cut and fitted, the next steps involve the final installation and adding finishing touches. Learning how to care for your new countertop will help ensure its longevity and maintain its appearance. Whether you’re aiming for a budget-friendly remodel or simply updating your kitchen’s look, this guide will walk you through each step to make your DIY project a success.
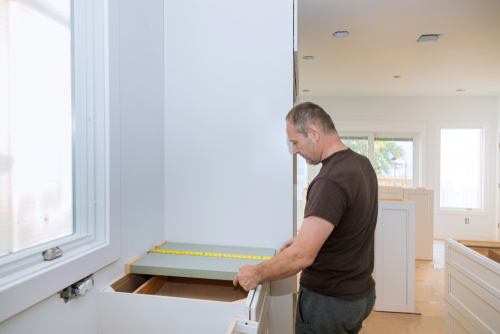 Cutting and fitting the laminate countertop involves precise measurements, accurate cutting, and careful fitting to ensure a perfect installation. Follow these detailed steps to achieve a professional result.
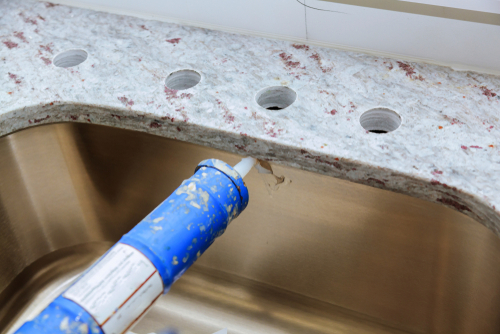 To complete your laminate countertop installation, it’s crucial to apply end caps and perform a final inspection with caulking to ensure durability and a clean finish.
 Waste Segregation on Construction Job Sites: Best Practices for Efficiency and Sustainability
Date: September 06 ,2024
 Junk Removal in Mount Pleasant SC: Efficient Services for a Cleaner Community
Date: September 06 ,2024
Key Takeaways
- Gather necessary materials and plan your project thoroughly.
- Remove the old countertop and accurately cut the new laminate.
- Follow detailed steps for installing and finishing the new countertop.
Tools and Materials Needed
When installing laminate countertops, having the right tools and materials is essential. Here’s what you’ll need:Tools
- Tape Measure: To ensure accurate measurements.
- Pencil: For marking cut lines.
- Circular Saw: For making straight cuts.
- Router: To trim edges perfectly.
- Jigsaw: Ideal for cutting out sink openings.
- Screwdriver: For assembling and removing screws.
- Hammer: Useful for tapping pieces into place.
- Caulk Gun: For applying adhesive and caulking.
- Sander/Belt Sander: To smooth edges.
- Rubber Mallet: Gentle tapping to position pieces.
- Drill and Drill Bit: To create holes and pilot holes.
- Cordless Drill: For mobility and convenience.
- Wood Glue: For bonding wood surfaces.
- Sandpaper: To smooth rough surfaces.
- Screws/Wood Screws: For secure attachment.
- Level: Ensures your countertop is even.
- Square: To check corners and lines.
- Masking Tape: To protect surfaces and mark lines.
- Clamps: To hold pieces in place while the adhesive sets.
- J-Roller: Ensures the laminate bonds well.
- File: To smooth edges.
Materials
- Particleboard: Often used as underlayment.
- Glue/Contact Cement: For attaching laminate to the substrate.
- Construction Adhesive: For stronger bonds.
- Sheet Laminate: The main surface covering.
- Silicone/Silicone Caulk: For sealing edges.
- Caulking: To fill gaps and secure edges.
Planning and Preparation
- Before starting, gather all necessary materials and tools including a tape measure, a router with a laminate cutting bit, miter bolts, and adhesive.
- Measurements are critical. Measure the length and width of your countertops carefully to ensure you cut the laminate pieces accurately.
- If using a template for the sink, place it on the new laminate and trace the outline. Double-check for a snug fit.
- For sink cutting, set your sink upside down on the laminate and trace around it if a template isn’t available. Center it properly to avoid misalignment.
- Use the old countertop as a guide. Lay it on the new laminate and mark the cuts. This helps to match existing dimensions.
- Prepare the substrate, typically particle board, as your base. Ensure it is clean and free of any debris. This provides a solid foundation for the laminate.
- Aligning mitered edges with miter bolts requires precise placement. Apply glue to the edges of the laminate and secure them using miter bolts in pre-cut slots.
- Organize your supply of materials, ensuring everything is within easy reach before you begin.
- Secure the cabinboard and ensure it is level. Any unevenness can affect the final countertop installation.
- Verify all measurements once more. It’s crucial to confirm that the dimensions are accurate before proceeding with the installation.
Removing the Old Countertop
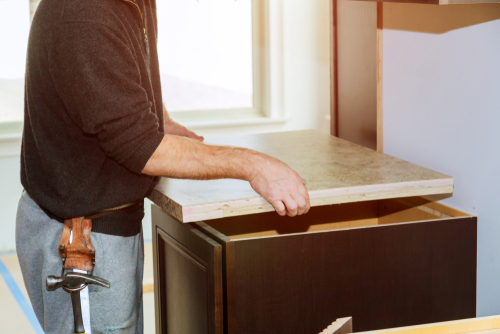
Start by clearing off the old countertop and removing any appliances, obstacles, or décor items. Empty the cabinets below to access the underside of the countertop. Turn off the water supply and disconnect the plumbing from the sink using a wrench. Use a screwdriver to remove the screws holding the sink clips, then detach and set the sink aside. Unscrew the fasteners securing the countertop to the cabinet bases. This might require a screwdriver or drill for easier removal. Be cautious not to damage the cabinet bases. To separate the countertop from the adhesive, use a paint scraper or putty knife. Carefully wedge the tool between the countertop and cabinet bases to break the seal. Pry the countertop upwards, working slowly to avoid splintering. If the countertop is attached to a particle board sub-top, check whether the sub-top needs to be retained or removed. For laminate replacements, keeping the sub-top might save time. If installing stone or other materials, removing the particle board might be necessary. Remove screws and lift off as needed. Have a helper assist in lifting the countertop to prevent injury or damage to surrounding areas. Dispose of the old countertop according to local regulations. Ensure the cabinet bases are clean and free of debris before proceeding with the new installation.Cutting and Fitting the Laminate Countertop
 Cutting and fitting the laminate countertop involves precise measurements, accurate cutting, and careful fitting to ensure a perfect installation. Follow these detailed steps to achieve a professional result.
Measuring and Marking
Use a tape measure to determine the exact dimensions of your cabinets and countertop space. Measure from the back wall to the front edge, considering any overhang, typically 1-1/4 to 1-1/2 inches. Mark these measurements accurately on your laminate sheet using a pencil. To cut out spaces for sinks or other fixtures, use templates. Place the template on the countertop, trace the outline with a pencil, and then measure and mark the cut lines. Double-check all measurements before proceeding to ensure accuracy.Cutting the Laminate Sheets
Use a circular saw or snips to cut the laminate sheet based on your markings. Ensure the saw has a fine-toothed blade to avoid chipping the laminate. Secure the laminate sheet on a stable surface using clamps to prevent movement during cutting. If cutting out spaces for sinks, drill 1-inch holes at the corners of the template marking. Then use a jigsaw to cut along the lines, starting with the sides. Be cautious and follow the marked lines precisely. Always wear safety glasses and gloves during this process.Fitting the Countertop Pieces
Place wood dowels on the substrate (particleboard or another base material) to act as spacers. Rest the laminate sheet on top of the dowels to prevent immediate adhesion to the contact cement applied on the substrate. This allows you to adjust the positioning. Starting from the center, press down on the laminate, removing the dowels one by one. This method ensures an even and secure attachment. Use a router to trim any excess laminate from the edges for a clean finish. Check the fit by dry fitting the countertop pieces together before gluing. Make any adjustments as needed to ensure a seamless fit.Installing the Countertop
When installing your laminate countertop, focus on securing it properly to the cabinets, attaching the backsplash, and sealing the edges and seams. Proper techniques and the right tools are essential to ensure a lasting and attractive finish.Securing the Countertop to Cabinets
Start by ensuring that your cabinets are level. Use shims if necessary to achieve a completely flat surface. Next, apply a bead of adhesive along the top edges of the cabinets where the countertop will rest. A strong construction adhesive is recommended for this purpose. Place the countertop onto the cabinets, positioning it correctly. Use screwbars to securely fasten the countertop to the cabinets. Drill pilot holes through the brackets and into the underside of the countertop. This will prevent the wood from splitting. Drive the screws through these holes. Ensure the screws are snug but do not overtighten, as this could damage the laminate. Check again to ensure that the countertop remains level throughout the attachment process. Adjust as necessary to maintain a flat, even surface.Attaching the Backsplash
Measure and cut the backsplash pieces to fit the length of your countertop. It is important to ensure precise cuts for a seamless appearance. Apply a bead of adhesive to the back of each backsplash piece. Press the backsplash firmly against the wall, ensuring an even application of pressure. If your backsplash includes integrated outlets or fixtures, make the necessary cutouts before attaching. Use tap masonry to secure the backsplash in place while the adhesive sets. Wipe away any excess adhesive immediately to maintain a clean, professional look. Allow the adhesive to cure according to the manufacturer’s instructions before removing any support braces.Sealing Edges and Seams
Apply sealant to any gaps between the countertop and the wall or cabinets. This will prevent moisture penetration, which can lead to damage over time. Use caulk to seal around sinks and other cutouts. Be sure to use a caulk that is compatible with laminate surfaces and provides a waterproof seal. Apply the caulk evenly and smooth it out with a caulking tool or your finger dampened with water. For the seams between laminate sheets, use specialized seam adhesive to create a tight, invisible joint. Apply a thin layer of glue along the seam’s edge and press the pieces together firmly. Wipe away any excess adhesive promptly. Make sure all edges and seams are fully sealed to keep out moisture and debris. Allow all adhesives and sealants to cure completely before using your new countertop.Finishing Touches
 To complete your laminate countertop installation, it’s crucial to apply end caps and perform a final inspection with caulking to ensure durability and a clean finish.
Applying End Caps
Start by measuring the ends of your countertop to determine the length of end caps you’ll need. These end caps help protect the edges from moisture and give a polished look. Before applying the caps, sand the edges lightly to remove any rough spots that might interfere with adhesion. Use contact cement to secure the end caps in place, following the manufacturer’s instructions for curing time. Align the end cap along the edge, and press firmly. Use a roller to ensure that the adhesive bonds the laminate to the countertop edge evenly. Trim off any excess material with a router or a file, and sand the edges smooth to avoid sharp corners. Properly installed end caps not only enhance the countertop’s appearance but also offer significant protection against potential water damage.Final Inspection and Caulking
Inspect all seams and edges to ensure they are flush and well-aligned. Any gaps or uneven areas can lead to problems later on. Clean the areas where the countertop meets the wall and the sink opening. Use a trowel to apply a thin bead of silicone caulk along these seams. This helps create a watertight seal, preventing moisture from seeping under the laminate. Blue painters tape can be used to guide your caulking lines, ensuring cleaner edges. Smooth the caulking bead with your finger or a caulk finishing tool for a professional finish. Allow the caulk to dry completely before using the countertop. Proper caulking not only seals but also maintains the aesthetic quality of your installation, ensuring a grounded, clean look. Following these finishing touches ensures your laminate countertop is both functional and visually appealing, ready to serve your kitchen for years to come.Additional Enhancements
To elevate the appearance and functionality of your laminate countertops, consider these additional enhancements: Edge Treatments:- Adding edge treatments can give your laminate countertops a polished look.
- Options such as bevel, bullnose, and ogee edges can enhance the aesthetic appeal.
- Installing a matching or contrasting backsplash can protect walls and add visual interest.
- Materials for backsplashes include tiles, glass, or the same laminate, providing a cohesive look.
- Under-cabinet lighting illuminates the countertop workspace.
- LED strip lights or puck lights are popular choices, enhancing both functionality and ambiance.
- Consider integrating useful accessories such as built-in cutting boards or knife blocks.
- These can be embedded in the countertop, maintaining a seamless surface.
- Adding decorative accents like inlays or borders can provide a unique touch.
- Materials such as metal or contrasting laminate can be used for this purpose.
- Incorporate Tri-Gestures technology for a modern touch.
- This technology allows touchless control of lighting, providing convenience and a sleek look.
- Adding hot spades or trivets in the countertop can protect the surface from hot pots and pans.
- These can be made of metal or other heat-resistant materials, integrated seamlessly into the design.
- Integrate camera-based systems for security or cooking tutorials.
- Position the cameras to cover your workspace, offering a hands-off experience.
Caring for Your New Laminate Countertops
- To keep your laminate countertops looking new, regular cleansing is essential. Use a mild dish soap and a soft cloth to wipe away spills and stains. Avoid abrasive cleaners that can scratch the surface.
- Always use hot banners or mats when placing hot pots or pans on the countertop. Extreme heat can damage the laminate, causing it to warp or discolor. This practice ensures longevity and maintains aesthetics.
- Be mindful of cutting directly on the countertop. Instead, use a cutting board to prevent scratches and maintain surface integrity. Deep scratches can harbor bacteria, affecting cleanliness.
- If you need to place seafoods on the countertop, always cover the area with a protective sheet. This helps prevent any odors or potential stains from setting into the surface.
- Consider keeping some spares of common cleaning supplies like microfiber cloths and gentle cleansers handy. This makes it easier to clean up messes quickly and efficiently.
- Spills should be wiped up promptly to avoid staining. For tougher stains, a mixture of baking soda and water can be effective. Apply the paste, let it sit for a few minutes, then wipe clean.
- To maintain a pristine look, polish the countertop monthly with a product designed specifically for laminate. This adds shine and provides a protective layer against future damage.
Frequently Asked Questions
Discovering how to install laminate countertops involves understanding the specific steps and best practices that ensure durability and a polished finish. From cutting to installation, these frequently asked questions address critical aspects of the process.What is the process for installing laminate countertops on base cabinets?
Start by measuring the base cabinets to ensure a precise fit for the countertops. Cut the laminate to size and dry-fit it on the cabinets. Secure the laminate to the base cabinets with adhesive and screws, ensuring it aligns correctly with the walls and other surfaces.Can laminate sheets be installed over existing countertops?
Yes, laminate sheets can often be installed over existing countertops. This approach involves sanding the old surface to create a rough texture for better adhesion. Clean the countertop thoroughly before applying the new laminate sheet with a strong adhesive, ensuring it bonds well to the surface below.What are the steps for attaching laminate countertops to cabinets?
Apply a bead of silicone caulk along the top edge of the base cabinets. Position the laminate countertops on top, aligning them properly. Fasten the countertops from beneath using screws through the cabinet’s support braces. Ensure you do not overtighten to avoid damaging the laminate.What should be considered when doing a DIY kitchen countertop installation?
Plan the layout and gather all necessary tools before starting. Measure accurately to avoid miscuts. Use safety gear such as goggles and gloves during cutting and sanding processes. Follow manufacturer instructions for adhesives and other materials to ensure longevity and a professional finish.What are the best practices for installing laminate countertop edges?
Trim the laminate edge strips to the correct size. Apply contact cement to both the countertop and the back of the edge strips. Press the edge strips firmly into place once the cement becomes tacky. Trim any excess with a router or laminate trimmer, then smooth the edges with a fine file for a seamless look.How do you properly cut and join laminate countertops?
Use a template to mark the cut lines on the laminate. Cut the laminate using a fine-tooth saw or a jigsaw with a laminate blade. For joining pieces, use miter bolts placed in the precut slots underneath the countertop. Tighten the bolts carefully to pull the seams together without causing gaps or bumps. By addressing these common questions, you can approach your laminate countertop installation with confidence and precision.RECENT BLOGS
 Waste Segregation on Construction Job Sites: Best Practices for Efficiency and Sustainability
Date: September 06 ,2024
 Junk Removal in Mount Pleasant SC: Efficient Services for a Cleaner Community
Date: September 06 ,2024
Our Reviews
Brian Healy
1725553543
Heather was so very pleasant, informative and charming. Next time… I will use you again.
Brandi Childers
1724853716
Ricardo helped me with my reservation. He made everything super clear and answered all my questions to help me pick the right dumpster to rent!
Steven Hewett
1724785537
Heather made the sales and scheduling experience extremely easy. Thank you for having great employees that care about conducting great business.
Jackson Vandiver
1724703158
Great service and fantastic customer service department. I would use them again.
kristin hester
1723492493
Vanessa was amazing!
