May 17, 2024 - Benjamin Ehinger
How to Handle Bathroom Demolition: Your Step-by-Step Guide
CALL NOW 844-762-8449
Embarking on a bathroom demolition can be a rewarding yet daunting endeavor. It’s a significant first step in any bathroom renovation that requires careful planning and preparation. Whether you’re looking to update fixtures or completely overhaul the space, understanding how to dismantle your current bathroom safely and effectively is crucial. To tackle this project successfully, you’ll need the right tools, a clear strategy, and a strong emphasis on safety to avoid any costly mistakes or injuries.
Before swinging a sledgehammer, it’s important to have a plan for the resulting debris. One wise move is to arrange for a roll-off dumpster rental to manage waste efficiently. Companies like Waste Removal USA offer various dumpster sizes that can accommodate the debris from your bathroom project. Securing a rental ensures that you have a designated place to dispose of tiles, drywall, and old fixtures, keeping your workspace clear and minimizing the environmental impact of your renovation.
Remember to wear protective gear such as goggles, gloves, and a mask to safeguard against debris and dust. Ensure all your tools, such as the sledgehammer for breaking up fixtures or the crowbar for prying tiles, are in good working condition. Using a drill may be necessary to remove screws from the vanity or a medicine cabinet, while a utility knife and wrench could be needed for cutting through caulking or disconnecting plumbing.
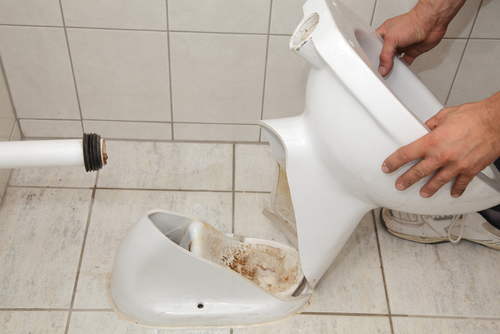 Before starting the bathroom demolition process, it’s crucial to properly remove the toilet and address the plumbing to prevent water damage and facilitate the removal of fixtures. You will need basic tools such as an adjustable wrench and screwdrivers.
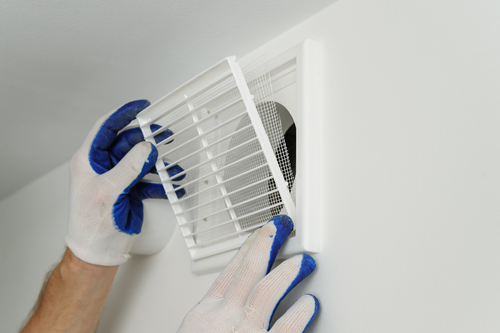 Before you begin bathroom demolition, it’s critical to address safety concerns related to electrical wiring and ensure proper airflow through ventilation. These steps are crucial for preventing accidents and maintaining air quality.
Key Takeaways
- Proper planning and preparation are key to a successful bathroom demolition.
- Safety measures and the correct tools are essential for efficient execution.
- Securing a dumpster rental is necessary to manage debris and streamline cleanup.
Planning Your Bathroom Demolition
Before you begin the demolition process of your bathroom, it’s essential to understand the extent of work and assemble the tools and supplies you’ll need. Proper preparation will ensure a smoother and safer DIY demo project.Understanding the Scope
To correctly size up the demolition project, assess the parts of your bathroom that need to go. This may involve removing a vanity, taking out a tub, or stripping wall tiles. Recognize any potential challenges, such as plumbing or electrical wiring, and consider how they will affect your demo plan. Be mindful that the scope of work determines the time investment and the level of difficulty.Gathering Necessary Tools and Supplies
Gathering the right tools and supplies is crucial. Here’s a checklist of the essentials you’ll need for a typical bathroom demo:| Tools | Supplies |
|---|---|
| Safety goggles | Trash bags |
| Work gloves | Drop cloths |
| Utility knife | Dust mask |
| Screwdriver set | Cleaning rags |
| Sledgehammer | Duct tape |
| Claw hammer | Zipper doorway |
| Adjustable wrench | Plastic sheeting |
| Drill | |
| Crowbar |
Preparation and Safety Measures
Before beginning a bathroom demolition, ensuring your workspace is safe and prepared for the task ahead is essential. This includes safeguarding surrounding areas from debris and equipping yourself with the necessary personal protective equipment.Setting Up the Workspace
- Protect Surfaces: Lay drop cloth or heavy-duty plastic sheeting on the floors to catch debris and prevent damage. For more valuable or delicate surfaces near the bathroom, consider adding layers of cardboard as additional protection.
- Secure the Area: Seal off the bathroom with plastic sheeting to contain dust and debris, using painter’s tape to keep the barriers in place.
Personal Protective Equipment
- Face and Eye Protection: Always wear a face mask to avoid inhaling dust and safety goggles to prevent injuries from flying particles.
- Hand Safety: Equip yourself with sturdy work gloves to guard against cuts and abrasions.
- Knee Protection: Use knee pads to cushion your joints when working on floors or in lower areas of the bathroom.
Dismantling Fixtures and Vanity
Dismantling bathroom fixtures and vanity requires a careful approach to prevent damage to the plumbing and surrounding areas. You’ll need basic tools and a straightforward process to remove the sink, vanity top, mirrors, and accessories efficiently.Removing the Sink and Vanity Top
Begin by shutting off the water supply to your sink to avoid any accidents. After ensuring the water is no longer running, start by disconnecting the water supply lines using a wrench. Be prepared for residual water by placing a bucket underneath to catch any drips. Next, remove the P-trap, which is the curved pipe under the sink; this might also have water inside, so keep your bucket handy. For the vanity top, start by slicing through any caulk between the top and the wall or cabinet with a utility knife. Most vanity tops are fastened with adhesive or brackets from underneath. Carefully pry up the vanity top and lift it away from the cabinet. If it’s attached with screws, loosen and remove these with a screwdriver. If your vanity top includes a sink, it should lift away with the top. Remember, the vanity top can be heavy, so you might need assistance.Taking Out Mirrors and Accessories
Mirrors are typically mounted with brackets or adhesive. If screws are holding your mirror in place, unscrew them carefully. For mirrors installed with adhesive, you’ll need to gently cut through the adhesive with a wire saw or putty knife, always wearing safety gear to protect against accidental shattering. Move slowly to avoid breaking the glass. Accessory removal varies depending on the item. Towel bars, toilet roll holders, and similar accessories are usually secured with screws. Unscrew and gently pull them away from the wall, making sure to patch any holes left behind. Finally, if your vanity cabinet is freestanding, it will likely be screwed to the wall, and perhaps also to the plywood subfloor. Remove these screws and ensure that no plumbing is anchored to the cabinetry before you attempt to lift it away. It’s essential to maintain a neutral and controlled technique to prevent any damage to your bathroom structures or to the fixtures if you plan on reusing them.Removing Toilet and Other Plumbing
 Before starting the bathroom demolition process, it’s crucial to properly remove the toilet and address the plumbing to prevent water damage and facilitate the removal of fixtures. You will need basic tools such as an adjustable wrench and screwdrivers.
Detaching the Toilet
To remove your toilet, first shut off the water supply to prevent any leaks. Typically, there is a valve near the base of the toilet; turn it clockwise to close it. Flush your toilet multiple times to drain the water from both the bowl and the tank. Sponge out any remaining water to mitigate any potential mess. Use an adjustable wrench to disconnect the water supply line. Once the water is cleared, remove the caps on the base of the toilet to reveal the bolts. Unscrew these bolts with the wrench. You may need to use some force or additional tools like a socket wrench if the bolts are corroded. After the toilet is unfastened, gently rock it back and forth to break the wax seal. Now, you can lift the toilet out of place. Make sure to stuff a rag into the open drain to block sewer gases and prevent debris from falling in.- Turn off water supply
- Flush toilet and sponge out remaining water
- Disconnect supply lines
- Unscrew base bolts
- Break wax seal and remove toilet
Handling Pipes and Water Supply
For other plumbing fixtures such as sinks and showers, begin by turning off the main water supply to the bathroom. To be safe, you might want to turn off the property’s main water supply. After the water is turned off, open the faucets to drain any residual water in the pipes. Use an adjustable wrench or screwdrivers to disconnect any supply lines from the fixtures. Be prepared to catch any remaining water with a bucket. Remember to cap any open pipes after removing fixtures to avoid any debris entering the plumbing and to close off the water system in preparation for the new fixtures.- Shut off main water supply
- Open fixtures to drain pipes
- Disconnect and cap supply lines
Demolishing Walls and Flooring
When starting bathroom demolition, focusing on the walls and flooring is crucial for a successful teardown. You’ll deal with various materials such as drywall, tiles, and potentially backer boards that require specific tools and methods to be removed properly.Taking Down Drywall and Tiles
First, you’ll need to remove any drywall or cement board surrounding fixtures, like the tub or shower. For this task, tools like a utility knife and a reciprocating saw can be extremely useful. Make cuts into the drywall carefully, taking care not to damage any underlying studs. Here are some steps to help you:- Safety First: Wear protective eyewear and gloves.
- Cutting Drywall: Use a drywall saw or utility knife to cut into the drywall.
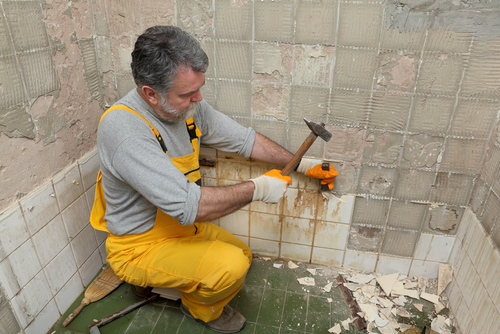
- Removing Tiles: If removing shower tile or wall tiles, a chisel and mallet can be used to break the grout seal before prying the tiles off.
Breaking Up the Flooring
Floor tile removal calls for a methodical approach to avoid damaging any subflooring or plumbing:- Flooring Removal Preparations: Place a drop cloth to protect surfaces and collect debris.
- Tile and Mortar Removal:
- Break the grout seal with a hammer and chisel.
- Slide the chisel under the edge of the floor tile.
- Gently tap with a hammer to lift and remove the tile.
Cleanup and Waste Disposal
When you’re undertaking a bathroom demolition, managing the resulting debris is crucial. Begin by spreading a durable drop cloth or plastic sheet to collect smaller fragments. As you remove tiles and fixtures, place them gently to avoid any unnecessary breakage which can lead to more mess. For clearing up dust and small particles:- Use a broom to sweep up the larger pieces of debris.
- Follow up with a shop vac to remove finer dust and smaller particles that the broom cannot pick up.
- Keep a bucket handy to collect any liquids when disconnecting the plumbing.
- Wipe down surfaces with rags to remove leftover dust and moisture.
Preparing for Renovation
Prior to diving into the demolition, a thorough inspection of your bathroom’s subfloor and walls is crucial for a smooth renovation process. Planning for new installations requires foresight to ensure compatibility with existing structures.Inspecting and Repairing the Subfloor and Walls
Inspect the subfloor for any signs of water damage or rot, especially around the toilet and tub, which can be common problem areas. If damage is found, remove the affected plywood and replace it with new, sturdy material. Ensure that all baseboard sections are removed before you begin repairs to avoid further damage. Check for mold or mildew presence that could compromise air quality, and replace any compromised studs to maintain structural integrity.Planning for New Installations
Map out where new fixtures and features will go in relation to the existing plumbing and electrical layouts. You should consider the dimensions of new installations to ensure they will fit without requiring unnecessary adjustments to the subfloor or walls. If you are planning on resizing fixtures or changing the layout significantly, consult with a professional to verify that these changes are plausible and won’t affect the structural supports of the studs. Being methodical in your planning will minimize surprises and help maintain the momentum of your bathroom renovation.Handling Electrical and Ventilation
 Before you begin bathroom demolition, it’s critical to address safety concerns related to electrical wiring and ensure proper airflow through ventilation. These steps are crucial for preventing accidents and maintaining air quality.
Dealing with Electrical Wiring
- Safety First: Switch off the circuit breaker to cut power supply to your bathroom. Test outlets with a voltage tester to ensure they are no longer electrified.
- Identification: Locate all electrical connections, including outlets, lighting, and fans. Label wires for easy identification when reinstalling or adjusting connections.
- Preparation: Remove outlet covers and disconnect wiring. If you are unfamiliar with electrical work, consider hiring a professional to avoid risk of shock or future electrical issues.
Adjusting Ventilation and Ducts
- Secure the Area: Before touching the vent, make sure your electrical safety measures are in place. Vent fans are typically connected to your bathroom’s electrical system.
- Vent Access: Use a jigsaw if you need to cut through material for vent access or installation. Wear protective equipment to guard against dust and debris.
- Ductwork: Inspect your ductwork for any signs of damage or wear. Ensure that it is securely connected and free of blockages. Ducts need to be handled carefully to prevent leaks.
Working with Contractors
When you’re about to tear apart your bathroom, choosing the right team is crucial. You should seek a contractor who will become a trusty partner in navigating through the complexities of demolition and renovation.Selecting a Reliable Contractor
To ensure a smooth renovation, vet your contractor thoroughly. Start by checking their credentials and reviews, then move on to portfolios to see if they’ve tackled challenges like the Jeffrey Court Renovation Challenge. Ask for references and don’t shy away from discussing their success rates with similar projects.- Credentials and Reviews: Confirm licenses, insurance, and a positive track record.
- Portfolio Analysis: Look for experience in projects of similar scope and style.
- References: Reach out to previous clients to gauge satisfaction and reliability.
Collaborating on the Project Timeline and Details
Once you have a contractor on board, detailed planning is your next step. Outline a clear project timeline and agree on the details, including demolition and construction phases, which will prevent misunderstandings and budget overruns.- Project Outline: Create a timeline with milestones and deadlines.
- Demolition and Construction Phases: Establish a work sequence to minimize disruption.
- Budget Planning: Determine costs upfront and factor in a contingency for unforeseen issues.
Final Thoughts and Considerations
Before embarking on your bathroom demolition, it’s crucial to have a solid understanding of what lies ahead. A successful demo day or weekend requires thorough preparation and a clear plan of action.Reviewing the Demolition Process
When reflecting on the demolition process, your primary focus should be the sequence of tasks completed with precision. Here is a quick checklist to review:- Preparation:
- Protect floors and adjacent areas with drop cloths.
- Turn off the water supply to fixtures and disconnect plumbing.
- Cut power to electrical fixtures and outlets.
- Secure personal protective gear (goggles, gloves, masks).
- Fixture Removal:
- Start by detaching the toilet and capping off the pipes.
- Remove the vanity, sink, and any cabinetry.
- Take down mirrors and lighting carefully to avoid breakage.
- Tile and Flooring:
- Begin chipping away at grout lines and lift tiles with caution.
- Bag up debris and ensure the subfloor is not damaged in the process.
- Walls and Structures:
- If removing walls or altering the structure, ensure stability throughout the process.
- Use sledgehammers for heavy lifting and demolition hammers for more precise work.
Frequently Asked Questions
Embarking on a bathroom demolition can be both exciting and challenging. This section addresses common inquiries to help you navigate the process with confidence and safety.What are the steps involved in demolishing a bathroom floor?
To demolish a bathroom floor, start with protective measures such as shutting off the water and electricity. Remove fixtures and cover surfaces. Then break the grout seal and lift tiles using a hammer and chisel, proceeding cautiously to avoid damage to plumbing below.How do you safely remove a shower pan during bathroom demolition?
For shower pan removal, first disconnect the drain assembly. Carefully pry up the pan to avoid breaking it if you plan to reuse it. Check for water damage or mold beneath and handle materials as needed for disposal or recycling.What is the best way to begin a bathroom demolition project?
Initiating your project involves preparation and planning. Ensure you have the necessary tools and safety gear, obtain any required permits, and create a systematic demolition plan that prioritizes your safety and the integrity of your home’s structure.What factors influence the cost of demolishing a bathroom?
Demolition cost is determined by the bathroom size, complexity of fixtures, labor rates in your area, and disposal fees. If there’s a need for specialized services, like asbestos removal, costs will increase.How long does it typically take to complete a full bathroom demolition?
The timeframe for a complete bathroom demolition varies based on the bathroom’s dimensions and complexity, but it typically ranges from a day to a week. Planning, removing fixtures, and handling unexpected issues all affect the duration.Can a homeowner perform a bathroom demolition without professional help?
Yes, a motivated homeowner can perform a bathroom demolition independently, provided they possess the necessary tools, knowledge, and attention to safety. It’s critical to understand your limits and when to call in experts for certain tasks, such as electrical or plumbing work.RECENT BLOGS
Our Reviews
Glenda Lanier Prowell
1721758635
I have ordered an 11 yard dumpster to be delivered to my house.Lonier was extremely helpful and answered all my questions. The rate was very reasonable.
Cedric Smikle
1721660395
Amber was extremely professional and courteous. She answered all of my questions and even some that I didn’t know I needed to ask.
Cait Kaider
1721243051
I highly recommend Waste Removal USA for their responsiveness and how the staff work hard to provide exceptional customer service. They have done well by us and our clients. Thank you!
Easom Family
1721223306
Louiner Pierre-Louis Is awesome! Did a great job. Will definitely be using this same company for all my dumpster needs because of his awesome customer service! Thank you!!!
tabitha Vazquez
1720539988
Wonderful and fast customer service!
LATEST BLOGS

