March 22, 2024 - Benjamin Ehinger
How to Demo a Bathroom: Your Step-by-Step Guide
CALL NOW 844-762-8449
Embarking on a bathroom demolition can be an exciting step towards creating your dream space, but it’s essential to approach the task methodically to ensure safety and efficiency. Before you start swinging the sledgehammer, understanding the process and preparing adequately are key. With the right tools and a clear plan, you can dismantle your old bathroom, paving the way for renovation.
Safety is paramount when demolishing any part of your home, and the bathroom is no exception. If you’re ready to take on this project yourself, you will need to invest in protective gear, including gloves, goggles, and a dust mask. Additionally, securing a local dumpster rental from Waste Removal USA can make the process smoother by providing an immediate solution for debris.
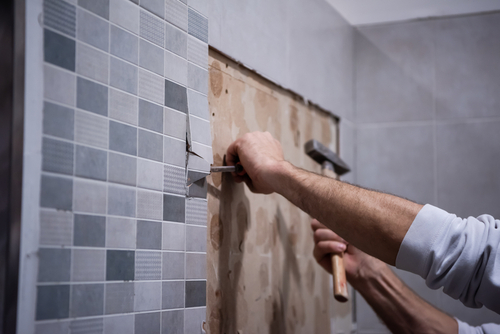 When embarking on tile and flooring removal, the right tools and technique are paramount to prevent damage to the subfloor and to ensure your safety. You’ll typically need a chisel, hammer, and a pry bar for tiles, while a reciprocating saw may be necessary for the underlying flooring.
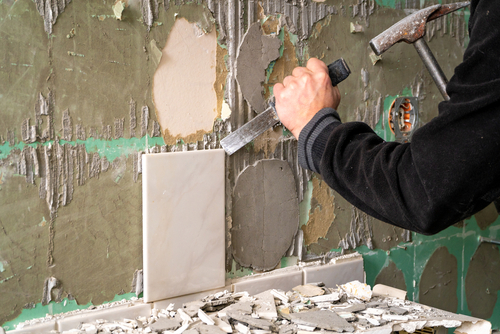 In bathroom demolition, effectively managing and disposing of debris is critical to maintain a safe workspace. You’ll want to gather the necessary supplies like buckets, contractor trash bags, a trash can, a shop vac, and a broom to keep the area clean and free of hazardous waste.
Key Takeaways
- Adequate preparation and understanding of demolition steps are crucial.
- Safety gear and equipment, such as a rental dumpster, are essential.
- A systematic approach to demolition will set the foundation for a successful renovation.
Preparation and Safety
Before embarking on your bathroom demolition project, it’s essential to prioritize preparation and safety. Properly gathering supplies and setting up the work area are crucial to protect yourself and avoid unnecessary damage or accidents.Gathering Supplies
First, you’ll need to assemble your tools and supplies. This includes:- Safety gear: safety goggles to shield your eyes from debris, a dust mask or full-face mask to filter out airborne particles, and heavy-duty work gloves to protect your hands.
- Demolition tools: a utility knife for cutting through caulking or drywall, a hammer, a pry bar, and maybe a power drill.
- Protective materials: drop cloths to cover the floor and rags for clean-up.
| Safety Item | Purpose |
|---|---|
| Safety goggles | Protect eyes from debris |
| Dust mask/face mask | Prevent inhalation of harmful dust |
| Work gloves | Safeguard hands from sharp objects and impacts |
| Knee pads | Provide knee protection during floor work |
Setting Up The Work Area
Preparation of your work area involves several steps:- Contain the workspace: Use painter’s tape to secure drop cloths around the demolition area, preventing debris from spreading.
- Utility management: Ensure that the water and electricity supply to your bathroom are shut off to avoid accidents.
Safety Measures
Maintaining a safe environment is non-negotiable. Adhering to these safety measures can ensure a smoother demolition process:- Dress Appropriately: Make sure you’re wearing long pants and sleeves to minimize skin exposure to irritants and potential cuts.
- Goggles and Masks: Always wear safety goggles and a dust mask or respirator, especially when dealing with insulation or older buildings that may contain hazardous materials.
Initial Demolition Steps
Before beginning the demolition of your bathroom, it’s essential to take a methodical approach. Ensure you have all necessary tools at hand and understand the proper sequence to avoid damage to plumbing and the structure of your home.Removing Fixtures
Start by targeting the fixtures such as the sink, toilet, and any faucets. For the sink, you’ll need to shut off the water supply before you detach the plumbing with a wrench. Take care to keep all screws and connectors in case they are needed later. When it comes to the toilet, first turn off the water supply and flush to empty the bowl and tank. Lastly, unbolt the toilet from the floor flange. Employ a screwdriver if necessary to loosen any fixtures and carefully lift them out of place.Starting with the Vanity
Moving onto the vanity, begin by clearing out any items inside and disconnect any attached plumbing. You may find that the vanity is secured with screws or nails, or simply caulked to the wall. Scour underneath and inside the vanity for any fixing points and proceed to remove them. If there’s any plywood backing or if the vanity is tiled in, use a screwdriver or pry bar to separate materials. Mirror removal often involves prying it away from the wall, so do this with caution to prevent shattering.Tile and Flooring Removal
 When embarking on tile and flooring removal, the right tools and technique are paramount to prevent damage to the subfloor and to ensure your safety. You’ll typically need a chisel, hammer, and a pry bar for tiles, while a reciprocating saw may be necessary for the underlying flooring.
Stripping Tiles
Begin removing tile from your bathroom by placing a drop cloth to protect surfaces and gather debris. Use a hammer and chisel to carefully break the grout seal of the first tile. Slide your chisel under the edge and gently tap it with the hammer to lift the tile. Tile demolition can be dusty, so wear safety gear. Repeat this process across your bathroom, working tile by tile.Taking Out the Flooring
Once tiles are removed, assess your flooring. If it’s plywood or another material needing to be cut out, operate a reciprocating saw to dislodge sections safely. For removing tile floor beddings, employ a pry bar to separate materials from the subfloor. Remove each piece methodically and clear away debris promptly. Remember, patience is critical to avoid causing unintentional damage during this process.Plumbing and Electrical Considerations
When demolishing a bathroom, it is imperative to prioritize safety surrounding plumbing and electrical systems. You’ll want to prevent leaks and avoid electrical hazards that could result from inadvertently cutting into live wires or pipes.Handling Water Supply
Ensure you have located and turned off the main water supply to the bathroom to prevent any accidental flooding. Once the water is off, open the faucets to drain any remaining water from the lines. Use an adjustable wrench to disconnect the supply lines from fixtures like sinks and toilets. Remember to remove any drain covers and check for leftover water in the traps, which can be removed with a wrench.Dealing with Electrical Wiring
Before starting your demolition, shut off the power to the bathroom at the circuit breaker to ensure a safe work environment. Carefully remove any electrical plates and outlet covers. For any exposed wiring, use a voltage tester to confirm that there is no active current before proceeding. If you are not experienced with electrical work, it’s highly recommended to consult with a professional plumber or electrician. Keep in mind that proper disconnection of the electrical and plumbing systems is not just for your safety during demo; it also sets the stage for subsequent renovations.Deconstructing Walls and Ceiling
Before you begin tearing down the walls and ceiling, understand that it is a messy process requiring precision to avoid damaging structural components. Your main focus will be on safely removing drywall and preserving the underlying framing.Drywall and Framing
To remove drywall, you’ll need to carefully locate the studs which provide the structural support. Begin by using a stud finder to mark the locations of all studs on the drywall. Once you have located the studs, use a utility knife to score along the stud lines. This scoring helps prevent tearing or ripping the drywall paper beyond your removal area.- Removal Process:
- Cut or drill a hole into the drywall to start.
- Slide a pry bar into the hole and gently pry the drywall away from the studs.
- Remove any screws or nails holding the drywall in place with a screwdriver or hammer.
- Tools Required:
Tool Purpose Stud Finder Locate studs behind the drywall Utility Knife Score drywall for controlled cuts Pry Bar Gently remove drywall Screwdriver/Hammer Remove installation fasteners
Disposing of Debris
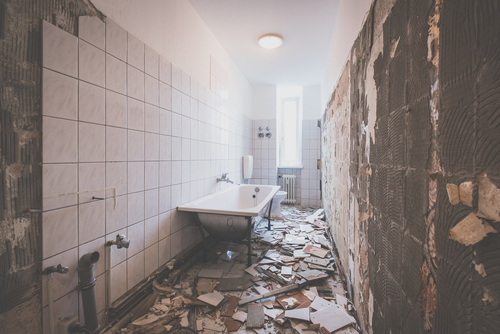
 In bathroom demolition, effectively managing and disposing of debris is critical to maintain a safe workspace. You’ll want to gather the necessary supplies like buckets, contractor trash bags, a trash can, a shop vac, and a broom to keep the area clean and free of hazardous waste.
Cleanup Process
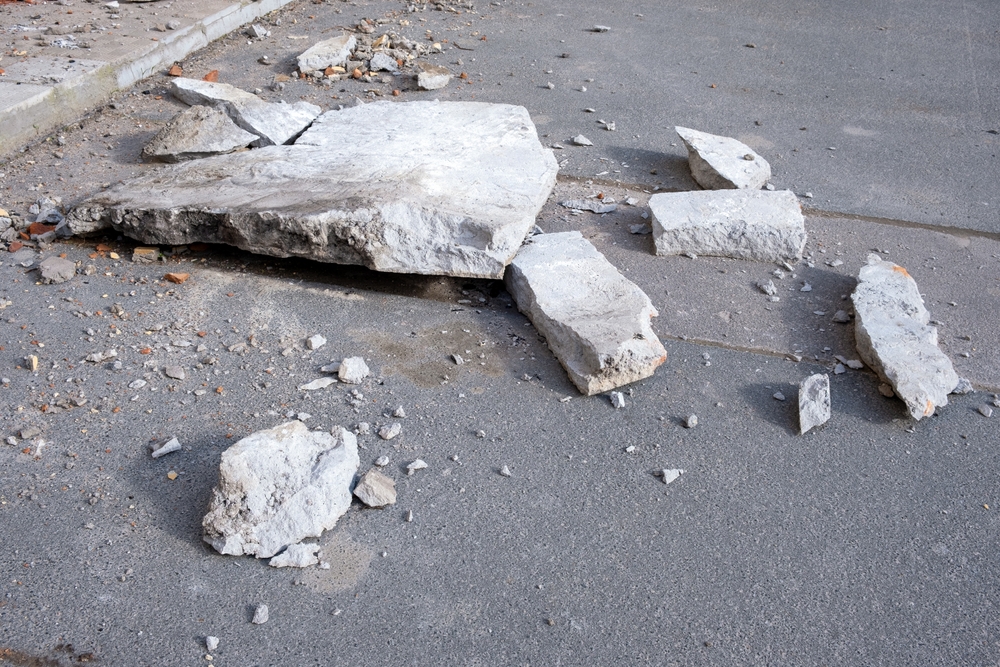
When demolishing your bathroom, you’ll produce a variety of debris ranging from tiles to fixtures. Your initial step should be to use a bucket to collect small pieces of debris and water that may be trapped in the P-trap of the sink. After most of the water is removed, utilizing a shop vac can help suck up the remaining moisture and smaller debris particles that are difficult to pick up by hand. With the dust and smaller debris managed, sweep the larger pieces into a pile with a broom and shovel them into a trash can or contractor trash bags for easy disposal. It’s important to segregate the debris according to your local waste management guidelines, particularly for items that may require special disposal methods due to their hazardous nature. Disposing of the debris properly is essential for a smooth demolition process. Depending on the project’s size, you might want to rent a home dumpster for efficiency or contact a waste removal company to handle it, ensuring you comply with any regulatory requirements for disposal.Finishing Touches
Before you consider your bathroom demolition complete, ensure the surfaces you’ve exposed are properly prepped for the next phase of your renovation. This involves addressing any imperfections on walls and floors to create a smooth canvas for new installations.Smoothing Surfaces
After removing tiles and fixtures, inspect your surfaces carefully for leftover debris. Remaining mortar must be chiseled away with a mallet to smooth out the floor. If you encounter drywall damaged during the demo, it should be cut out and replaced with new backer board, secured by screwdrivers and fasteners.- Tools You’ll Need:
- Mallet
- Chisel
- Screwdrivers
- Drywall saw or utility knife
- Backer board
- Materials:
- Drywall or backer board
- Screws or fasteners
Final Inspections
With your walls and floors smoothed, conduct a thorough inspection to ensure no sharp edges or rough patches remain. If any caulking was removed during demo, now is the time to reapply it to seal any gaps around the edges. Double-check that all nails or screw heads are flush or removed to prevent future issues when installing new materials.- Checklist for Inspections:
- No leftover mortar or tile pieces
- Surfaces are even and smooth
- Nail and screw heads are not protruding
- Caulk has been applied to necessary areas
Renovation and Reconstruction
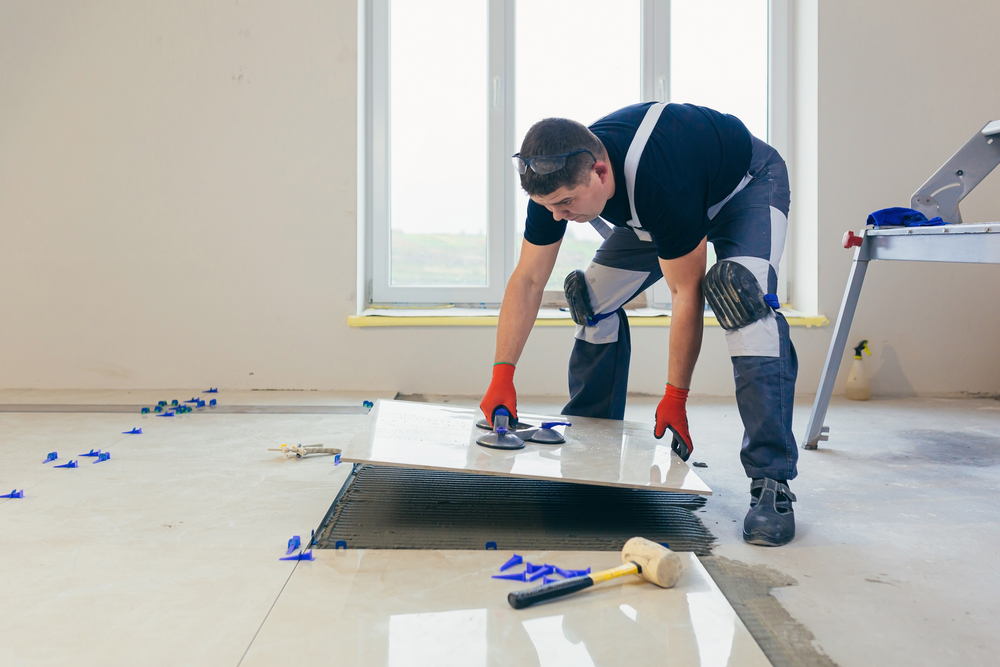
Embarking on a renovation, whether you’re tackling it DIY style or hiring a contractor, is about transforming your space with precision and foresight. This journey will take you through complex tasks like installing new vanity units, laying shower tiles, and ensuring that your drywall and tiles harmonize for that perfect bathroom remodel.Preparing for New Installations
Before the thrill of tiling or the satisfaction of seeing your new vanity in place, preparation is essential. You’ll want your bathroom to not only look good but to be structurally sound.- Plywood Subfloor: Ensure the plywood subfloor is level and securely attached. Replace any water-damaged sections to support new installations.
- Cement Board: For areas that will be tiled, such as showers or floors, installing a cement board provides a solid, water-resistant surface that helps tiles adhere and last longer.
- Drywall: Check and prepare your walls, replacing any damaged drywall, to provide a clean canvas for paint or tile work.
Time and Resource Management
When demolishing a bathroom, managing your time and resources efficiently is crucial to a successful and stress-free project. This involves planning your tasks, estimating durations, and coordinating with any partners.Efficient Workflow
To ensure an efficient workflow, start by outlining each task that needs to be completed during the demolition. Break down the demolition process into manageable chunks and estimate how long each will take. For example, removing a toilet typically takes between 30 minutes to an hour. Define these tasks for your demo day or weekend project timeline.- Preparation (1-2 hours): Gather tools, protective gear, and materials for waste disposal.
- Toilet removal (30-60 minutes): Turn off water, flush to drain, and disconnect plumbing.
- Sink removal (30-90 minutes): Shut off water, disconnect supply lines, and remove the sink.
- Bathtub removal (2-4 hours): Depending on its size and material, this could involve some heavy lifting.
- Flooring and wall tile removal (3-6 hours): Varies with the type of material and installation.
Professional Assistance
When you undertake the task of a bathroom demolition, you may reach a point where expert advice and labor are not just helpful, but essential. Accurate demolition requires an understanding of plumbing, electrical work, and structure, all of which a professional contractor can navigate with ease.When to Hire a Contractor
- Plumbing: If you encounter complex plumbing while removing your vanity or toilet, a licensed plumber should be consulted. Incorrect handling can lead to significant water damage.
- Bathroom Demolition: The process involves more than just tearing out fixtures. If you need to knock out tiles or gut drywall and are unsure about the locations of electrical wiring or plumbing, hiring a contractor is a safe choice.
- Safety and Tools: Contractors possess the necessary tools for efficient demolition and have a keen eye for safety protocols, which is invaluable, especially when it comes to handling potentially hazardous materials or situations.
- Permits and Regulations: Your bathroom renovation may require permits or need to adhere to specific building codes. A professional can ensure that your project complies with these regulations, preventing legal issues and ensuring safety.
- Structural Integrity: If your demolition work may affect the bathroom’s structural integrity, a contractor will detect load-bearing walls and devise a plan to prevent structural damage.
Post-Demolition Review
After you’ve completed the demolition for your bathroom renovation, it’s crucial to conduct a thorough review of the area to ensure the space is ready for the next phase of your project. This involves assessing structural stability, checking for water damage that might have been uncovered, and ensuring that the space is prepped for reconstruction.Assessing the Area
- Structure: Closely inspect the framing and supports in your bathroom. Look for signs of warping, cracking, or any form of distress in the materials. It is important that the supporting structures are sound before you proceed.
- Hidden Damage: Demolition may reveal previously hidden issues, such as water damage or mold behind tiles and under flooring. If you find any signs of moisture, it’s critical to address these issues immediately to prevent future problems.
- Safety Hazards: Check for protruding nails, screws, and sharp edges left after demolition. Remove or secure these hazards to protect yourself and others who may enter the demolition zone.
- Cleared Space: Ensure all debris is removed. Leftover materials and waste can be hazardous and will hinder the progress of your renovation. Using protective gear, carefully sweep and clear the area for a safe and tidy workspace.
- Protection Measures: If you discovered any areas vulnerable to water damage or other risks, take measures to protect them during the renovation. This may include waterproofing or installing additional safeguards to preserve the structural integrity of your bathroom.
Frequently Asked Questions
In this section, you’ll find concise answers to common questions about DIY bathroom demolition procedures, safety measures, cost considerations, and more.What is the proper step-by-step process for demolishing a bathroom floor?
Begin by removing fixtures and fittings, including the toilet, sink, and any other items. Next, detach the flooring materials using the appropriate tools such as a pry bar or hammer.What safety precautions should I take when demolishing a bathroom wall?
Wear protective gear, including gloves, safety glasses, and dust masks. Ensure the water and power are turned off before you start, and be aware of plumbing and electrical lines to avoid accidents.How should I go about removing an old bathroom vanity on my own?
Start by shutting off the water supply and disconnecting the plumbing. Use a utility knife to cut any caulk between the vanity and the wall, then remove the countertop and the vanity base with a pry bar.What are the key considerations when planning a DIY bathroom demolition?
Plan thoroughly, including obtaining necessary permits and outlining your end goal. Make sure you have the right tools for the job and understand the steps involved in demolition.Can you outline the typical sequence for demolishing a bathroom to ensure structural safety?
Begin with smaller fixtures and fittings, then move on to larger elements like the bathtub. Always keep structural integrity in mind, and consider consulting a professional if you’re unsure about a step.What factors influence the cost of a bathroom demolition and remodel project?
The size of the bathroom, complexity of the demolition, disposal of materials, and the cost of new fixtures all contribute to the overall expense. A clear budget and plan can help manage costs.RECENT BLOGS
Our Reviews
Glenda Lanier Prowell
1721758635
I have ordered an 11 yard dumpster to be delivered to my house.Lonier was extremely helpful and answered all my questions. The rate was very reasonable.
Cedric Smikle
1721660395
Amber was extremely professional and courteous. She answered all of my questions and even some that I didn’t know I needed to ask.
Cait Kaider
1721243051
I highly recommend Waste Removal USA for their responsiveness and how the staff work hard to provide exceptional customer service. They have done well by us and our clients. Thank you!
Easom Family
1721223306
Louiner Pierre-Louis Is awesome! Did a great job. Will definitely be using this same company for all my dumpster needs because of his awesome customer service! Thank you!!!
tabitha Vazquez
1720539988
Wonderful and fast customer service!
LATEST BLOGS

