Thinking about knocking down a wall to create a more open floor plan? Wall demolition can be an exciting and transformative part of a home renovation. It’s crucial to know whether the wall you want to remove is load-bearing or non-load-bearing, as this will determine the complexity and cost involved.
Before you begin, consider the legal and safety aspects. You’ll likely need permits and should plan to rent a construction dumpster for the debris. This phase also involves gathering the necessary tools and protective gear to ensure the safety of your home during the demolition process.
Once you’re ready to execute the demolition, take steps to avoid damage to surrounding areas and to properly recycle materials whenever possible. Thoroughly cleaning up and addressing any structural issues post-demolition will set a solid foundation for the rest of your home renovation project.
 Proper preparation is essential for a safe and efficient wall demolition. Key tasks include rerouting electrical and plumbing systems, setting up your workspace, and protecting adjacent areas to minimize damage and maintain a clean work environment. You should also have a small dumpster rental delivered so you have a place for the debris.
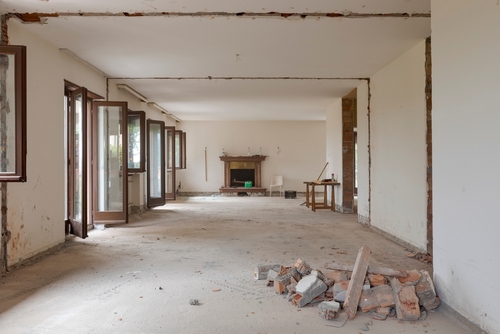 After completing a wall demolition, there are essential steps to ensure a clean and safe environment, as well as to prepare the space for subsequent work. These steps involve managing debris, conducting necessary patching and repair work, and performing final inspections.
 Construction and Demolition Recycling Association: Advancing Sustainable Practices in the Industry
Date: September 11 ,2024
Key Takeaways
- Determine if the wall is load-bearing or non-load-bearing.
- Secure the necessary permits and safety equipment.
- Plan for a construction dumpster rental to manage cleanup.

Determining the Wall Type
Identifying the type of wall is crucial in any demolition project. Understanding whether a wall is load-bearing or not, and consulting with a structural engineer, can prevent serious structural issues.Identifying Load-Bearing Walls
Load-bearing walls support the weight of the structure above them, such as the roof and upper floors. These walls are integral to the building’s structural integrity. You can identify load-bearing walls by examining the blueprints of your home or consulting with a builder or architect. Load-bearing walls are often positioned directly above other walls or beams in the floor below. In multistory buildings, they typically run perpendicular to floor joists. Exterior walls are always load-bearing since they support the building’s overall structure.Differentiating Non-Load-Bearing Walls
Non-load-bearing walls, also known as interior partition walls, serve primarily to divide spaces within the home. These walls do not support significant weight from the structure above and are mostly found in the interior. They can be identified by their placement, which is often parallel to floor joists, and by consulting blueprints. Non-load-bearing walls are generally easier to remove or modify, making them more flexible for redesigns. Despite being simpler to manage, always verify with a professional before proceeding with demolition.Considering Structural Engineering Principles
When planning wall demolition, incorporating structural engineering principles is vital. A structural engineer can conduct a thorough assessment to determine the nature of the wall and suggest the safest removal procedure. They will consider factors like the load distribution, material strength, and overall stability of the structure. This assessment includes detailed analysis and calculations, ensuring that removing or altering a wall doesn’t compromise the building’s safety. Consulting with a structural engineer can save time and prevent costly mistakes, ensuring the project complies with building codes and regulations.Legal and Safety Considerations
Before you start any wall demolition project, it’s essential to secure the proper permits, conduct thorough inspections, and implement stringent safety measures to ensure compliance and worker protection.Securing the Necessary Permits
Securing the necessary permits is a crucial first step. You must obtain a building permit from your local government. Failing to do so can result in severe penalties and delays. Verify that the demolition contractor is licensed and insured, ensuring that they comply with state and local regulations. Official documents often detail specific requirements, so review these carefully. Demolition work must adhere to environmental regulations as well, preventing harmful substances like asbestos from being released.Conducting a Preliminary Inspection
A preliminary inspection is vital to identify any potential hazards. This includes an engineering survey to assess structural weaknesses and the presence of hazardous materials. Hiring a licensed professional to conduct the inspection protects you from unforeseen issues. The contractor should evaluate the equipment required and manpower needs. Public safety considerations like barricades or warning signs are also essential during this phase.Implementing Safety Precautions
Implementing safety precautions is non-negotiable for any demolition project. Workers must use protective gear such as helmets, gloves, and fall protection harnesses. Setting up caution zones to keep unauthorized personnel away is crucial. Ensure compliance with OSHA demolition standards, which cover a broad range of safety measures. Proper training sessions on emergency procedures should also be conducted. Regular safety audits help to verify that all protocols are being followed consistently.Preparing for Demolition
Proper preparation is essential for a safe and efficient wall demolition. Key tasks include rerouting electrical and plumbing systems, setting up your workspace, and protecting adjacent areas to minimize damage and maintain a clean work environment. You should also have a small dumpster rental delivered so you have a place for the debris.
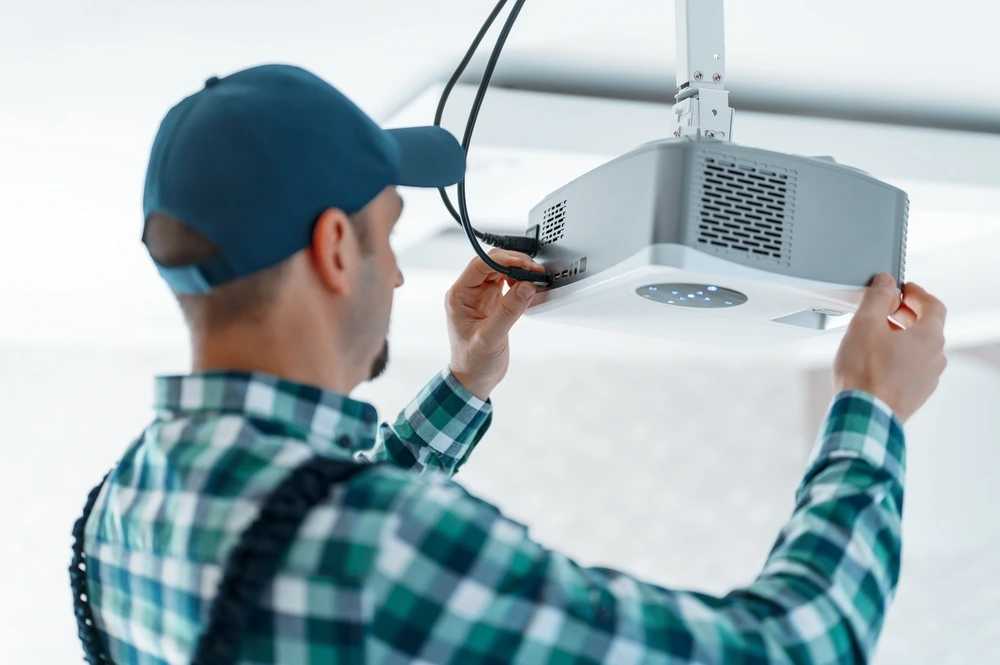
Rerouting Electrical and Plumbing
Before starting demolition, identify any electrical wiring and plumbing pipes within the wall. Use a stud finder or consult blueprints to map out these utilities. Turn off the electricity and water supply to the area. For electrical systems, remove switch plates and outlets. Disconnect wires and label them for easy reconnection. For plumbing pipes, drain any remaining water and cap pipes securely. It is advisable to wear protective gear such as work gloves and eye protection during this process. If you are unsure about handling these tasks, consider hiring a professional to avoid potential hazards.Setting Up Your Workspace
A well-organized workspace is crucial. First, remove all furniture and valuable items from the vicinity. Lay down heavy-duty plastic sheets to catch debris and reduce cleanup time. A starter hole can help you assess the wall’s internal structure before full demolition. Gather essential tools like a hammer, pry bar, reciprocating saw, and a utility knife. Wearing eye protection and a dust mask is important to protect yourself from dust and debris. Ensure you have ample lighting to see clearly and avoid mistakes. Keep a basic first aid kit nearby in case of minor injuries.Protecting Adjacent Areas
Shielding the surrounding areas is vital to prevent collateral damage. Use plastic sheets or drop cloths to cover floors, ceilings, and walls adjacent to the demolition site. Seal off doorways with zippered dust barriers to contain any dust within the work area. Install temporary barriers or plywood sheets to protect delicate surfaces and fixtures. If possible, set up a negative air machine to extract dust and maintain air quality. For added safety, ensure all team members wear protective gear like work gloves and dust masks to reduce inhalation risks and physical injuries. Properly implementing these steps will help mitigate risks and make your demolition project smoother and safer.Executing the Demolition
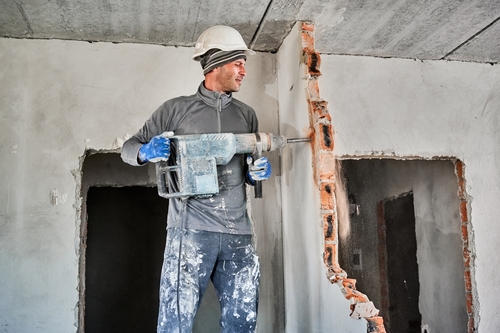
To ensure a safe and efficient wall demolition, focus on using the right tools and techniques, carefully removing wall covers and fixtures, and properly dismantling the wall structure.Using the Right Tools and Techniques
Select the appropriate tools for the job. Common tools include a sledgehammer, reciprocating saw, and pry bar. Each tool serves specific functions. For instance, a sledgehammer can create starter holes, while a reciprocating saw cuts through studs and nails. Safety gear is essential. Wear protective goggles, gloves, and masks to guard against dust and debris. Make sure to switch off electrical circuits that might be affected by the demolition. Plan your demolition to start from the top. This uses gravity to your advantage, making it easier to control the debris and ensuring safer operations.Removing Wall Covers and Fixtures
Before breaking down the wall, remove any drywall or plaster. Use a pry bar to gently pull off the drywall sheets. If the wall has tiles or hardwood covers, carefully remove them using specialized tools to avoid damage. Unscrew any fixtures attached to the wall, such as light switches, electrical outlets, or thermostats. If there are any pipes or electrical conduits, have a professional handle their removal to avoid accidents. This pre-demolition work helps simplify the process of dismantling the wall structure later.Dismantling the Wall Structure
Once the wall covers and fixtures are removed, focus on the structural elements like studs and joists. Start by cutting through the studs near the midway point using a reciprocating saw. This makes it easier to handle smaller sections of the wall. For load-bearing walls, ensure you have temporary supports in place to prevent structural damage to your house. A professional may need to install headers to maintain the stability of the building. After cutting the studs, use the sledgehammer to break them apart and a pry bar for removing any remaining nails. This step-by-step approach ensures a controlled and safe wall demolition.Post-Demolition Process
After completing a wall demolition, there are essential steps to ensure a clean and safe environment, as well as to prepare the space for subsequent work. These steps involve managing debris, conducting necessary patching and repair work, and performing final inspections.
Handling Demolition Debris
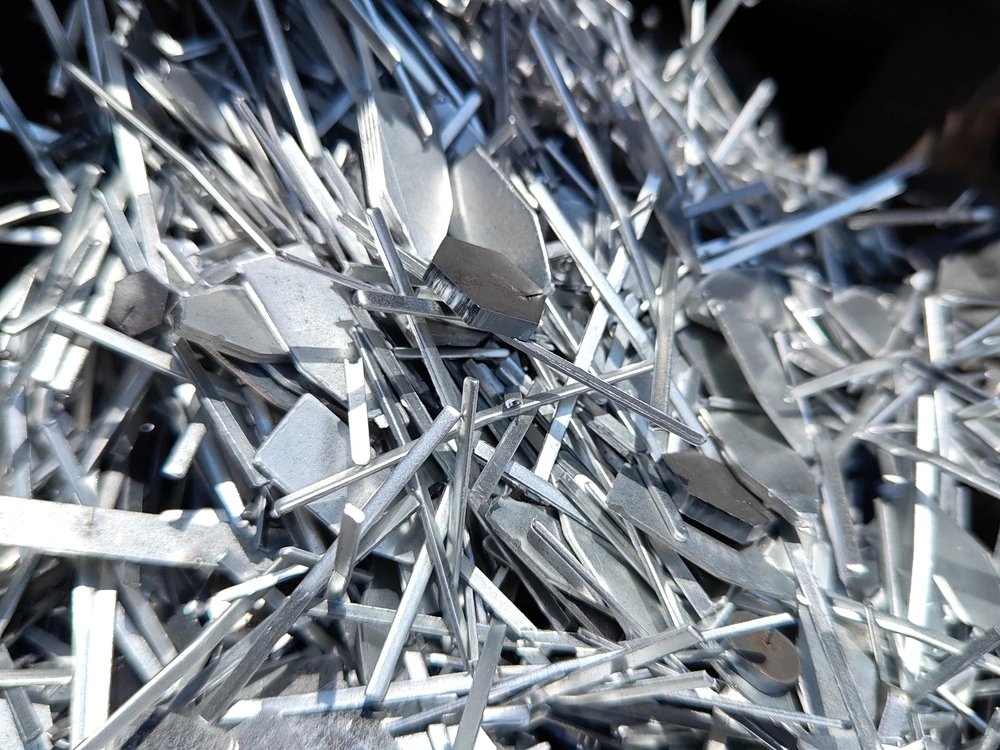
Efficiently handling demolition debris is crucial for maintaining safety and cleanliness. Begin by collecting all debris, including drywall, nails, and other materials. Use heavy-duty garbage bags or a dumpster rental for disposal. Sorting debris:- Recycle: Metal, clean wood
- Dispose: Broken drywall, insulation
Patching and Repair Work
Once debris is cleared, assess the wall cavity and surrounding areas for any damage. Use drywall screws to secure any loose sections and apply drywall mud to fill in holes and cracks. Smooth out the mud using a taping knife and sand it down once dry for a seamless finish. For ceiling repair, follow similar steps if any damage occurred during demolition. Apply multiple layers of mud and sand between coats. Consider repainting the affected areas to match existing walls and ceilings. It’s also a good time to inspect and address any issues with HVAC ductwork that may have been exposed.Final Inspections and Touch-Ups
Conduct a thorough inspection to ensure that all repair work meets safety and aesthetic standards. Check for any remaining imperfections in the patching and use fine-grit sandpaper to smooth out any rough spots. Repaint the patched areas with primer first, then the final coat to blend with the existing color. If necessary, repaint entire sections for uniformity. Inspect HVAC ductwork and vents to ensure they are clean and properly sealed. Verify that all repairs, painting, and cleaning are completed to your satisfaction before moving on to the next phase of your project.Frequently Asked Questions
Understanding wall demolition involves identifying load-bearing walls, adhering to safety measures, calculating costs, selecting contractors, navigating permit requirements, and choosing efficient removal methods.How can I determine if a wall is load-bearing before demolition?
You can check blueprints or consult a builder or architect to determine if a wall is load-bearing. Load-bearing walls support the structure of your home, so identifying them is crucial.What are the typical safety precautions to take during wall demolition?
Wear proper safety gear, such as gloves and goggles. Turn off utilities like electricity and water to avoid hazards. Use tools like sledgehammers carefully to minimize risks. Properly dispose of debris to prevent injuries.What factors influence the cost of wall demolition?
Costs vary based on the wall type, whether it’s load-bearing, and the complexity of removal. Obtaining permits and hiring professionals can add to the expenses. The size and materials of the wall also play a role.How do I choose a reliable contractor for wall demolition?
Look for contractors with good reviews and proper licenses. Ask for quotes and compare them. Verify their experience with similar projects. It’s important to check their safety record and ensure they have insurance.Can I demolish a wall in my house without a permit?
Check local regulations to see if a permit is required. Generally, major renovations, especially those involving load-bearing walls, need permits. Skipping permits can lead to legal issues and affect your home’s resale value.What is the best method to remove a wall for creating an open floor plan?
For non-load-bearing walls, use a sledgehammer to create a starter hole between studs. For load-bearing walls, install temporary supports and consult professionals to ensure structural safety. Creating a starter hole can simplify the process.RECENT BLOGS
 Construction and Demolition Recycling Association: Advancing Sustainable Practices in the Industry
Date: September 11 ,2024

Our Reviews

Mark Ramick
1725926374
Amber was awesome in helping me schedule the right dumpster for my job. Thanks again

Brian Healy
1725553543
Heather was so very pleasant, informative and charming. Next time… I will use you again.

Brandi Childers
1724853716
Ricardo helped me with my reservation. He made everything super clear and answered all my questions to help me pick the right dumpster to rent!

Steven Hewett
1724785537
Heather made the sales and scheduling experience extremely easy. Thank you for having great employees that care about conducting great business.

Jackson Vandiver
1724703158
Great service and fantastic customer service department. I would use them again.
LATEST BLOGS