June 14, 2024 - Benjamin Ehinger
Renting a Dumpster for a DIY Patio Paver Installation: A Practical Guide
CALL NOW 844-762-8449
Embarking on a DIY paver patio project can transform your backyard into an elegant outdoor living space. Having the right plan and materials is crucial for the success of your installation. Renting a dumpster is an often overlooked, yet essential, step in managing the debris and keeping your workspace clean and safe. This streamlined approach can save you countless trips to dispose of the old patio materials and yard waste, allowing you to focus on the precise laying of your new pavers.
As you consider the size and design of your future patio, remember that preparation is key. Since you’ll be excavating soil and shaping the land to create a solid foundation, a rental dumpster becomes indispensable for disposing of the earth and other materials you remove. You’ll also want to factor in the correct process for laying the foundation and pavers, ensuring your patio is not only aesthetically pleasing but also durable. Then, as you lay each paver, consider how you will maintain the surface and prevent future issues, as proper finishing techniques will extend the life and beauty of your patio.
 Setting the pavers correctly and establishing a robust edge restraint are crucial for the longevity and appearance of your patio. Precise work in these stages ensures a stable surface and a defined, attractive boundary.
 When embarking on a DIY patio paver installation, it’s crucial to familiarize yourself with local regulations and ensure you have the right safety gear. Ignorance of the law or inadequate safety measures can lead to problems that might halt your project.
Key Takeaways
- Renting a dumpster is a practical step in managing debris during patio installation.
- Proper groundwork ensures a durable and elegant paver patio.
- Effective finishing and maintenance extend your patio’s longevity.
Planning Your Paver Patio Design
Before you embark on laying out your dream patio, it’s important to scrutinize your space, pick suitable materials and tools, and plan your budget to avoid any unwelcome surprises.Assessing Your Outdoor Space
When considering the design of your paver patio, start with assessing the dimensions of your outdoor space. It’s not just about square footage; think about sun exposure, drainage, and the lay of the land. This assessment will guide the size and shape of your patio. Use string or a hose to map out the area, adjusting to incorporate curves or angles that complement your garden’s layout.Choosing the Right Materials and Tools
Selecting the right materials is vital for both aesthetics and durability. Concrete pavers are budget-friendly and come in a variety of colors and shapes, while natural stone offers unique patterns. Brick is traditional and can be arranged in attractive designs like the herringbone pattern. Each material has its own installation requirements, so ensure you have the right kind of sand, gravel, and landscaping fabric. For the job ahead, you’ll need tools such as a tamper, a wet saw, a level, and a rubber mallet.Creating a Budget for Materials and Equipment
To accurately foresee the cost associated with your patio project, create a detailed budget. Include all the materials such as pavers, base material, and sand, as well as any tools you might need to purchase or rent. Don’t forget to factor in optional but beneficial equipment, like a plate compactor for a solid base. Costs can vary widely based on your choice between standard concrete pavers or more premium natural stone. Considering renting a dumpster from a service like Waste Removal USA for an efficient cleanup process.Preparing the Foundation
A solid foundation is crucial for the longevity and stability of your patio. Proper excavation and preparation of the base material will ensure a durable outdoor space with efficient drainage.Clearing and Excavating the Patio Area
Begin by marking the area for your patio and remove any sod or debris. You’ll need to dig to the depth required for your patio materials—typically around 7 inches for the base layer and paver thickness. This includes the gravel and sand layers beneath the pavers. As you excavate, remember to check for a consistent depth with a level.Creating a Level Base and Proper Slope
Once the area is cleared, add a layer of landscape fabric to discourage weeds. Then, start laying your base material, which is usually a crushed stone or gravel base. It is essential to create a level foundation; however, you should maintain a slight slope away from structures for water runoff—aim for a drop of about 1 inch every 4 feet. Use a rake to distribute the gravel evenly before leveling.Compacting the Soil and Gravel Base
Compact the excavated soil with a plate compactor before adding the gravel. After spreading the gravel, you’ll need to compact it as well to create a sturdy base. Layer the gravel base and compact it in steps if your patio is large, typically in 2-inch layers until you have at least 4 inches of compacted base material. Next, add builder’s sand for a smooth and level surface for the pavers. Use straight boards and a screed process to evenly distribute the sand, then compact the sand with a tamper.Laying Pavers and Edging
Setting the pavers correctly and establishing a robust edge restraint are crucial for the longevity and appearance of your patio. Precise work in these stages ensures a stable surface and a defined, attractive boundary.
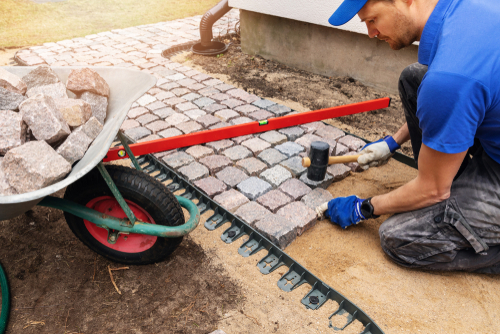
Setting Up Pavers and Edge Restraints
Begin by laying your pavers on the sand bed you have prepared. Make sure the sand is evenly spread and level to avoid unevenness in your final patio. As you set each paver down, use a rubber mallet to tap it gently into place, ensuring there are no gaps and each paver is snug against the others. To form the exterior boundary of your patio, install paver edging or edge restraints along the perimeter. This will hold your pavers in the desired pattern and keep them from shifting over time. Secure the restraints with spikes, driven deep for stability.- Steps for Setting Pavers:
- Lay pavers on the sand, starting from a corner.
- Tap each paver firmly with a rubber mallet.
- Keep pavers level and aligned with string lines.
- Steps for Installing Edge Restraints:
- Place edge restraints around the paver perimeter.
- Use spikes to anchor the restraints into the ground.
- Ensure edge restraints follow the walkway or patio shape closely.
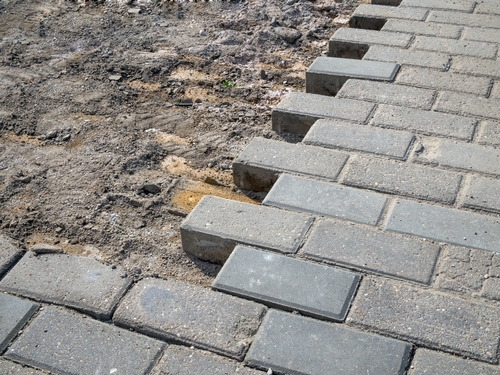
Ensuring Stability and Aesthetics
Once all pavers are in place, spread polymeric sand over the top, making sure to sweep it into every joint between the pavers. This type of sand, when activated with water, will harden and provide additional stability to the patio. For aesthetics, pay particular attention to the border pavers as they define the visible edge of your walkway or patio. Choose edgings that complement the pavers and your landscape. Compact the sand and pavers once more after the polymeric sand is applied to ensure everything is tightly fit and the sand is settled.- Securing Pavers:
- Use polymeric sand to fill joints.
- Compact pavers and sand after filling joints.
- Keep surface and edges clean and free of excess sand.
- Tips for Aesthetic Appeal:
- Select edging that enhances the paver design and overall landscape.
- Ensure border pavers are snug against edgings for a neat finish.
- Maintain clean, straight lines with the help of string lines.
Finishing Techniques and Maintenance
After meticulously installing your paver patio, ensuring a robust gravel foundation and utilizing a plate compactor for an even surface, the final steps are crucial for a long-lasting, low-maintenance outdoor space. Here’s how to keep your new patio in top shape with proper finishing and maintenance methods.Completing the Patio Surface
Once you’ve laid down all the pavers, it’s time to secure them in place. Sweeping fine sand over the patio will filter down into the joints between the pavers. This not only helps to stabilize the patio but also aids in preventing weed growth and insect infestation. For best results, use a broom to methodically distribute the sand and a garden hose to lightly mist over the area which will compact the sand further into the joints. Then, run the plate compactor over the patio one last time to ensure a flat and even surface.- Materials Needed:
- Fine sand
- Broom
- Garden hose
- Instructions:
- Sweep sand over the pavers.
- Mist the area with water.
- Compact the surface once again.
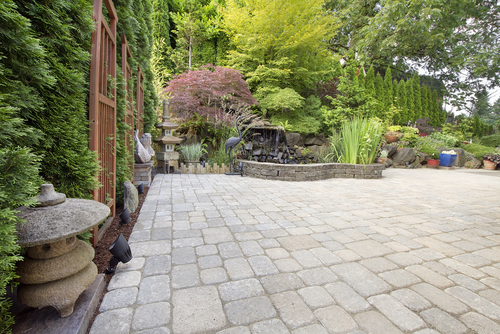
Cleaning Up and Applying Finishing Touches
Your paver patio is almost ready for enjoyment but don’t overlook the cleanup and finishing touches. First, clear away any leftover materials using a wheelbarrow. With the hard work completed, focus on aesthetics and functionality. Consider integrating lighting fixtures to enhance the ambiance and extend patio use into the evening. Lastly, add elements of landscaping around the perimeter to marry your patio with the rest of your garden, which not only looks great but can also offer additional erosion control. Maintaining the area is straightforward; regular sweeping and occasional hosing down will keep your paver patio looking neat and clean.- Checklist:
- Remove excess material with a wheelbarrow.
- Install lighting for aesthetics and functionality.
- Landscape around the patio for a cohesive look.
- Regularly sweep and hose the patio for cleanliness.
DIY Considerations and Compliance
When embarking on a DIY patio paver installation, it’s crucial to familiarize yourself with local regulations and ensure you have the right safety gear. Ignorance of the law or inadequate safety measures can lead to problems that might halt your project.
Understanding Local Building Codes and Permits
Before you start laying a single paver, it’s essential to check your local building codes. These regulations dictate the size, type, and placement of structures you can build on your property. They are in place to ensure safety, compliance with zoning laws, and overall community aesthetics. Get in touch with your local permit office or an engineer to understand these codes as they relate to your project. They will inform you if your project needs a permit and guide you through the application process. Having your project approved beforehand can save you from potential fines and the hassle of redoing work that doesn’t comply.- Obtain a permit if required
- Consult with engineers for compliance
- Align project with zoning laws
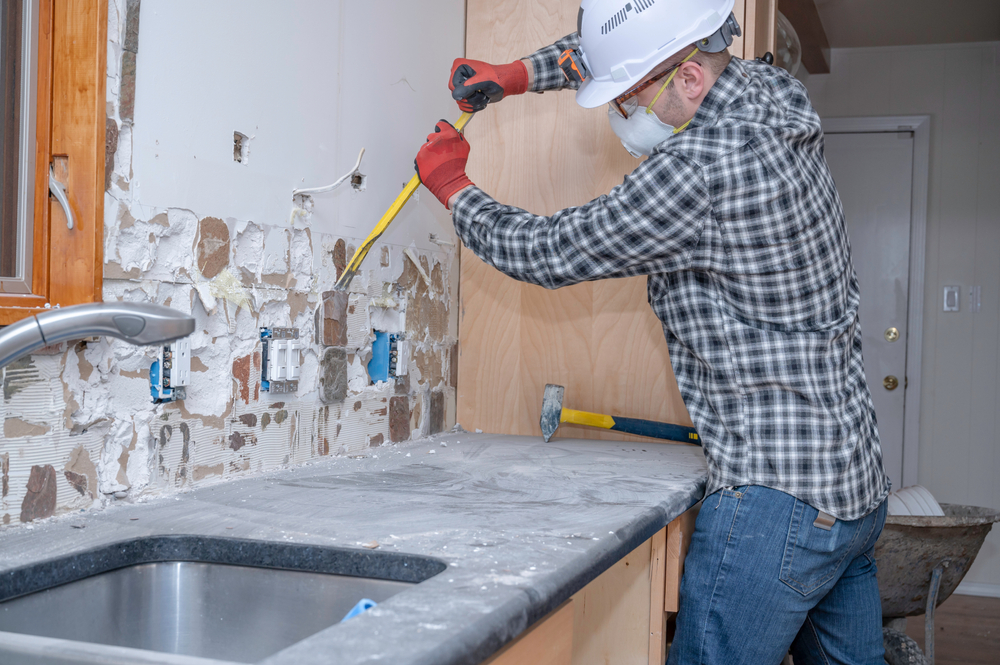
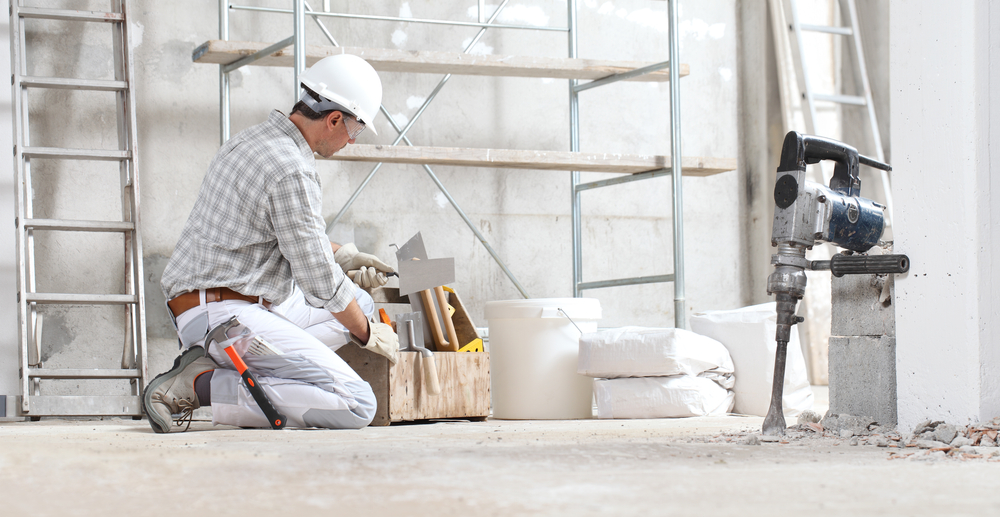
Selecting and Using Proper Safety Equipment
For a successful DIY patio project, your safety is paramount. Ensure that you are equipped with the necessary safety gear before you begin. Wear protective eyewear, such as safety goggles, when cutting pavers with a masonry saw. Gloves are essential to protect your hands while handling materials and tools like hammers and chisels. Dust masks are recommended to prevent inhalation of fine particulate matter during the cutting process. Moreover, anticipate the need for cables and PVC pipe for leveling and drainage, respectively, and handle these with care. Here is a quick checklist of safety equipment you might need:- Safety Goggles: Protects eyes from flying debris
- Gloves: Prevents cuts and improves grip
- Dust Mask: Limits inhalation of harmful dust
Frequently Asked Questions
Selecting the right dumpster size and understanding the costs associated with your DIY patio paver project can make all the difference in how smoothly your renovation goes. Here, we offer guidance on dumpster selection, placement, rental duration, and weight limits to assist you in making well-informed decisions.How do I estimate the correct dumpster size for my DIY patio paver project?
To estimate the correct dumpster size, measure the patio area and calculate the volume of debris that will be generated. A 10 yard roll-off dumpster is usually suitable for an average-size patio. If your project is larger or includes additional landscaping, consider a 20-yard dumpster or 30-yard dumpster.What are the average costs associated with renting a dumpster for concrete waste?
Costs vary depending on dumpster size and your location. On average, a 10-yard dumpster might cost $200-$400, with prices increasing for larger dumpsters. Be aware of potential additional fees for exceeding weight limits or disposing of prohibited items.Are there specific dumpsters for landscaping or dirt removal from a patio site?
Yes, there are yard waste dumpsters designed for landscaping or dirt removal. These dumpsters typically have shorter sides to make it easier to load heavy materials like soil or concrete.What factors should I consider when placing a dumpster on my property?
When placing a dumpster on your property, consider the proximity to the work area and ensure the location is accessible for delivery and pickup. Check for overhead wires or other obstructions and ensure the ground is firm enough to support the dumpster’s weight without causing damage.What duration of rental is typical for a patio paver installation project?
The typical rental duration for a dumpster can vary; however, a seven-day rental period is common. This allows ample time for demolishing and disposing of your old patio and installing the new pavers. If your project is expected to last longer, speak with your rental company about extended rental options.Can you explain the weight limits for different sizes of dumpsters?
Each dumpster size has a specific weight limit which is critical to adhere to in order to avoid extra fees. For example, a 10-yard dumpster may have a weight limit of 2-3 tons. Larger dumpsters will have higher weight limits, but these also come with increased rental costs. Be sure to check with your rental company for the weight limits associated with their dumpsters.RECENT BLOGS


Our Reviews

glenda prowell
1719242299
Louiner made it easy to make arrangements to have a dumpster put in my driveway. He was able to answer all my questions and made the entire process simple.

Glenda Lanier Prowell
1719241850
I have ordered an 11 yard dumpster to be delivered to my house.Lonier was extremely helpful and answered all my questions. The rate was very reasonable.

debbie Craton
1718740650
Heather was SUPER friendly and worked with me to get me whst I needed.I am very glad I called Waste Removal

adorna hayward
1718635411
Very pleasant to work with. Makes you want to call her back specifically.

Alvin Laws
1718397329
Always answers. Very responsive and follows the guidelines we have requested about where our receptacle sits.