March 21, 2024 - Benjamin Ehinger
Removing Kitchen Cabinets: A Step-by-Step Guide
CALL NOW 844-762-8449
Removing kitchen cabinets can seem like a daunting task, but with the right approach, it can be a manageable and rewarding part of your kitchen remodel. Whether you’re updating the look, adjusting the layout, or completely renovating the space, the removal of old cabinets is a critical step. It’s important to proceed carefully to avoid damaging your walls, floors, or the cabinets themselves, especially if you plan to donate or sell them. Safety should be your top priority; ensure you have protective gear and are aware of any plumbing and electrical connections.
Before you start the physical work, consider the cleanup and debris removal process. Renting a small dumpster from Waste Removal USA can make disposal of old cabinets and construction debris much more convenient. Planning and preparation are key to successfully removing kitchen cabinets. Having the necessary tools at hand, such as a drill, hammer, pry bar, and gloves, can help streamline the process. Be prepared to methodically remove doors, drawers, countertops, and sinks, and carefully dismantle wall and base cabinets. Understanding how to manage plumbing and electrical connections safely during the removal is also vital. Remember, an organized work area and thoughtful disassembly will simplify reinstallation or disposal.
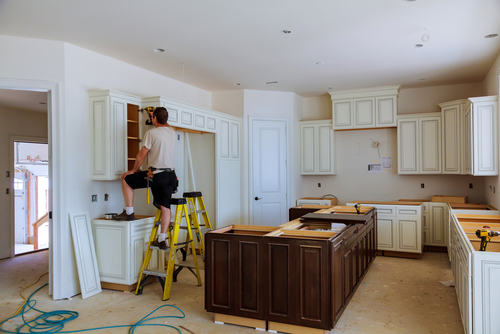 Before you begin the removal process, it’s important to know that detaching countertops and sinks requires careful handling and attention to plumbing attachments. Ensure the water supply is shut off before starting, and have the necessary tools on hand.
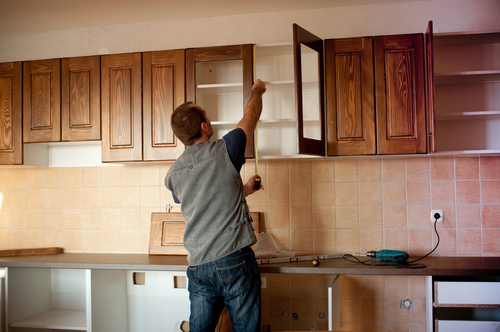 In removing your kitchen cabinets, ensuring the safety and integrity of plumbing and electrical systems is paramount. You’ll need to address water supply lines and electrical connections before proceeding.
Key Takeaways
- Proper preparation and having the right tools ensures a safer and more efficient cabinet removal process.
- Disposing of old cabinets is simplified by renting a dumpster for the debris.
- Methodical disassembly and area organization are essential for a smooth kitchen remodel transition.
Preparation for Cabinet Removal
Before you begin the process of removing your kitchen cabinets, it is crucial to prepare your workspace, gather all necessary tools, and implement safety precautions to ensure a smooth and injury-free removal.Clearing the Workspace
Your first step is to clear the workspace to provide unobstructed access to the cabinets. Remove all pots, pans, and other items from the drawers and shelves. It’s helpful to use drop cloths or cardboard to protect your countertops and floors from debris and damage during the removal process. Ensuring a clutter-free space not only makes the task easier but also helps prevent accidents.Gathering Necessary Tools
Next, you’ll need to assemble the necessary tools for the job. Arm yourself with a screwdriver, drill for removing stubborn screws or drilling pilot holes, a hammer, and a pry bar to loosen and remove the cabinets. Also, having a utility knife on hand is beneficial for cutting away any sealant or caulk that may be securing the cabinets to the walls.Safety Precautions
Before starting the removal, it’s essential to don gloves and safety goggles to protect your hands and eyes from sharp objects and debris. Keep your workspace well-ventilated, and if you’re not experienced with electrical or plumbing work, consider shutting off the appropriate utilities to avoid potential hazards.Removing Doors and Drawers
Before you begin the removal process of the cabinet components, it is important to have a clear workspace and the right tools at hand. You’ll need a screwdriver or a drill with the appropriate bit to detach the doors and drawers from the cabinetry.Detaching Cabinet Doors
To remove your cabinet doors, start by locating the hinges that hold the door to the cabinet frame. Each door will usually have two hinges. Unscrew the hardware carefully, starting with the lower hinge to prevent the door from tilting out unexpectedly. As you detach each door, it’s a good practice to label them along with their corresponding hardware to ensure easy reinstallation later on.Taking Out Drawers and Hardware
Removing drawers is typically a straightforward task. Pull the drawer out as far as it will go, then locate the drawer glide mechanism. Some drawers will have a release lever; push down or up on this lever and pull the drawer out towards you. Once the drawers are out, unscrew and remove any remaining hardware, such as drawer pulls or knobs. Remember to keep all your screws and hardware in a safe place to avoid misplacing them.Detaching Countertops and Sink
 Before you begin the removal process, it’s important to know that detaching countertops and sinks requires careful handling and attention to plumbing attachments. Ensure the water supply is shut off before starting, and have the necessary tools on hand.
Handling Countertops
Your kitchen countertop may be secured with adhesive and brackets. Begin by slicing through the caulk along the backsplash and edge of the countertop using a utility knife. If glue has been used to affix the countertop, you may need a putty knife to gently pry it up.- Removing Fasteners: Locate any screws or brackets that secure the countertop to the base cabinets. You can find these either underneath the countertop or within the base cabinetry.
- Lifting the Countertop: After detaching all hardware, lift the countertop with care. Heavy stone countertops will require additional people or equipment for safe handling.
Disconnecting the Sink
The kitchen sink needs to be disconnected from the plumbing to avoid damage when removing the cabinets.- Turn Off Water: Start by shutting off the water supply valves under the sink.
- Faucet and Drain: Next, using a wrench, disconnect the lines to the faucet and undo the drain pipe. For sinks with a garbage disposal or dishwasher, make sure to disconnect any additional connections linked to these appliances.
- Sink Attachment: Release clamps or clips holding the sink in place from below, then cut through any caulk around the edges.
- Removing the Sink: Carefully lift the sink out from the countertop and set it aside.
Dismantling Wall Cabinets
When removing upper cabinets, you must protect your walls and ensure a safe workspace. Have your tools ready and allocate sufficient time to complete the task without rushing.Removing Upper Cabinets
To begin, clear the contents of your upper cabinets to prevent any items from falling and causing injury or damage. Locate the brackets inside the upper cabinets; these often support the unit against the wall. With a screwdriver, carefully unscrew side screws. It’s important to have someone support the cabinet as you work to prevent it from falling. Next, examine any molding or trim that may be attached to the top or bottom of the cabinets. This decorative element is typically affixed with small nails or adhesive and must be gently pried off, taking care not to damage the surrounding wall. Once all brackets and screws are removed, the upper cabinets should be free to move. Ensure you and your helper have a firm grip before fully detaching the cabinet from the wall to safely remove kitchen cabinets.Dismantling Base Cabinets
Before you start removing base cabinets, you will need to clear the work area and prepare your tools. Remember to protect adjacent surfaces and ensure your safety during the process.Handling Lower Cabinets
Your first step in dismantling lower cabinets is to empty them entirely, removing any contents, drawers, and shelves. Once clear, locate and unscrew the mounting screws that attach the base cabinets to the wall; these are often found inside the cabinet, along the back wall. Be sure to support the weight of the cabinet as you loosen the screws to prevent it from falling.Removing Toe Kick Plates
Toe kick plates are the panels located at the bottom front of your base cabinets, covering the recessed area near the floor. To remove them, gently pry them away from the cabinets using a crowbar or similar tool. Start on one end, working carefully to avoid damage to the cabinet or the toe kick plate, which could be useful if you plan to reinstall or repurpose them.- Tools Required: Screwdriver, crowbar, protective gloves
- Material: Protective sheeting for surrounding surfaces
- Safety Tip: Turn off water and power supply if working around appliances or plumbing
Managing Plumbing and Electrical
 In removing your kitchen cabinets, ensuring the safety and integrity of plumbing and electrical systems is paramount. You’ll need to address water supply lines and electrical connections before proceeding.
Dealing With Water Supply Lines
Before removing cabinets near your sink or dishwasher, shut off the water supply to prevent leaks. This typically involves turning off valves under the sink. If you’re planning to remove a dishwasher or garbage disposal, you’ll also need to disconnect their water supply lines after the valve shutoff.- Turn off water valves: Under sink for sink-related plumbing, additional valves for appliances if necessary.
- Disconnect water lines: Use a wrench to loosen and detach any lines leading to appliances such as the dishwasher.
Handling Electrical Connections
Electrical safety is critical. Turn off the circuit breaker for the kitchen area to avoid electric shocks. Unplug all appliances and carefully remove any electrical wiring from behind or inside the cabinets. Pay special attention to wires that supply power to garbage disposals, dishwashers, and other fixed appliances.- Disconnect power:
- Flip the kitchen’s circuit breaker to off.
- Unplug appliances.
- Remove wiring safely:
- If there are wire nuts or electric plates, remove them with appropriate tools.
- Keep track of your connections with labels for easier reinstallation.
Cabinet Removal Cleanup
After you’ve successfully removed your kitchen cabinets, it’s vital to manage the aftermath methodically. Your focus should be on ensuring that the workspace is safe, free from debris, and prepared for any subsequent remodeling tasks.Debris and Damage Control
Debris: Begin by collecting all the loose screws, brackets, and other small hardware in a container to prevent them from becoming hazards. Larger pieces of broken wood or laminate should be piled separately. Use a broom and dustpan to sweep up sawdust and smaller particles, then follow up with a vacuum for a thorough clean. If you’ve designated the mudroom or another area for storing debris, transport materials carefully to prevent further mess. Damage Control: Carefully inspect walls for any inadvertent damage that might have occurred during the removal process. Look for scratches, holes, or removed paint. Fill any nail or screw holes with spackle, and sand the area smooth once dry. In the case of paint or stain touch-ups, use a small brush to gently cover the affected areas, blending with the existing wall color. Always ensure proper ventilation and use protective gloves when handling paint or stain. Remember, methodical cleanup and damage mitigation are key steps to set the stage for whatever new installation or design you have planned for your kitchen space.Post-Removal Considerations
Once you’ve successfully removed your old kitchen cabinets, it’s time to focus on the next steps: disposing or donating the discarded materials and preparing your space for the installation of new cabinets.Disposal and Donation
- Disposal: You’ll need to determine the most responsible and efficient way to dispose of your old cabinets. Check with your local waste management service to see if they offer large item pickup. For materials that are not accepted, consider renting a local dumpster or hiring a junk removal service, which can usually be done through local contractors with the necessary expertise.
- Donation: If your old cabinets are still in good condition, donating them can be a great way to recycle and help others. Organizations such as Habitat for Humanity often accept cabinet donations for reuse in their building projects. Ensure the cabinets are clean and all hardware is attached before donating to facilitate easier reusing by the new owners.
Preparation for New Cabinets
- Before the arrival of your new cabinets, prepare your kitchen space to ensure a smooth installation process. This may involve patching and painting walls, updating plumbing or electrical work as needed, and making sure your floors are level.
- Engage with contractors early to discuss any preparatory work that needs to be done. Their expertise is invaluable in identifying potential issues that could affect the installation of new cabinets, such as uneven walls or floors.
- Make sure you have all necessary permits for your kitchen remodel, as this can impact the timeline and process of installation. Discuss this with your contractors to understand local regulations and requirements.
Frequently Asked Questions
In this section, you’ll find direct answers to common inquiries regarding the removal of kitchen cabinets, focusing on safe and efficient techniques that preserve the integrity of your kitchen components.What is the correct process for safely removing lower kitchen cabinets?
To safely remove lower kitchen cabinets, begin by clearing out the contents and detaching any drawers or doors. It’s essential to turn off the water supply and disconnect any associated appliances like dishwashers before unscrewing and carefully removing the cabinets from the wall.How can one detach kitchen cabinets when there are no visible screws?
When screws are not immediately visible, they may be concealed underneath decorative covers or filler panels. Inspect carefully for hidden screws and use a putty knife or a screwdriver to remove any coverings. Then proceed to unscrew and separate the cabinets.What steps should be followed to take down wall-mounted kitchen cabinets?
Start by clearing the area and protecting your countertops. Then, remove any adjoining trim or caulk and unscrew the cabinets from the wall brackets or rails, making sure to have assistance to prevent the cabinet from falling.Can kitchen cabinets be removed without harming the countertops?
Yes, kitchen cabinets can be removed without damaging the countertops by carefully disconnecting any screws or adhesive that attach the cabinets to the underside of the countertops and using a utility knife to cut through any caulk that seals the joint.What is the appropriate method for detaching kitchen cabinets that are affixed to the floor?
For floor-affixed kitchen cabinets, you should begin by identifying and removing the anchoring screws or fasteners at the base of the cabinet. If there is caulking along the toe kick or floor joint, cut it cleanly to separate the cabinets without damaging the flooring.Is it possible to remove kitchen cabinets that are adhered with glue, and if so, how?
Cabinets affixed with glue can be removed by gently prying them away from the wall or adjacent surfaces. Apply steady pressure and work carefully to avoid damaging the cabinet or wall surface. If necessary, use a solvent designed for loosening adhesive to help separate the bonded materials.RECENT BLOGS
Our Reviews
Glenda Lanier Prowell
1721758635
I have ordered an 11 yard dumpster to be delivered to my house.Lonier was extremely helpful and answered all my questions. The rate was very reasonable.
Cedric Smikle
1721660395
Amber was extremely professional and courteous. She answered all of my questions and even some that I didn’t know I needed to ask.
Cait Kaider
1721243051
I highly recommend Waste Removal USA for their responsiveness and how the staff work hard to provide exceptional customer service. They have done well by us and our clients. Thank you!
Easom Family
1721223306
Louiner Pierre-Louis Is awesome! Did a great job. Will definitely be using this same company for all my dumpster needs because of his awesome customer service! Thank you!!!
tabitha Vazquez
1720539988
Wonderful and fast customer service!
LATEST BLOGS

