February 14, 2024 - Benjamin Ehinger
Refinishing Hardwood Floors: A Step-by-Step Guide for Lasting Beauty
CALL NOW 844-762-8449
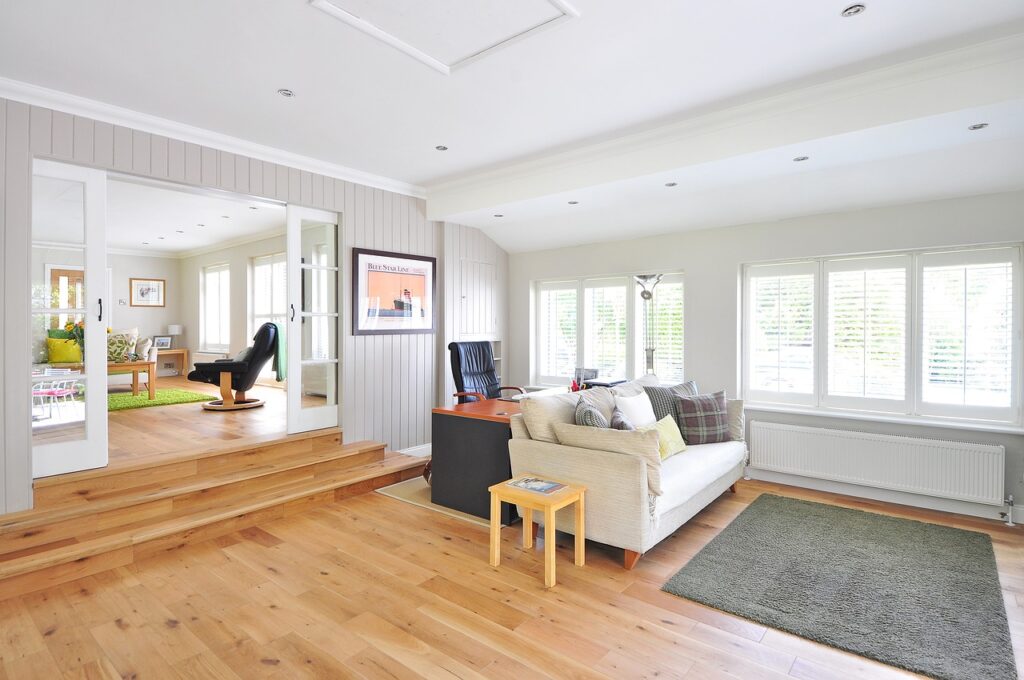
Refinishing hardwood floors is a valuable skill that can restore the natural beauty of your floors and protect them for years to come. Whether you’re dealing with years of wear and tear, or simply looking to update the look of your space, the process of refinishing can be an economical and satisfying DIY project. By understanding the right techniques—from assessing the condition of your floors to applying the new finish—you can achieve professional-looking results without the expense of hiring a pro.
Before diving into the project, it’s important to gather the correct tools and materials and to understand each step of the process. You’ll need to know how to prepare your work area effectively, the best methods for stripping away the old finish, how to repair any damage to the wood, and the intricacies of staining and sealing your floors. Being well-prepared and cautious with each step ensures a smoother process and helps avoid common pitfalls such as uneven finish or improper drying times. Knowing how to maintain your newly refinished hardwood floors will also help you preserve their condition and extend their lifespan.
Don’t forget to include safety equipment such as masks and knee pads, and tool rental fees for items like a drum sander or edge sander, which can significantly add to the overall cost if not already owned. Preparation for refinishing may also require a broom for initial cleaning and a pry bar for removing any nails or staples.
Be sure to purchase slightly more material than you think you’ll need to account for any errors or miscalculations. This will ensure you won’t have to pause the project to acquire additional supplies.
 When undertaking the project of refinishing hardwood floors, you’ll need a variety of tools and materials to ensure the job is done correctly and safely.
 Staining your hardwood floors can enhance their natural beauty and provide a new, fresh look to your space. Choosing the right stain and applying it correctly are crucial steps in the process.
Key Takeaways
- Refinishing your hardwood floors can enhance their appearance and longevity.
- Proper preparation and the use of the right tools are critical to the refinishing process.
- Post-refinishing maintenance is essential in protecting your hardwood floor investment.
Evaluating Hardwood Floors
Before you decide to refinish your hardwood floors, it’s important to assess their current condition.- Surface Check: Examine the wood for any signs of warping, deep scratches, or structural damages. If these are minimal, refinishing is a viable option.
- Thickness: Floors too thin from repeated refinishing may not withstand another pass. Check that there’s enough wood above the tongue and groove to handle a sanding.
- Finish Test: Old finishes may affect the adhesion of new sealants. A simple test involves dripping a few water droplets onto the wood. If they bead, your floor might not need refinishing right away, as mentioned in a guide by Architectural Digest.
- Deep Cleaning: Sometimes, a thorough cleaning can return the shine to your floors, without the need for refinishing. Use a soft bristle broom and vacuum for a test cleaning as suggested by The Spruce.
Planning and Preparation
Refinishing hardwood floors is a considerable project that requires careful planning and preparation. Before diving in, you need to establish a clear timeline and budget, and understand the materials you’ll need.Setting a Schedule
To successfully refinish your hardwood floors, you should first establish a detailed schedule. Consider the size of your space and the condition of your floors. Experienced DIYers may spend 1-2 days per room, whereas new practitioners might need additional time. Remember to include time for:- Room preparation (moving furniture, removing old finish)
- Sanding
- Stain application (if desired)
- Applying multiple coats of finish, with adequate drying time between each
Budgeting and Material Acquisition
Having a realistic budget is key. The costs will vary depending on the size of your floors and the finish you choose, but on average, you can expect to spend between $200 to $500 per room. Be prepared to acquire the following materials:| Materials | Specifics |
|---|---|
| Sandpaper/Sanding Screens | Multiple grits (coarse to fine) are required, starting around 40-grit to 100-grit. |
| Wood Stains | Optional, depending on desired coloration and grain enhancement. |
| Sealer/Finish | Polyurethane or similar protective coatings are necessary for your floor’s longevity. |
| Applicators | Brushes, rollers, or pads for even application of stains and finishes. |
Tools and Materials Needed
When undertaking the project of refinishing hardwood floors, you’ll need a variety of tools and materials to ensure the job is done correctly and safely.
Tools:
- Sanding Equipment: To remove the old finish, you’ll need a drum sander or belt sander for the main floor areas. For edges and tight corners, an edge sander or orbital sander is required.
- Vacuum Cleaner: A vacuum with a filter will help you clean up sawdust and particles after sanding.
- Hammer and Nail Set: Use these to set any protruding nails below the surface.
- Pry Bar: Essential for removing molding and trim.
Materials:
- Sandpaper: Various grits are required, from coarse to fine, to gradually smooth the floor.
- Wood Stain: If you desire to change the color of your hardwood, select a wood stain of your choice.
- Wood Finish or Polyurethane: To protect your floor, apply a wood finish or polyurethane layer.
- Painter’s Tape: To protect baseboards and walls during staining and finishing.
Floor Stripping Process
Refinishing your hardwood floors begins with the essential step of removing the existing finish, which prepares the surface for sanding and the new finish. This process involves a careful approach to avoid damaging the wood beneath.Removing Existing Finish
To start, you’ll need to strip any current finish. This involves a test, such as the water droplet technique, to assess the condition of your floors. If water soaks in immediately, it indicates that your floor’s finish is compromised and needs refinishing. You can use a chemical stripper to soften the old finish, making it easier to remove without aggressive sanding, which preserves the wood’s integrity.- Apply the chemical stripper as directed.
- Let it sit to soften the old finish.
- Scrape away the residue with a plastic scraper.
- Clean the floor thoroughly to remove any remaining stripping solution.
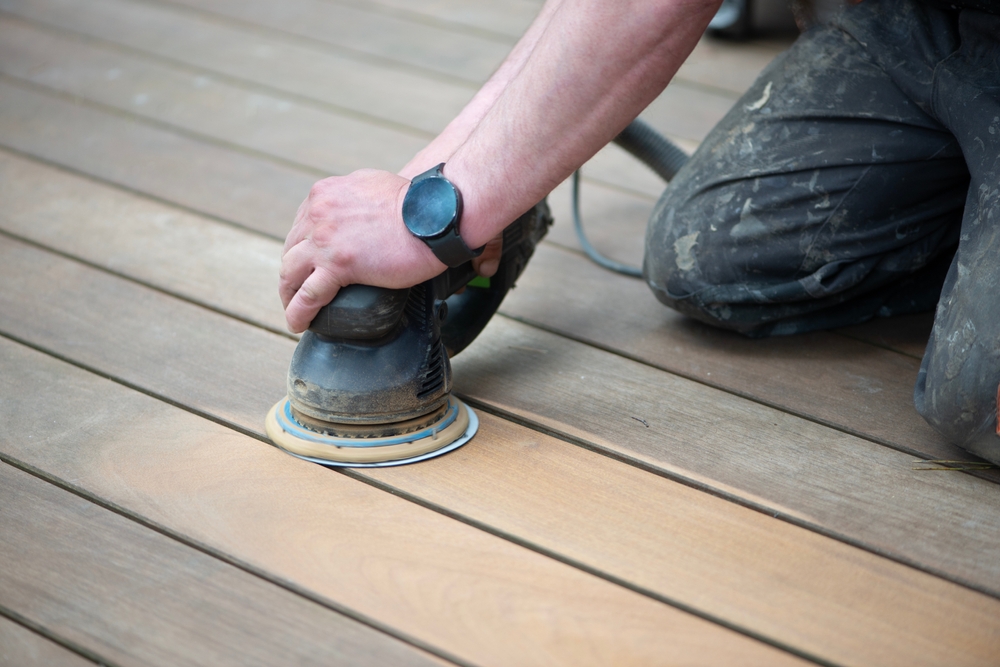
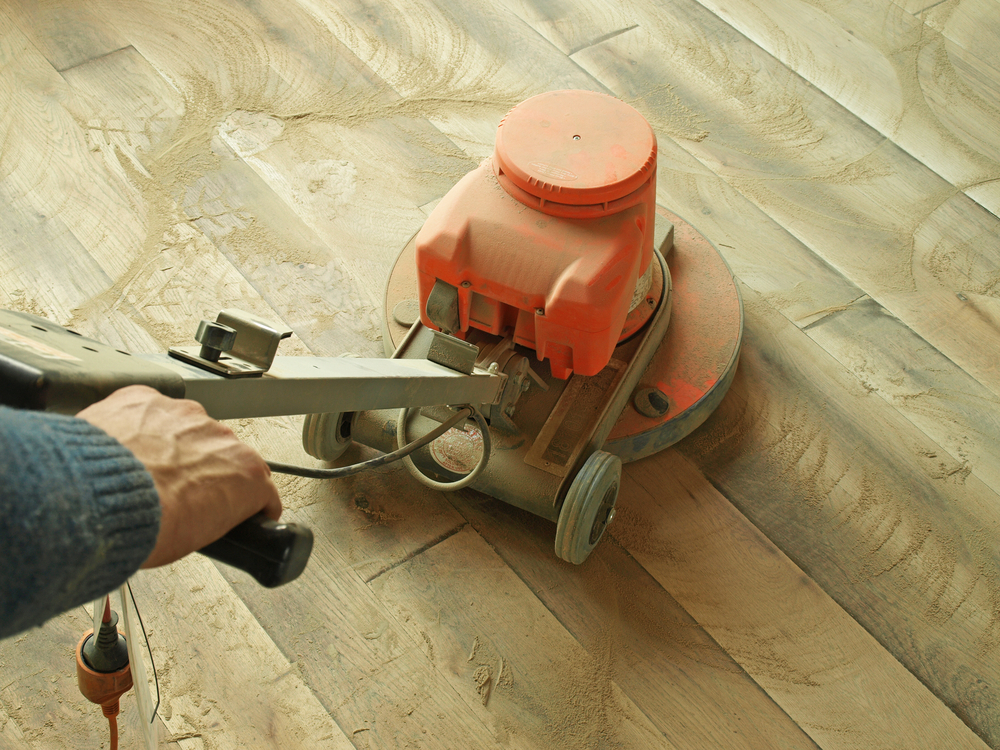
Sanding Techniques
Sanding is crucial to achieving a smooth base for the new finish. Your sanding method will depend on the state of your floors and the type of finish you desire.- For heavily worn floors, you may need to use a drum sander, which removes the top layer of wood.
- Start with coarse-grit sandpaper.
- Progress to finer grits sequentially.
- For minor scratches, a buffer with a sanding screen might suffice, which gently abrades the finish without removing significant wood layers.
- Always sand along the grain of the wood.
- Use a handheld orbital sander for edges and corners.
Wood Floor Repairs
Before considering a complete refinishing, addressing local issues like scratches and gouges can rejuvenate your hardwood floors. These targeted repairs are cost-effective and less labor-intensive than a full-scale refinishing project.Dealing with Scratches
If your floors have light surface scratches, you have options that don’t involve extensive sanding or refinishing. Products like Scratch Away can be applied directly to the affected area. Here’s a simple approach:- Evaluate the scratch: Is it superficial or does it penetrate the wood?
- Clean the area: Ensure it’s free from debris and dust.
- Apply the correct product: Use a scratch repair solution for minor blemishes.
- Buff it out: Gently work the solution over the scratch.
Fixing Gouges and Holes
For deeper damage, such as gouges or holes, there are a few more steps involved:- Clean and prepare the area just as you would for a scratch.
- Fill the gouge or hole with wood filler that matches your floor’s color.
- Let the filler dry according to the product’s instructions.
- Sand it down smoothly to match the surrounding floor level.
- Finish the area with a matching stain or sealant for protection.
Staining Hardwood Floors
Staining your hardwood floors can enhance their natural beauty and provide a new, fresh look to your space. Choosing the right stain and applying it correctly are crucial steps in the process.
Choosing Stains
When selecting your wood stain, consider the type of wood you have as each species reacts differently to stain. Oak, for example, absorbs stain evenly, while maple can become blotchy. Stains come in various types, such as:- Oil-based stains provide long-lasting color but take longer to dry.
- Water-based stains dry faster and have less odor but may require more coats.
Application Methods
Before staining, ensure your floors are sanded and clean. There are two main methods for applying stain to your hardwood floors:- Rag or Cloth: This method allows you to rub the stain into the wood, giving you control over the evenness of application.
- Brush or Roller: These tools are suitable for covering large areas more quickly, but you must be cautious to avoid lap marks.
Applying Finish
After sanding your hardwood floors, applying the right finish is crucial for protection and aesthetics. Your choice of finish can dramatically affect the longevity and appearance of your floors.Selecting the Appropriate Finish
When selecting a finish, consider durability, curing time, and your personal lifestyle requirements. Oil-based polyurethane is durable and has a warm amber hue, but takes longer to dry. Water-based polyurethane offers a clearer finish and dries faster but may require more coats. Wax provides a low-sheen, natural finish, though it’s less durable and requires more maintenance. There’s also acid-cured finish, a highly durable option that’s ideal for high-traffic areas but comes with a stronger odor and longer curing time. For a detailed comparison, you might want to look into the pros and cons discussed in the article How to Refinish Hardwood Floors the Easy Way – This Old House.Finish Application Techniques
You must apply your selected finish evenly and efficiently for the best results. Here’s a quick guide:- Preparation:
- Ensure your room is well-ventilated.
- Tack cloth or a vacuum can be used to clear all dust from the sanding process.
- Apply a thin coat of sealer (if required by the chosen finish type).
- Technique:
- Use a high-quality, natural bristle brush or a foam applicator for oil-based finishes.
- For water-based finishes, a synthetic fiber brush or applicator is recommended.
- Application:
- Start at the furthest corner of the room and work towards the door.
- Apply finish with the grain of the wood.
- Maintain a wet edge to avoid lap marks.
- Allow adequate drying time before applying subsequent coats. Usually, at least 24 hours is recommended between coats.
- Sand lightly between coats with a fine-grit abrasive (typically 220-grit or higher).
Drying and Curing Time
When you’re refinishing your hardwood floors, understanding the difference between drying time and curing time is fundamental. Drying time refers to how long it takes for the surface to be dry to the touch, meaning when solvents or water have evaporated sufficiently so that the floor can be walked on. However, the floor is not yet fully hardened. In contrast, curing time involves the finish reaching its maximum hardness and chemical resistance. During this period, the underlying coatings chemically bond to form a solid, impermeable surface. Drying Time:- Typically ranges from 24 to 48 hours
- Affected by ventilation, humidity, and temperature
- Floors should be dry to the touch before applying another coat
- Can take from 7 to 30 days, depending on the product used
- Floors may be usable, but care should be taken to avoid scratching or staining
- Full use of floors is often recommended after the entire curing period has elapsed
- Read the manufacturer’s guidelines for specific drying and curing times
- Avoid placing rugs or furniture on the surface until the curing process is complete
- Keep the room well ventilated, but avoid direct airflow on the surface during drying
Maintenance Tips
Proper maintenance of your hardwood floors can vastly extend their life and beauty. Below are targeted strategies to keep your floors looking their best.Regular Cleaning
Daily: Sweep or dust mop your floors to remove daily dirt and debris. Weekly: Use a wood floor cleaner recommended by flooring professionals, like the products discussed on The Spruce, to maintain the shine without damaging the finish. Deep Cleaning:- Monthly: Apply a concentrated wood cleaner to address dirt build-up.
- Annually: Consider a professional deep clean to rejuvenate your hardwood’s appearance.
Preventative Measures
- Mats and Rugs: Place them at entryways to catch grit and moisture.
- Furniture Pads: Attach felt pads to furniture legs to prevent scratches.
- Quickly clean up spills.
- Use a water droplet test, as explained by The Home Depot, to assess if refinishing is necessary.
- Keep indoor humidity levels between 35% and 55% to prevent warping.
Troubleshooting Common Issues
When refinishing hardwood floors, you may encounter a range of issues. Here’s how to address some common problems: Peeling Finish: If your finish is peeling, ensure proper adhesion by appropriately abrading the surface before application. Incorrect abrasion can lead to finish that doesn’t properly stick to your hardwood floors. Warping: A warped floor is often due to excess moisture. Check for plumbing leaks and address any house seals that are failing. Water can cause hardwood to deform, creating an uneven surface. Dust Contamination: During the refinishing process, dust can settle into the wet finish, causing imperfections. To avoid this, clear the floor entirely of debris and maintain a dust-free environment as much as possible. Scratches: If you find scratches post-refinishing, it may be due to grit brought in from outside or even stiff bristles during cleaning. Use a soft bristle broom for sweeping and protect your floors with rugs in high traffic areas to prevent this issue. It’s essential to follow the correct steps and procedures during the refinishing process to minimize these common problems. If issues persist, consulting a professional may be your best course of action.Professional Refinishing Services
When your hardwood floors start losing their sheen and elegance, professional refinishing services can breathe new life into them. Refinishing your hardwood floors is not just about beauty; it also protects your investment and enhances the longevity of your floors. Choosing the Right Service: Selecting a reputable company is crucial. Companies like Bob Vila’s top picks bring trusted expertise to your project. Look for service providers with a track record of quality work and positive customer feedback. What to Expect:- Initial assessment of floor condition
- Sanding to remove the old finish
- Stain application to achieve the desired color
- Sealing with a protective finish
- Durability: A new finish layer provides extra protection.
- Aesthetics: Revitalizes the wood, enhancing its natural beauty.
- Value: Well-maintained floors can increase your home’s market appeal.
Frequently Asked Questions
What steps are involved in sanding and refinishing hardwood floors?
The process typically includes preparing your floor by removing furniture and nails, sanding it down to the bare wood, cleaning up the dust, applying the stain, and then finishing with a protective coat like polyurethane.How can you refinish hardwood floors without sanding?
Sanding isn’t always necessary; if your floors are not deeply scratched or damaged, you can opt for a chemical etching technique followed by a refinishing coat.What is the average cost of refinishing hardwood floors per square foot?
The cost can vary widely, but on average, DIY refinishing can run between $600 and $1,000 overall, which can translate to a few dollars per square foot. Professional services may cost more, typically ranging between $1,150 to $2,500 or more, depending on the project’s complexity.What are the differences between hardwood floor resurfacing and refinishing?
Resurfacing involves only the top coat of your floor’s finish, while refinishing encompasses sanding down to the bare wood before applying new stain and finish—addressing more extensive damage and wear.How frequently should hardwood floors be refinished to maintain their condition?
The frequency depends on wear and tear. Well-maintained floors might only need to be refinished every 7-10 years, but high-traffic areas could require more frequent refinishing.What should you consider when deciding whether to DIY or hire a professional for hardwood floor refinishing?
Evaluate your skill level, tools required, time available, and the cost difference. DIY can save money but requires significant effort and know-how. Professional refinishing ensures a high-quality finish but at a higher cost. Consider the pros and cons of each approach before deciding.RECENT BLOGS


Our Reviews

Glenda Lanier Prowell
1721758635
I have ordered an 11 yard dumpster to be delivered to my house.Lonier was extremely helpful and answered all my questions. The rate was very reasonable.

Cedric Smikle
1721660395
Amber was extremely professional and courteous. She answered all of my questions and even some that I didn’t know I needed to ask.

Cait Kaider
1721243051
I highly recommend Waste Removal USA for their responsiveness and how the staff work hard to provide exceptional customer service. They have done well by us and our clients. Thank you!

Easom Family
1721223306
Louiner Pierre-Louis Is awesome! Did a great job. Will definitely be using this same company for all my dumpster needs because of his awesome customer service! Thank you!!!

tabitha Vazquez
1720539988
Wonderful and fast customer service!
LATEST BLOGS
