May 21, 2024 - Benjamin Ehinger
How to Replace a Ceiling: A Step-by-Step Guide
CALL NOW 844-762-8449
Replacing a ceiling can seem like a daunting task, but with careful planning and the right tools, it’s a project that can significantly improve the appearance and value of your home. Whether your ceiling is damaged due to water, structural issues, or simply outdated, removing the old material and installing a new ceiling will revitalize your space. Prior to starting, it’s essential to assess any structural damage and address those issues to ensure your new ceiling is both safe and secure.
You’ll need to prepare the area to minimize the mess and ensure an efficient workflow. Securing a 10-yard dumpster rental for the resulting debris is a practical step that will keep your workspace clean and organized. Keep in mind that if you have existing fixtures or electrical work, these may require careful removal or adjustment before you can start the demolition process. After clearing the area, installing a new framework and the chosen materials will set the base for your new ceiling. Finishing touches will involve smoothing and refining the surface, painting, decorating, and reinstalling any fixtures.
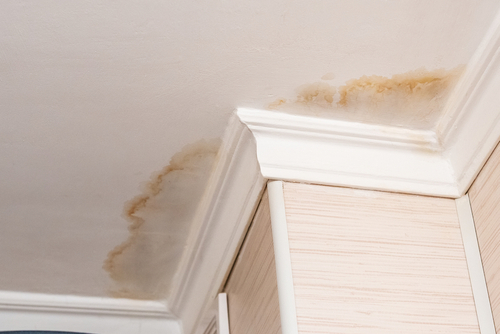 Before tackling the removal of your old ceiling, be aware of the materials and tools you’ll need. You’ll need a methodical approach for disassembling the ceiling and special attention if dealing with asbestos material.
 When installing a new ceiling framework, it’s critical to ensure the structural soundness of ceiling joists and the correct mounting of drywall panels. Proper alignment and secure fastening are the keystones of this phase in ceiling replacement.
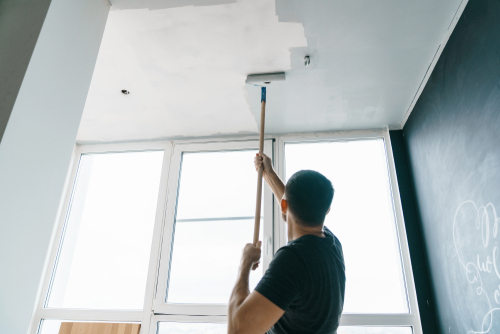 After replacing your ceiling, a fresh coat of paint and some decorative accents can transform the space. It’s essential to choose the right type of paint and accurately apply each layer for a professional finish.
Key Takeaways
- Assessing the ceiling structure and preparing the area is crucial for a successful replacement.
- A 10-yard dumpster rental helps manage debris from ceiling removal and installation.
- After installing the new framework, finishing the surface and reinstalling fixtures complete the transformation.
Preparation for Ceiling Replacement
Before you begin the ceiling replacement process, it’s crucial to set the stage for a safe and efficient job. Thorough preparation involves implementing safety measures, clearing the area, and ensuring containment to prevent damage and contamination to other parts of your home.Safety Precautions
Your safety is paramount. You will need to wear safety equipment such as goggles, gloves, and a dust mask or respirator, especially if you suspect the presence of asbestos in older ceiling materials. If asbestos is suspected, stop work and contact a professional. When painting or sanding, ensure good ventilation and avoid skin contact with hazardous substances.Removing Furniture and Fixtures
Start by clearing the room. Remove all furniture to prevent any damage and cover the floor with drop sheets or plastic sheeting to catch falling debris. Take down any light fixtures, ceiling fans, and detachable elements, keeping mindful of electrical connections.Setting Up for Containment
To minimize the spread of dust and debris, section off the work area by hanging plastic sheeting from the ceiling down to the floor, securing it with tape. This is essential to protect the rest of your house and makes for easier cleanup. Stay within your budget by reusing these materials if they remain intact after your project.Identify and Resolve Structural Issues
Before attempting a ceiling replacement, it’s crucial to assess any structural issues that could compromise the integrity of your new ceiling. An in-depth analysis of the ceiling joists and mold presence must be conducted to ensure a secure and healthy environment.Analyzing Ceiling Joists
To evaluate the state of your ceiling joists, use a stud finder to accurately locate them. A visual inspection is essential; check for signs such as sagging or bending which may indicate weakness or damage. If any joists are compromised, reinforcing or replacing them with new timber is imperative for maintaining the ceiling’s structure. Ensure the right drywall thickness is used to match the existing structure for a cohesive load distribution.Detecting and Treating Mold
When inspecting your ceiling for structural integrity, also look for signs of mold. Typically caused by moisture, mold can pose health risks and further damage if not addressed. If you find mold, you need to remove the affected drywall and treat the area with an EPA-registered fungicide. After mold remediation, replace the drywall ensuring it’s properly sealed to prevent future mold growth. Regular maintenance checks are advised to catch any new occurrences swiftly.Removing the Old Ceiling
 Before tackling the removal of your old ceiling, be aware of the materials and tools you’ll need. You’ll need a methodical approach for disassembling the ceiling and special attention if dealing with asbestos material.
Disassembling the Existing Ceiling
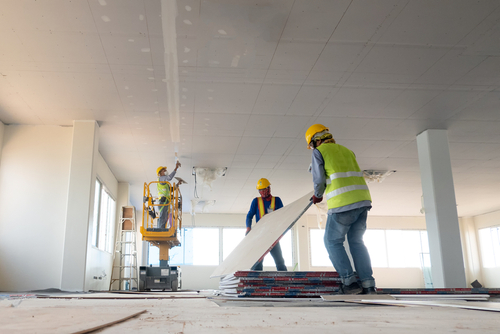
First, ensure that the room is clear of furniture and that you’re wearing protective gear. Start by using a drywall saw to carefully cut along the edges of the ceiling. This will prevent damage to the surrounding walls. Then, proceed to remove each ceiling drywall panel. Remove screws using a screwdriver or drill. Place the panels on the ground gently to minimize dust and debris.Handling Asbestos Material Carefully
If your home was built prior to 1980, it’s crucial to check for asbestos in the ceiling materials. If suspected, do not proceed with the removal; asbestos exposure is hazardous. Immediately contact a certified asbestos abatement professional to handle the material safely, as it requires specific precautions and disposal methods.Electrical Considerations
When replacing a ceiling and dealing with electrical components, safety and precision are paramount. Both the integrity of the ceiling’s structure and the proper function of any electrical fixtures depend on careful attention to detail.Working with Wires and Fixtures
Before touching any electrical wires or fixtures, ensure that the power is turned off at the breaker. Use a non-contact voltage tester to confirm that the electricity is off in the area you are working. Unfasten the light fixtures from the old ceiling and carefully disconnect the wires. Wire nuts are typically used to secure the connections between the electrical wires from both the junction box and the light fixture. Remember to match wire colors—black to black (hot), white to white (neutral), and green or bare to green or bare (ground).Ensuring Proper Insulation
When reinstalling your ceiling components or installing new ones, verify that there is appropriate insulation around the junction box to minimize the risk of an arc or other electrical hazards. If you’re working in the attic, make sure any new cable or wiring does not compress or damage existing insulation, which could affect your home’s thermal efficiency. After installing the junction box and fixtures, double-check that all parts sit properly, without strain to the wires or pressure points that could damage insulation in the future.Installing New Ceiling Framework
 When installing a new ceiling framework, it’s critical to ensure the structural soundness of ceiling joists and the correct mounting of drywall panels. Proper alignment and secure fastening are the keystones of this phase in ceiling replacement.
Setting Up New Joists
Materials Needed:- Ceiling joists
- Tape measure
- Chalk line
- Level
- Hammer or nail gun
- Joist hangers
- Nails or suitable fasteners
Mounting the Drywall Panels
Materials Needed:- Drywall panels
- Drywall screws
- Drill or screw gun
- Drywall lift or support (optional)
- Fine-tooth saw or drywall knife
- Screw pattern guide
Finishing and Refining the Ceiling Surface
After securing the new ceiling panels, the next critical step involves sealing the seams and applying joint compound, followed by sanding the area to ensure a smooth and finished surface. Proper execution of these steps is crucial for a professional-looking ceiling.Sealing Seams and Applying Joint Compound
Your first task is to securely seal the seams between the drywall panels. Begin by applying a layer of drywall compound along the seams using a putty knife. Next, carefully place mesh tape or drywall tape over the compound along the seams, pressing down to ensure it adheres smoothly without bubbles. Apply the first coat of joint compound over the tape, extending a few inches beyond the seam for a seamless look. Allow the first coat to dry as recommended by the manufacturer, then apply a second, and possibly third coat, letting it dry thoroughly between applications. It’s important to feather out the edges of the compound with your putty knife to create a flat and even surface.Sanding for a Smooth Finish
Once the joint compound has completely dried, use fine-grit sandpaper to gently sand the surface. Always sand in a circular motion to avoid grooves or scratches and aim for a completely flat finish. A damp cloth can be used after sanding to wipe away any residual dust. Be patient and thorough while sanding; the smoother your work, the better the finished ceiling will look. Throughout these steps, maintain a clean working environment to ensure a high-quality finish, and inspect your work regularly to catch any imperfections early.Painting and Decorating
 After replacing your ceiling, a fresh coat of paint and some decorative accents can transform the space. It’s essential to choose the right type of paint and accurately apply each layer for a professional finish.
Applying the First Coat of Paint
Before you begin painting, ensure that all surfaces are clean, dry, and smooth. If you’ve installed beadboard planks or an acoustic ceiling, the material may affect how you proceed. Use a primer suited for the ceiling material; this is particularly important for acoustic ceilings to prevent damage. A 9-inch roller with a 1/2-inch nap is perfect for holding enough paint to cover the surface effectively. Start in one corner and move across in overlapping rows. When applying paint on beadboard, pay special attention to the grooves to prevent missed spots.Adding Final Touches and Decor
After the first coat of paint dries, inspect for any uneven areas or missed spots. Depending on the ceiling’s texture and the type of paint you used, a second coat may be necessary for a streak-free finish. For added character, consider adorning your ceiling with planks running in a contrasting direction to the beadboard, creating an eye-catching pattern. Finish with a clear protective coat to ensure durability and to enhance the sheen of your painted ceiling.Reinstalling Fixtures and Cleaning Up
Once the ceiling has been replaced, you can turn your attention to reattaching electrical fixtures and tidying up the area. It’s critical to ensure that all your fixtures are properly installed and that your space is left clean and safe for use.Attaching Electrical Fixtures
- Turn off the power: Before beginning, make sure the power to the circuit is shut off.
- Connect the wires: Pair the wire connectors with their matching colored wires—black to black (hot), white to white (neutral), and green or bare to green or copper (ground).
- Secure the fixture: Use the provided screws or bracket to attach your light fixture to the ceiling box. Ensure the fixture is snugly fit and level.
- Install the bulb: Once the fixture is secure, screw in the appropriate type of bulb, making sure it matches the fixture’s specifications.
Final Cleanup and Furniture Setup
- Remove all drop sheets or plastic sheeting carefully to prevent any dust or debris from spreading.
- Dispose of debris: Bag up any plaster or old fixtures that are no longer needed and dispose of them according to your local regulations.
- Furniture placement: Return furniture to its original position, taking care to avoid scraping your freshly installed ceiling.
- Wipe down surfaces to remove any residue for a clean finish.
Frequently Asked Questions
In addressing common ceiling replacement queries, you’ll find concise guidance on tackling everything from minor repairs to complete overhauls. The information provided aims to ensure you approach your ceiling project with confidence.What are the steps to replace water-damaged ceiling drywall?
To replace water-damaged ceiling drywall, first ensure you’ve addressed the source of the moisture. Remove the damaged section, cut a new piece of drywall to fit, secure it with drywall screws, tape the seams, and apply joint compound for a smooth finish. Sand, prime, and paint the repaired area to match your ceiling.Can I replace a portion of my ceiling without having to redo the entire area?
Yes, you can replace a portion of your ceiling by carefully removing the damaged part, ensuring a clean cut around it. Install a new section that matches the existing ceiling in thickness and texture. Finish by taping, mudding, and blending it into the surrounding area to make the repair inconspicuous.How do I remove a ceiling fan and repair the ceiling?
To remove a ceiling fan, first turn off the power at the circuit breaker. Disconnect and remove the fan. To repair the ceiling, fill the holes with joint compound, sand until smooth, and retexture or paint as needed to blend with the existing ceiling.What is the process for safely removing a ceiling to expose beams?
Removing a ceiling to expose beams involves protective gear and carefully detaching the ceiling material from the joists, taking care not to damage the beams. Dispose of old ceiling parts responsibly. Clean and treat the exposed beams before finishing the aesthetic look to your preference.Is it possible to replace ceiling plasterboard as a DIY project, and how can it be done?
Replacing ceiling plasterboard is a feasible DIY project. You’ll need to remove the old plasterboard, prep the ceiling joists, and lift the new plasterboard into place. Fasten it securely, then tape and mud the joints. Sanding and painting will give your new ceiling a finished appearance.What are cost-effective methods for redoing a ceiling?
For cost-effective ceiling redo methods, consider painting over surface imperfections or applying a textured treatment like popcorn or knockdown texture. Utilizing ceiling tiles or planks can also offer an affordable and stylish upgrade, transforming your space without extensive construction.RECENT BLOGS
Our Reviews
Glenda Lanier Prowell
1721758635
I have ordered an 11 yard dumpster to be delivered to my house.Lonier was extremely helpful and answered all my questions. The rate was very reasonable.
Cedric Smikle
1721660395
Amber was extremely professional and courteous. She answered all of my questions and even some that I didn’t know I needed to ask.
Cait Kaider
1721243051
I highly recommend Waste Removal USA for their responsiveness and how the staff work hard to provide exceptional customer service. They have done well by us and our clients. Thank you!
Easom Family
1721223306
Louiner Pierre-Louis Is awesome! Did a great job. Will definitely be using this same company for all my dumpster needs because of his awesome customer service! Thank you!!!
tabitha Vazquez
1720539988
Wonderful and fast customer service!
LATEST BLOGS

