February 16, 2024 - Benjamin Ehinger
How to Remove A Bathtub: A Step-by-Step Guide for a Seamless Removal
CALL NOW 844-762-8449
Learning how to remove a bathtub is a project that many homeowners decide to undertake as part of a bathroom renovation or simply to replace an outdated or damaged tub. The process includes several steps, such as preparation, removal of fixtures, and the actual detachment and extraction of the tub itself. Safety is paramount, as you’ll be dealing with heavy materials and sometimes sharp edges. Additionally, having a roll off dumpster rental on hand is crucial for the efficient disposal of the old bathtub and any other waste materials that result from the job.
Before starting, make sure to turn off the water supply to avoid any potential flooding. You’ll need to carefully remove any existing caulk and disconnect the drain and overflow. After the initial steps are taken to prep the area, the bathtub can be detached from its current position. Depending on the material and size of your tub, you may require assistance to safely extract it from the bathroom. Whether it’s a steel, cast-iron, or fiberglass bathtub, each type will present its own set of challenges.
 Before beginning the process of removing your bathtub, it’s essential to first take out all attached fixtures, including faucets, handles, and the drain system. Proper detachment of these components is a critical step to ensure a smooth removal of your bathtub.
 Prior to removing your bathtub, ensure that the water supply is shut off and the plumbing is disconnected. The following steps focus on the physical removal of the tub from your bathroom.
 After the bathtub has been successfully removed, the focus shifts to leaving your work area in pristine condition and ensuring everything is in order.
Key Takeaways
- Ensuring safety and proper disposal, such as renting a dumpster, is vital.
- Disconnect plumbing and fixtures before attempting to remove the bathtub.
- Assistance may be required to safely extract the bathtub from the bathroom.
Preparation and Safety
Before starting the process of how to remove a bathtub, it’s crucial to gather all necessary tools and understand the safety measures to protect yourself and your property.Tools and Materials Needed
To begin with, you’ll need a few tools and materials on hand:- Adjustable wrench
- Screwdriver set
- Utility knife
- Putty knife
- Pry bar
- Sledgehammer (for cast iron tubs)
- Reciprocating saw (if cutting is required)
- Tub drain wrench
- Pipe wrench
- Pliers
- Safety glasses
- Dust mask or respirator
- Heavy-duty gloves
- Drop cloth or tarp to protect the floor
- Bucket
- Construction dumpster rental for disposal
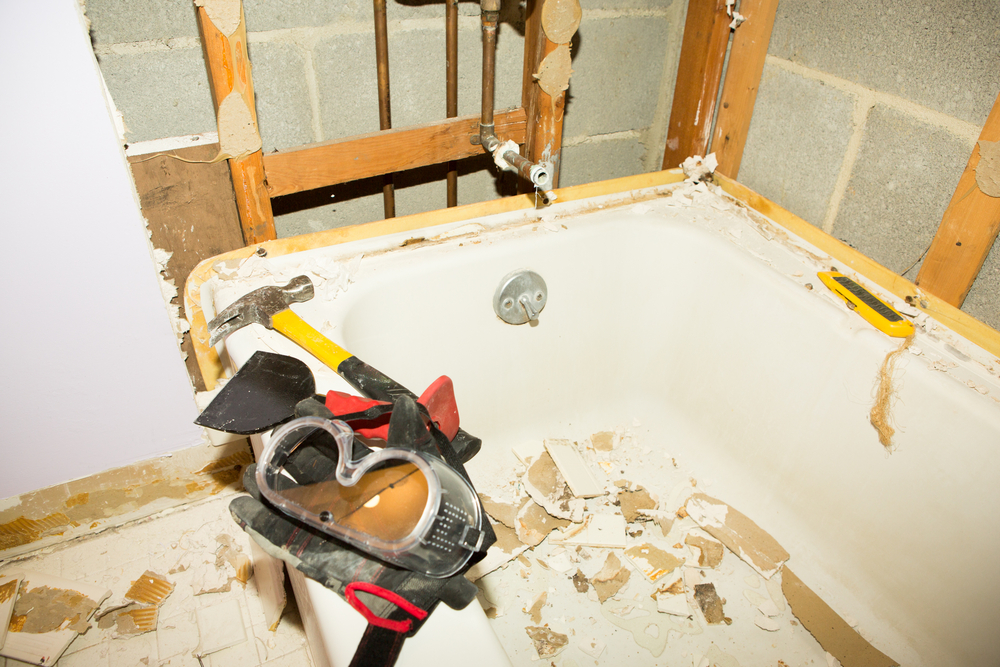
Safety Precautions and Personal Protective Equipment
Safety should be your top priority as you learn how to remove a bathtub. Here are some safety guidelines:- Shut off the Water: Ensure that the water supply to the bathroom is turned off to avoid any accidental spills or leaks.
- Electrical Precautions: Turn off the electricity to the bathroom if you need to work near electrical outlets or fixtures.
- Ventilation: Keep the area well-ventilated to avoid inhalation of any dust and debris that may result from removing the tub.
- Personal Protective Equipment (PPE): Always wear safety glasses to protect your eyes from sharp debris, a dust mask or respirator to prevent inhalation of harmful particles, and heavy-duty gloves to protect your hands from sharp edges or rough surfaces.
- Clear the Area: Remove any obstacles around the bathtub to have a clear working area and prevent trips or falls.
- Handle Tools with Care: Use tools like the reciprocating saw and sledgehammer with caution to prevent accidents and injuries.
Initial Steps
Before you begin the process of removing your bathtub, it’s crucial to prepare properly. The initial steps involve disconnecting the water supply to ensure a safe work environment and draining the bathtub to avoid water messes.Disconnecting Water Supply
To start, locate the main water supply valve in your home and turn it off. This will prevent any water flow to your bathroom fixtures. For some freestanding bathtubs, a shutoff valve may be available directly on the supply lines leading to the faucets; turn these off if present. Once the water supply is halted, open the bathtub faucets to relieve any remaining pressure in the pipes.Draining the Bathtub
Ensure that the bathtub is fully drained of any standing water. Check that the drain stopper is open and if necessary, remove it completely to speed up the drainage process. Removing standing water minimizes the risk of spills and accidents as you proceed with the removal of your bathtub.Removal of Bathtub Fixtures
Before beginning the process of removing your bathtub, it’s essential to first take out all attached fixtures, including faucets, handles, and the drain system. Proper detachment of these components is a critical step to ensure a smooth removal of your bathtub.
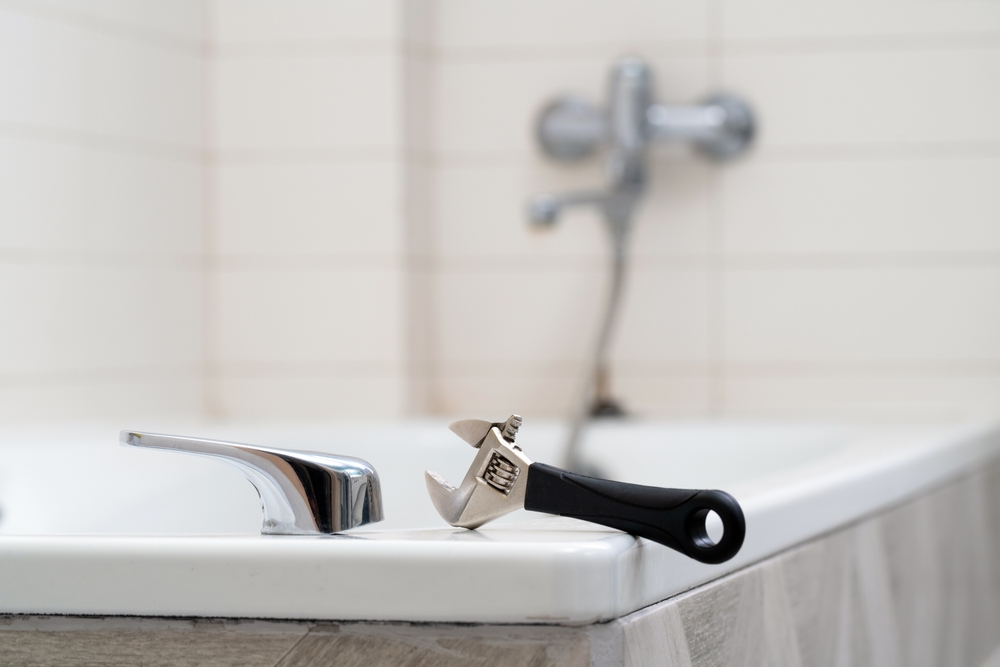
Taking Off Faucets and Handles
To start with the removal of faucets and handles, you’ll need a few tools such as a screwdriver and an adjustable wrench. First, turn off the water supply to your bathroom to prevent any accidental spills. Then, check for any decorative caps on the handles and remove them to expose the underlying screws. Using a screwdriver, unscrew the handles from the mounting stems. If they do not come off easily, you may require a handle puller tool. For the faucet, inspect whether it’s a screw-on or a slip-on type. A slip-on faucet can be loosened by removing the set screw and then gently pulling the faucet away from the wall. If it’s a screw-on type, use an adjustable wrench to turn the faucet counterclockwise and unscrew it from the wall fitting.Removing the Drain and Overflow
The drain and overflow are vital parts of the tub fixture that require careful handling. To remove the drain, you may need a drain removal tool or pliers to twist it out. Place the tool inside the drain and turn counterclockwise, applying steady pressure until it’s free. For the overflow, remove the cover plate by taking out the screws that hold it in place. Once you have access, disconnect the linkage and the stopper mechanism from inside the overflow tube. This will typically involve unscrewing or unhooking components, so examine your specific setup closely. Remember to keep all removed fixtures and screws in a safe place, so they can be easily accessed for bathtub reinstallation or replacement.Detaching the Bathtub
In this section, you’ll learn the precise steps for detaching your bathtub. This will involve cutting through any caulk and sealant and releasing the tub from any studs.Cutting Caulk and Sealant
Start by carefully slicing through the caulk around the bathtub where it meets the wall, using a utility knife. It’s important to remove all sealant to ensure the tub is freed without damaging the surrounding area.Releasing Tub from Studs
Once the caulk is removed, locate the screws or nails securing the bathtub flange to the studs. Use a screwdriver or pry bar to carefully disengage these fasteners. Ensure you do this gently to avoid any harm to the bathroom walls or the tub itself.Extracting the Bathtub
Prior to removing your bathtub, ensure that the water supply is shut off and the plumbing is disconnected. The following steps focus on the physical removal of the tub from your bathroom.
Lifting Techniques
To safely lift your bathtub, it’s crucial to have a clear understanding of the tub’s material, as this determines the weight and handling requirements. For instance, cast iron tubs are extremely heavy and may require multiple people or equipment to move. First, assess the tub’s weight and size. Second, remove any nails or screws fixing the tub to the walls. Acrylic and fiberglass tubs are lighter, but they still need to be handled with care to prevent damage.- For Heavy Bathtubs:
- Use a furniture dolly or have at least two strong individuals to lift.
- Strap the bathtub securely if using a dolly.
- For Lighter Bathtubs:
- Two people should be able to lift the bathtub by holding each end.
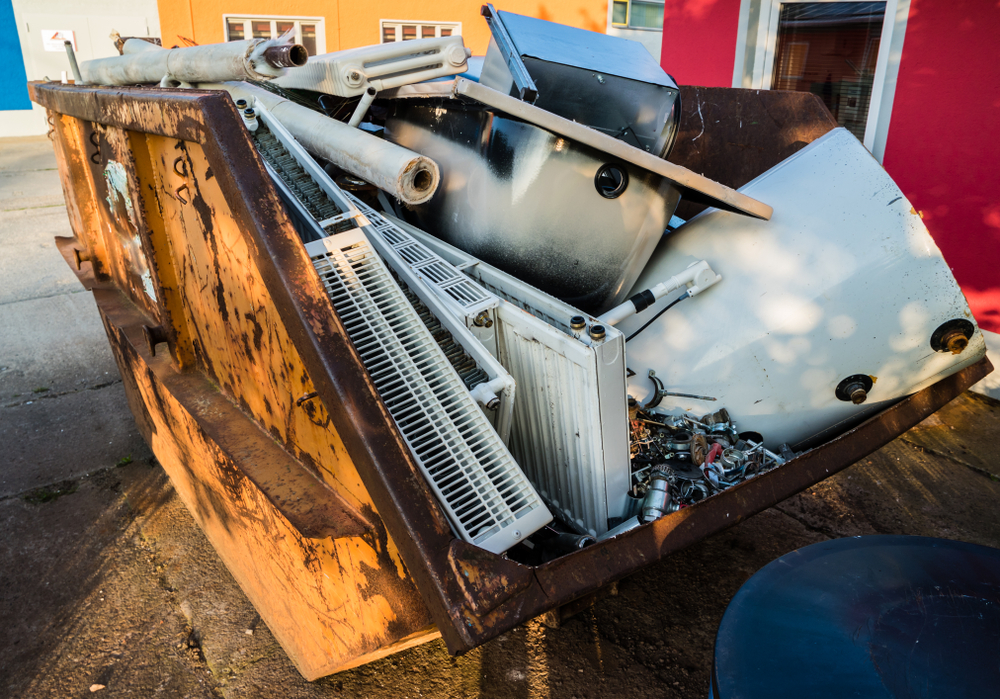
Disposal Considerations
After successfully lifting the tub, you must decide on the method of disposal. Local regulations may dictate how to dispose of bathroom fixtures, so be sure to check your city’s rules.- Renting a Dumpster:
- You can use a home dumpster rental to get rid of a bathtub, especially if you will have other waste materials, too.
- Recycling Options:
- For metal bathtubs like cast iron or steel, consider scrap metal recycling.
- Some areas have facilities that recycle fiberglass and acrylic.
- Donation:
- If the bathtub is still in good condition, donation to local charities or resale stores is a worthy option.
- Waste Disposal Sites:
- Contact local waste disposal facilities for large item pickups or designated drop-off locations.
Repair and Prep for New Tub
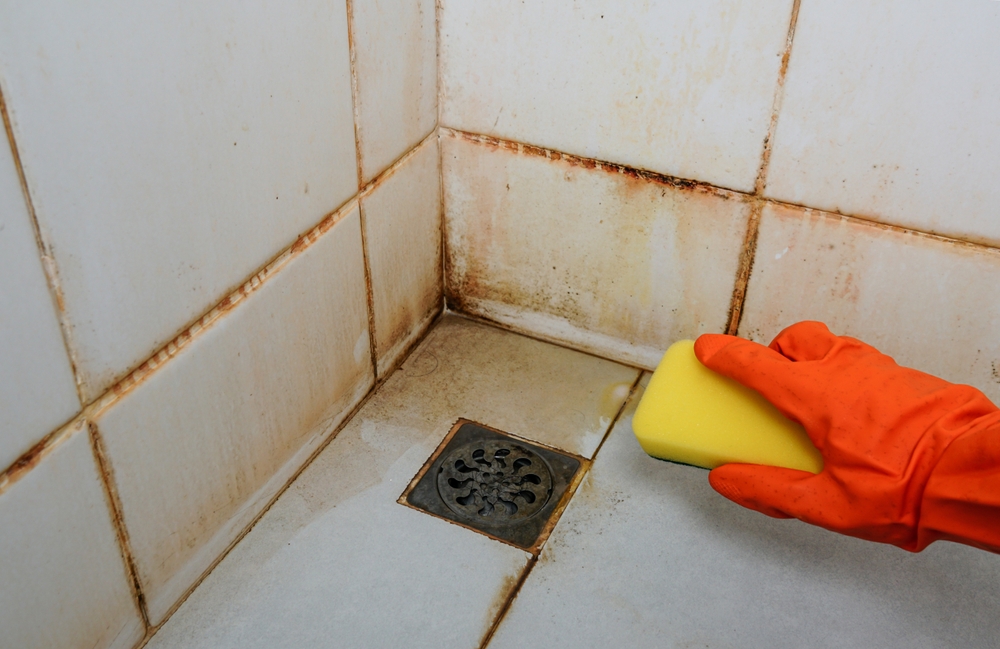
Before installing your new bathtub, it’s crucial to carefully assess the area for damage and prepare it so that the installation goes smoothly. This stage sets the foundation for a well-fitted and long-lasting bathtub.Assessing Area for Damage
After you have removed your old tub, inspect the exposed floors and walls for water damage or mold. These issues must be addressed prior to installing your new bathtub to prevent future complications. Look for any soft spots or discoloration on the surfaces, which can indicate rot or mold growth, necessitating repair. If there is existing damage, it will likely require removing the damaged sections and replacing them with new, sound materials. Always ensure that the support structure is solid and can bear the weight of the new tub.Prepping for New Bathtub Installation
Once the area is free of damage and repaired as necessary, prep the space to receive your new tub:- Level the Surface: Confirm that your floor is level using a spirit level. An uneven floor will need to be leveled to avoid complications with drainage and tub stability.
- Plumbing: Check that your plumbing is in place and configured correctly for your new tub. This includes the drain, faucet, and overflow valve. Adaptations may be required from your old setup to fit the new tub’s specifications.
- Installation Area Clean-Up: Remove all debris and clean the area thoroughly. Dust and particles can hinder a proper seal and bond between the tub and installation materials.
Alternatives to Removal
Removing a bathtub can be a complex and labor-intensive process. Before you embark on how to remove a bathtub, consider options that can update or repair your existing tub, potentially saving you time and effort.Refinishing or Relining the Bathtub
Refinishing: Also known as reglazing, this process starts with thoroughly cleaning the bathtub’s surface. Small cracks and chips are then repaired before applying a primer and several layers of coating. This can give your bathtub a fresh, new look. Bathtub Liners: Bathtub liners are custom-made to fit over your existing tub. The installation process involves taking precise measurements of your current bathtub to create a liner that fits snugly, providing a new surface without the need for removal.Troubleshooting Common Issues
When removing a bathtub, you may encounter a few snags, such as plumbing that won’t budge or parts that have succumbed to rust. Below are strategies to address these issues effectively.Handling Stuck Plumbing
If you’re trying to disconnect the plumbing and find that the pipes or fixtures are stuck, first attempt to loosen them with a plumbing wrench. Apply penetrating oil around the connection points and let it sit for a few minutes to help break down any buildup. For the drain flange, you might need a dedicated drain flange removal tool; if you don’t have one, apply the needle-nose plier technique to twist and pull it out. Remember, a steady hand and patience are your best tools here.Dealing with Corrosion and Rust
Rust and corrosion can be particularly troublesome when you want to remove a bathtub. Inspect all accessible connections for signs of rust. If any bolts or screws have rusted over, treat them with a rust dissolver before attempting removal. When dealing with a bathtub flange that’s fixed to the wall with corroded screws, delicately drill out the screws, taking care not to damage the surrounding materials. To prevent rust bits from falling into the plumbing during this process, carefully cover or plug the drains and openings.Cleanup and Finish
After the bathtub has been successfully removed, the focus shifts to leaving your work area in pristine condition and ensuring everything is in order.
Cleaning the Work Area
You should sweep and vacuum any debris from the floor, and wipe down any dusty surfaces with a damp cloth. Carefully collect and dispose of larger pieces of debris by hand and ensure sharp objects like nails or screws are securely discarded to prevent injuries. It’s crucial to check that no plumbing parts or tools are left behind as they can cause accidents or plumbing issues in the future.Final Inspection
Now, conduct a thorough inspection of the area where the bathtub was installed. Look for any damage to the surrounding walls, tiles, and plumbing that may have occurred during removal. Immediate repairs are advisable to prevent long-term problems. Also, confirm that the plumbing has been properly capped to avoid water leaks. If plumbing work is needed, it’s best to consult a professional.After Removal Steps
Once your bathtub is removed, carefully executing the following steps will ensure a smooth transition to installing a new bathtub.Post-removal Inspection
Check for Damage: Inspect the underlying floor and wall studs for water damage or mold. Look for rotting wood or crumbling drywall which might have been hidden by the old tub. Measurements: Confirm the measurements of the bathroom alcove. Ensure that your new tub will fit the existing space, noting the positions of plumbing and electrical wiring.Planning for Bathtub Replacement
Selection of New Tub: Choose a bathtub that fits the space and plumbing layout of your bathroom. Consider the tub’s material, size, and any additional features you desire.- Material: Acrylic, fiberglass, cast iron, or steel.
- Size: Common lengths include 5 feet, with widths of 30 or 32 inches.
- Features: Jets, non-slip flooring, or handle grips.
- Surface Preparation: Repair any damage to floors or walls. Apply a sturdy base if necessary.
- Plumbing Preparation: Adjust plumbing to match the new tub’s requirements. Ensure hot and cold water connections and the drain are in the correct locations.
Frequently Asked Questions
Before you begin the removal of your bathtub, it’s important to understand the proper procedures and safety measures. This will help you avoid damaging your bathroom and ensure a smooth removal process.What are the steps to remove a bathtub without causing damage to the surrounding walls?
To remove a bathtub without damaging the surrounding walls, first turn off the water supply. Then disconnect the drain and overflow from the plumbing. Carefully remove any caulking or sealant, cut away drywall if necessary, and gently pry the tub out, ensuring not to damage the walls.How can you extract a bathtub set in concrete without breaking the concrete?
Extracting a bathtub set in concrete entails a careful chiseling around the tub edges without hammering directly into the concrete. Use a pry bar with a steady, controlled force to lift the tub away from the concrete without breaking it.What is the proper technique for removing a bathtub overflow?
To remove a bathtub overflow, first disconnect the overflow cover by unscrewing it from the tub. Then detach the overflow pipe from the drain assembly, usually found behind the tub, by further unscrewing any connecting parts.Can you guide me through the process of removing a bathtub drain?
To remove the bathtub drain, use a drain wrench or unscrew it with a pair of pliers. If it’s resistant, apply penetrating oil to ease the process. Once loose, lift the drain out of the hole, ensuring you don’t damage the surrounding tub surface.What is the average cost associated with the removal of a bathtub?
The average cost to remove a bathtub can vary widely depending on the complexity and materials but generally falls between $50 and $200 for DIY removals. Professional services may charge significantly more, occasionally upwards of a few hundred dollars, depending on labor and disposal fees.What precautions should be taken when removing a fiberglass bathtub?
When removing a fiberglass bathtub, protect yourself with gloves and eyewear to avoid injury from sharp fiberglass edges. Cut the tub into smaller sections for easier, safer handling, and disposal, and be cautious not to puncture or tear surrounding materials.RECENT BLOGS


Our Reviews

Glenda Lanier Prowell
1721758635
I have ordered an 11 yard dumpster to be delivered to my house.Lonier was extremely helpful and answered all my questions. The rate was very reasonable.

Cedric Smikle
1721660395
Amber was extremely professional and courteous. She answered all of my questions and even some that I didn’t know I needed to ask.

Cait Kaider
1721243051
I highly recommend Waste Removal USA for their responsiveness and how the staff work hard to provide exceptional customer service. They have done well by us and our clients. Thank you!

Easom Family
1721223306
Louiner Pierre-Louis Is awesome! Did a great job. Will definitely be using this same company for all my dumpster needs because of his awesome customer service! Thank you!!!

tabitha Vazquez
1720539988
Wonderful and fast customer service!
LATEST BLOGS
