Building a DIY sunroom can be an immensely rewarding project, allowing you to create a personal haven filled with natural light. However, it’s imperative to manage waste efficiently during this process to ensure environmental responsibility and cost-effectiveness. Proper waste management is not just about disposal; it involves the planning, selection of materials, and maintaining the cleanliness and safety of your building site. By committing to thoughtful waste management, you will minimize the environmental impact of your project, keep your worksite safe, and potentially reduce building costs by repurposing materials.
As you embark on constructing your sunroom, consider that every material you use and every piece you discard can impact your project’s sustainability. Sorting waste materials, recycling where possible, and disposing of waste legally and ethically are all steps that contribute to a successful build. Anticipating these needs from the planning and design stages through to construction and finishing touches will streamline your project and ensure you are prepared for the waste your build will generate.
In developing a well-constructed DIY sunroom, it is essential to focus on the initial steps of selecting a viable location alongside understanding and complying with local regulations.
 Constructing a sunroom by yourself involves meticulous planning and execution, with particular attention to assembling the structure and installing the crucial elements such as windows, doors, and the roof. Ensuring quality execution will help weatherproof your space and give it a professional finish.
 When undertaking a DIY sunroom project, it’s crucial to understand when to call in professionals. Consulting with an architect or a professional contractor early on can save you time and money by ensuring that your vision for extra living space is structurally sound and viable.
For the do-it-yourself aspect, a four seasons sunroom kit can be a great starting point. These kits typically come with everything needed and include step-by-step instructions, simplifying the process.
Here are some tips to guide you:
When undertaking a DIY sunroom project, it’s crucial to understand when to call in professionals. Consulting with an architect or a professional contractor early on can save you time and money by ensuring that your vision for extra living space is structurally sound and viable.
For the do-it-yourself aspect, a four seasons sunroom kit can be a great starting point. These kits typically come with everything needed and include step-by-step instructions, simplifying the process.
Here are some tips to guide you:
Key Takeaways
- Effective waste management starts in the planning phase and continues through construction to finishing.
- Sorting and recycling materials reduce environmental impact and can lead to cost savings in your project.
- Proper disposal and anticipation of waste are crucial for a safe and environmentally friendly sunroom build.
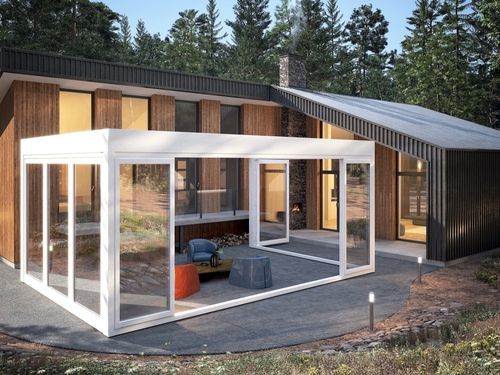
Choosing the Right Location and Layout
Your sunroom should not only complement the exterior of your home but also blend seamlessly with its natural surroundings to maximize views and sunlight. When assessing potential locations, consider the design and orientation of the space to ensure it meets your functional needs, such as privacy and energy efficiency. A south-facing sunroom will garner more consistent light, warming the space efficiently during cooler months. Consider the landscape and any existing garden elements that could influence your layout and enhance the room’s unique style. Balance these aspects properly within your budget to achieve an optimal outcome.Securing Necessary Permits and Understanding Building Codes
Prior to construction, it’s crucial that you obtain the appropriate permits. Your local municipality will have specific building codes that govern structural additions. These codes may dictate various aspects of the construction from the types of materials to the electrical wiring standards. You must ensure your project plans are compliant to avoid any legal or safety issues down the road. It is advisable to contact your local building authority early in the planning process to obtain accurate information and the necessary approvals. Not only does this step protect you legally, but it also guarantees that your sunroom will be safe and durable.Materials and Preparation
Carefully chosen materials and a well-prepared foundation are the cornerstones of a successful DIY sunroom build. Your decisions at this stage will impact the durability, efficiency, and overall satisfaction with your completed sunroom.Selecting Sunroom Kits and Materials
When selecting a sunroom kit, prioritize quality and compatibility with your home’s design. A typical kit should include:- Glass panels: Choose low-E glass for energy efficiency, or consider polycarbonate or acrylic glazing for a more budget-conscious option.
- Hardware: Ensure the kit contains all necessary screws, bolts, and fasteners; missing even a few can cause delays.
- Doors and windows: They should seal properly to maintain temperature and reduce energy costs.
Foundation and Framing Essentials
The foundation and framing of your sunroom are vital for its structural integrity:- Foundation: A sturdy foundation can be built using concrete with added rebar for reinforcement. Insulate properly to prevent heat loss.
- Sunroom framing: Use weather-resistant materials such as treated wood or metal. Secure with lag bolts and tack nails for a robust frame.
- Insulation: Apply fiberglass batts in the framing to enhance thermal performance.
- Alignment: Use shims and staples for precise fitting of frames, ensuring that doors and windows operate smoothly.
Construction Process
Constructing a sunroom by yourself involves meticulous planning and execution, with particular attention to assembling the structure and installing the crucial elements such as windows, doors, and the roof. Ensuring quality execution will help weatherproof your space and give it a professional finish.
Assembling the Structure
First, review the instructions for your DIY sunroom kit thoroughly. It is paramount to understand the process before you begin, as this will prevent mistakes that could compromise the build. You will typically start with laying down a solid foundation, which is essential for the integrity of the structure. Ensure your existing deck or foundation can support the weight of the new addition. Gather your materials and organize them so that you have easy access as your work progresses. Most kits come with pre-cut materials that need to be assembled in a specific order. Begin by constructing the frame, which will serve as the skeleton of your sunroom. If you’re reusing materials, ensure they are in good condition and won’t compromise the stability of your build. Here’s a simplified outline of the steps:- Prepare the site: Clear, level, and prepare the foundation, ensuring it’s ready to support your sunroom.
- Organize materials: Sort all parts and tools, familiarizing yourself with each item.
- Frame assembly: Erect the framework as directed, ensuring all parts are secured and level.
- Inspection: Periodically check your work with a level to prevent a slanted build.
Installing Windows, Doors, and Roof
After the structure is up, it’s time to move to the next phase by installing the windows and doors. Proper installation is critical to prevent drafts and water leakage, especially considering varying weather conditions. It’s important to seal all joints meticulously. Use flashing and sealant as required to ensure the watertightness of the installation. The roof installation should not be rushed. If you’ve chosen a DIY kit, follow the instructions to the letter to affix shingles or your chosen roofing materials. This might require extra help or a professional’s advice to avoid any future issues due to poor installation. Consider these steps:- Windows and doors: Place each window and door accurately within the frame and secure firmly.
- Sealing: Apply sealant around all edges to insulate and protect against the elements.
- Roofing: Install the roofing carefully according to instructions, ensuring it’s well-sealed and structurally sound.
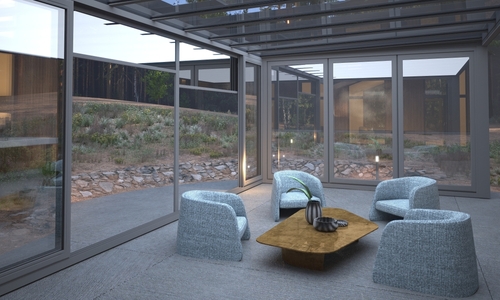
Interior and Exterior Finishing
When finishing the interior of your DIY sunroom, focus on creating a space that combines privacy and natural light. Start by installing a polyethylene vapor barrier to prevent moisture damage. Then, select your flooring; consider options that are both beautiful and durable, like ceramic tiles or treated wood suitable for a sunroom’s environment. Next, caulking is essential for sealing gaps and ensuring energy efficiency. Apply caulk around windows and doors to prevent drafts. The addition of trim boards gives your sunroom a polished look; choose trim that complements your design following a DIY tutorial or your own inspiration. On the exterior, secure a vent sleeve and vent cap in the sunroom’s walls to promote proper airflow—a crucial step for a room with high sun exposure. This can be particularly important if you envision your sunroom as a greenhouse or garden room. For a cohesive home improvement project, match the exterior finish to your home’s existing style. The final touches might include painting or using siding materials that align with your home’s aesthetic. Remember, this is more than just a building project; it’s an extension of your living space. Your DIY tutorial knowledge will guide you to create an inviting sunroom that’s a testament to your craftsmanship.- Interior Finishing Checklist
- Install polyethylene vapor barrier
- Select and lay flooring
- Apply caulking around windows and doors
- Attach and paint trim boards
- Exterior Finishing Essentials
- Install vent sleeve and vent cap
- Match finishes with your home’s exterior
- Execute painting or siding application
Professional Assistance and DIY Tips
When undertaking a DIY sunroom project, it’s crucial to understand when to call in professionals. Consulting with an architect or a professional contractor early on can save you time and money by ensuring that your vision for extra living space is structurally sound and viable.
For the do-it-yourself aspect, a four seasons sunroom kit can be a great starting point. These kits typically come with everything needed and include step-by-step instructions, simplifying the process.
Here are some tips to guide you:
- Tools and Materials: List what you need before beginning construction. Essential tools may include a drill, a saw, a level, screws, and sealant.
- Structural Integrity: Reinforce the installation point where the sunroom will attach to your house. It should withstand weather extremes.
- Keep an eye on Calahan Bath Kitchen and Sunrooms or similar suppliers for high-quality materials and potential guidance.
- Weatherproofing: Properly flash the roof and walls to prevent water leaks. Insulate the sunroom for energy efficiency.
- Regulations: Check local building codes and permits before starting your build. Compliance is key to avoid legal issues.
Maintenance and Upgrades
Proper maintenance ensures the longevity of your DIY sunroom build, while upgrades can enhance its functionality and aesthetics. Addressing weatherproofing allows you to enjoy your garden room comfortably regardless of the climate, and exploring remodeling possibilities can unlock additional living space tailored to your lifestyle.Weatherproofing and Insulation Upgrades
Regular weatherproofing helps protect your sunroom’s exterior components from harsh weather conditions, ensuring a cozy outdoor experience year-round. A well-insulated sunroom retains heat efficiently during colder months, which makes it a perfect extension of your living space into the outdoors.- Seal and Caulk: Check and replace the caulk around windows and doors annually to prevent drafts.
- Insulation Choices: Use high-quality insulation materials in walls and beneath the roof. Consider upgrading to double-glazed windows for improved thermal performance.
- Under-floor insulation: If your sunroom is built on a concrete slab, ensure it is insulated to prevent heat loss.
- Trim Boards: Inspect and replace any deteriorated exterior trim boards to maintain a tight seal against the elements.
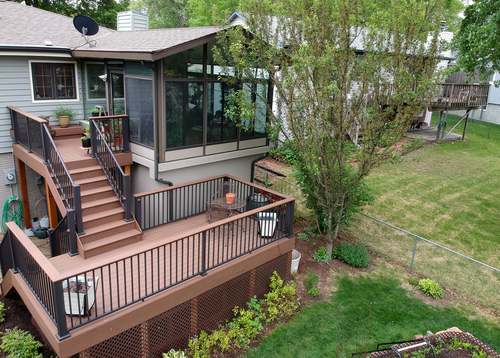
Expanding and Remodeling Opportunities
Embracing remodeling projects for your sunroom not only increases its functionality but also potentially the overall value of your property. From expanding to creating multifunctional spaces, the possibilities are substantial when it comes to providing additional living areas that are easily accessible and filled with natural light.- Expand Your Space: If your sunroom is on a porch or deck structure, consider expanding its footprint for more room.
- Deck Upgrades: Replace or reinforce your deck’s structure to support additional weight and improve safety.
- New Purposes: Transform your sunroom into a multipurpose area, such as a dining space or a greenhouse for your gardening hobby.
- Accessibility: Ensure the entrance to your sunroom is accessible from both your home’s interior and the patio, promoting seamless integration with the rest of your house.
Frequently Asked Questions
When embarking on a DIY sunroom build, effective waste management is crucial. Below, you’ll find detailed answers to common queries about sustainable practices during your construction project.What are the best practices for disposing of construction waste when building a sunroom?
To responsibly dispose of construction waste, sort materials into recyclables, donations, and landfill-bound waste. Materials like glass, metal, and untreated lumber can often be recycled. Consider contacting local recycling centers for specifics. For larger items or a significant amount of waste, renting a dumpster from a company that prioritizes waste sorting and recycling can be a prudent choice.Can I repurpose any materials when constructing a DIY sunroom?
Yes, repurposing materials not only reduces waste but can also lend a unique character to your sunroom. Old windows and doors can be integrated into the design. If you’re replacing parts of your house with the sunroom, consider using removed materials such as bricks or beams in the new construction.How can I ensure my sunroom build follows local recycling and waste management regulations?
Begin by researching your local municipality’s waste management regulations. This can usually be found on your local government’s website or by contacting the municipal waste management department. Adherence to these regulations will guide the disposal of items like electronics or hazardous materials.What are eco-friendly insulation options for a homemade sunroom?
Eco-friendly insulation options include materials like sheep’s wool, cotton (often recycled denim), and Icynene (spray foam insulation). These materials are not only effective insulators but also have a lower environmental impact than traditional fiberglass options.How do I handle leftover paint and chemicals after finishing my sunroom project?
Leftover paint and chemicals should not be disposed of with regular trash. Contact your local hazardous waste facility for safe disposal guidelines. Some hardware stores offer recycling programs for paint and solvents, ensuring that they are handled in an environmentally conscious manner.What is the most efficient way to manage scrap materials during a sunroom build?
Organize and store scrap materials as you build to prevent waste. For example, short lumber pieces might be useful for support blocks or shims. Metal scraps can be sold to scrap yards. Maintain a clean workspace by having designated areas for scraps, which can help in managing materials more efficiently.RECENT BLOGS
 A Homeowner’s Guide to Flash Flood Preparation, Cleanup, and Long-Term Protection
Date: May 27 ,2025
 Everything You Need to Know About Garbage Bin Rental: Sizes, Costs, and Practical Tips for Every Project
Date: May 14 ,2025

 Safe Disposal Methods for Refrigerators: Recycling, Donation, and Removal Options
Date: April 29 ,2025

Our Reviews


LATEST BLOGS
