February 22, 2024 - Benjamin Ehinger
How to Insulate an Attic: Efficient Techniques for Energy Savings
CALL NOW 844-762-8449
Insulating your attic is an effective way to increase your home’s energy efficiency and comfort throughout the year. By reducing the exchange of heat between your interior and the outside world, properly installed attic insulation maintains a consistent temperature, lowers heating and cooling costs, and reduces strain on your HVAC system. Whether you’re tackling a finished or unfinished attic space, understanding the types of insulation materials available and the methods for installation is crucial.
Before starting your insulation project, it’s important to assess your current attic situation. This includes checking for any existing insulation, identifying potential air leaks, and ensuring proper ventilation. Preparing your attic for new insulation might involve sealing gaps with caulk or spray foam and installing baffles to maintain airflow from soffit vents. Once the space is prepared, you can choose from various insulation techniques such as rolls or batts, loose-fill, or sprayed foam, depending on your needs and skills.
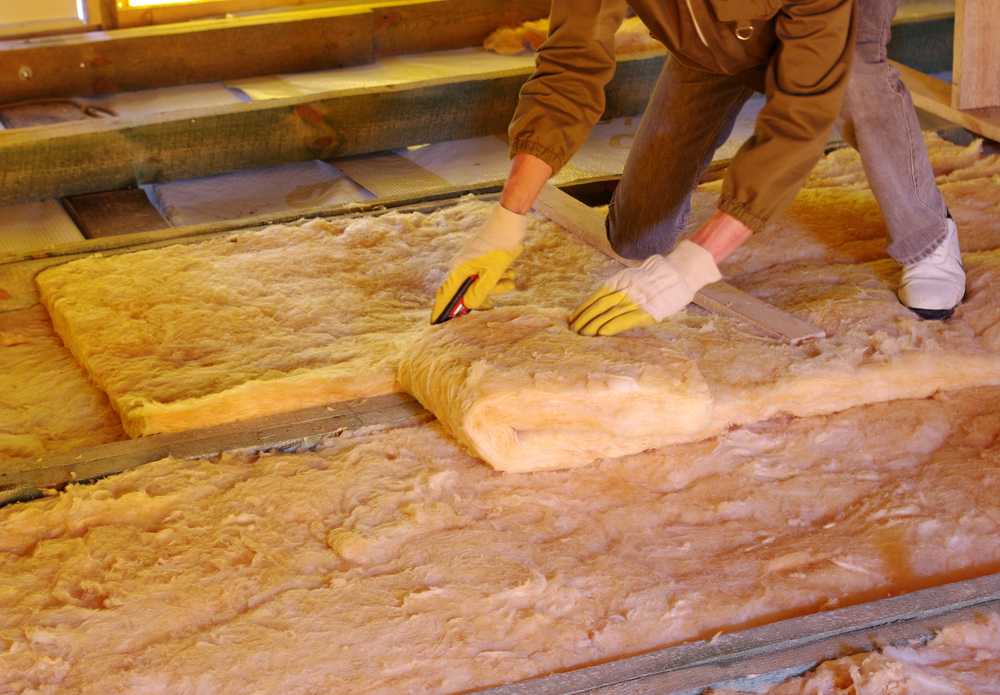 Before embarking on your attic insulation project, understanding the tools and materials you’ll need, along with necessary safety measures, lays a strong foundation for success.
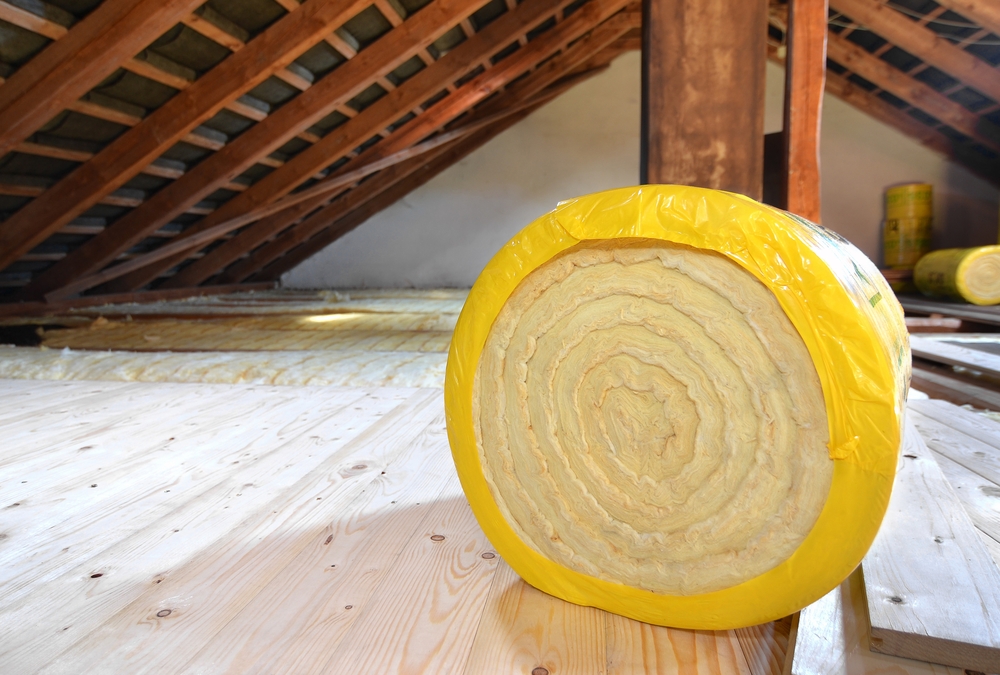 Proper attic insulation is contingent on the correct installation of baffles and meticulous air sealing. These steps are crucial to maintaining airflow and enhancing the overall efficiency of your home’s insulation.
Key Takeaways
- Effective attic insulation contributes to energy efficiency and indoor comfort.
- Assess and prepare your attic by sealing leaks and ensuring ventilation.
- Choose an insulation technique that complements your skills and attic requirements.
Understanding Attic Insulation Basics
When insulating your attic, choosing the right materials and understanding their R-value is crucial for effective energy conservation.Insulation Materials
- Fiberglass: Typically found in batts or rolls, easy to install between joists and studs.
- Cellulose: Loose-fill material, great for blowing into difficult-to-reach areas.
- Spray Foam: Provides an airtight seal, commonly used around gaps and spaces.
R-Value Explained
The R-value measures an insulation material’s thermal resistance. The higher the R-value, the greater the insulating power. Your attic requires a certain R-value based on your climate zone, which can be found in recommendations from the Department of Energy.Assessing Your Attic
Before you begin insulating, it’s crucial to evaluate the existing conditions in your attic. Understand the current state of insulation and assess the ventilation and air sealing, as these will influence your insulation strategy.Current Insulation Evaluation
Inspect the current insulation to determine its type, R-value, and overall condition. Look for any areas where insulation may be missing or damaged. Check for any signs of moisture, as wet insulation is ineffective and should be replaced. Use these key points to guide you:- Type of Insulation: Identify whether you have fiberglass batts, loose-fill, or foam insulation.
- R-Value Assessment: Determine if the current R-value meets recommended levels for your climate zone.
- Condition Check: Look for and note down areas with compression, gaps, or disturbances which compromise insulation efficiency.
Ventilation and Air Sealing
Ventilation is critical in an attic to manage moisture and maintain a balance between outside and attic temperatures. Inspect for proper airflow from soffit to ridge vents. Meanwhile, proper air sealing prevents energy losses and protects insulation effectiveness.- Ventilation Check: Ensure that attic vents are unblocked and that there is a clear path for air to flow from intake to exhaust vents.
- Sealing Inspection: Identify gaps or cracks around wiring, plumbing, and ductwork. Use weatherproofing materials to seal leaks before adding new insulation.
Planning Your Insulation Project
 Before embarking on your attic insulation project, understanding the tools and materials you’ll need, along with necessary safety measures, lays a strong foundation for success.
Tools and Materials Needed
To properly insulate your attic, you’ll need the following tools and materials:- Insulation Material: Select the appropriate type and amount of insulation, which might include fiberglass batts or loose-fill insulation. Ensure the R-value, or the measure of thermal resistance, is suitable for your climate (ENERGY STAR recommends different levels based on geographic locations).
- Insulation Blower (for loose-fill insulation): May be rented from local hardware stores if not already available.
- Utility Knife: To cut and fit insulation into spaces of varying sizes.
- Tape Measure: For accurate measurements of space to be insulated.
- Staple Gun: For securing batt insulation or vapor barriers.
- Protective Gear: This includes gloves, dust mask or respirator, long-sleeved shirts, and eye protection.
Safety Precautions
Adhering to these precautions ensures your safety during the process:- Wear protective clothing: Always use gloves, a dust mask, and eye protection while handling insulation.
- Ensure proper ventilation: Keep your work area well-ventilated to avoid inhaling airborne particles.
- Be mindful of your surroundings: Watch your step in the attic to avoid misstepping through the ceiling and use stable flooring or a plank across joists.
- Avoid overexertion: Take frequent breaks, especially when working in a hot attic.
- Check for electrical wiring: Before starting, locate and avoid any electrical wiring to prevent shocks.
Preparation Steps
Before insulating your attic, it’s crucial to properly prepare the space to ensure maximum efficiency and effectiveness of the insulation. Cleanliness and the integrity of the attic structure are paramount. You may also need to remove old materials. In some cases, a small dumpster rental can be helpful for disposing of old insulation and other waste materials.Attic Cleaning
Begin by removing any debris, old insulation, or storage items from your attic. This helps to reveal underlying issues that may affect the new insulation. Ensure the space is free from dirt and dust, which can also compromise insulation performance.Repairing Leaks and Patching Holes
Inspect the attic closely for any signs of leaks or water damage. It’s essential to repair these leaks before proceeding, as moisture can greatly diminish insulation’s effectiveness and even lead to mold problems. In addition, patch holes in the roof or attic floor to prevent air leaks, which can reduce energy efficiency. Use proper sealing materials, like caulk or foam, to seal any gaps around pipes or vents.Installing Baffles and Air Sealing
 Proper attic insulation is contingent on the correct installation of baffles and meticulous air sealing. These steps are crucial to maintaining airflow and enhancing the overall efficiency of your home’s insulation.
Baffle Installation
- Measure Rafter Spaces: Before installing baffles, accurately measure the space between the rafters where the baffles will be placed. This ensures a snug fit, which is essential for optimal performance.
- Placement and Securement: Insert the baffles into each rafter space, positioning them with care. They should be secured with staples, spaced appropriately to hold the baffles firmly in place.
Sealing Leaks
- Identify and Seal: Detect all gaps, cracks, and openings in the attic. These can typically be found near wiring, plumbing, ducts, and recessed lights. Seal these leaks using a combination of caulk for smaller gaps and expanding spray foam for larger openings.
Insulation Techniques
Proper insulation installation is crucial for energy efficiency and comfort in your home. The following subsections break down the specifics of installing blanket and loose-fill insulation in your attic.Blanket Insulation Installation
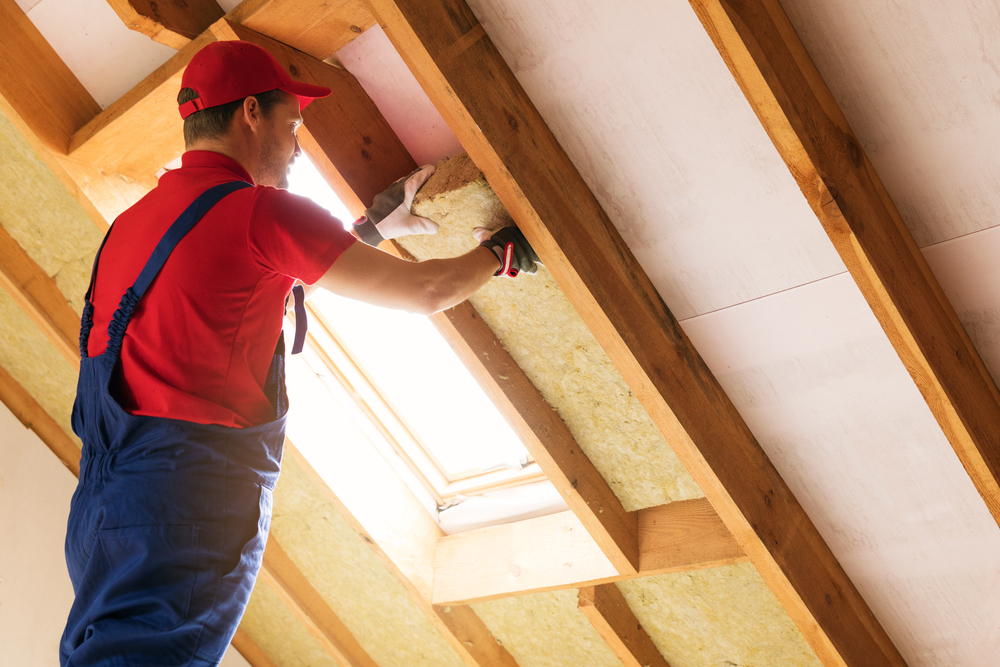
To install blanket insulation (fiberglass rolls or batts), you will need to carefully measure the space between attic joists and cut the insulation to fit. Always start from the farthest point from the attic access:- Place the batts or rolls between the joists with the vapor barrier facing the heated area below, if applicable.
- Ensure no gaps exist between sections and joists, as this can greatly diminish the insulation’s effectiveness.
Loose-Fill Insulation Technique
When applying loose-fill insulation, such as cellulose or fiberglass, follow these steps:- Use a rented blower machine, and fill to the recommended depth and density.
- Maintain consistent coverage throughout the attic and avoid blowing insulation near soffit vents to prevent blockage.
Upgrading Existing Insulation
Improving your attic’s thermal performance can be achieved by enhancing the insulation you already have. You can either add layers to existing insulation or completely replace old, inadequate materials.Layering Additional Material
If your current attic insulation is not up to par, you may simply need to add more material. It’s imperative to choose an insulation that complements what you already have. For instance, laying fiberglass batts over existing insulation is a practical approach, provided that the existing material is dry and in good condition. Remember, your aim should be to reach an insulation level of R-38, which typically equates to about 10 to 14 inches of fiberglass or similar materials. When handling insulation, always wear protective clothing—long sleeves, gloves, eye protection, and a dust mask.Replacing Old Insulation
Sometimes, the better option is to replace outdated insulation. If your attic’s current insulation is damp, moldy, or otherwise compromised, it should be completely removed. It’s then vital to ensure any air leaks are sealed before installing new insulation, which can be in the form of rolls, batts, or loose-fill. Choosing a type like loose-fill cellulose allows for a more custom fit between joists and around obstacles. Opt for insulation with a high R-value to increase energy efficiency and reduce heat transfer. For guidance on insulation types and methods, referencing Adding Attic Insulation by ENERGY STAR might be helpful. Additionally, This Old House offers practical advice on installing fiberglass batts correctly.Finishing Touches
Before declaring your attic insulation project complete, it’s crucial to pay attention to the details that will ensure the performance and longevity of your insulation.Ensuring Even Coverage
It’s essential to achieve uniform insulation coverage across your attic floor. This means meticulously checking for any gaps or areas where the insulation might be compressed or thin. Uneven insulation won’t provide a consistent thermal barrier and can lead to energy losses. Use a ruler or measuring tape to confirm that the insulation maintains its recommended thickness throughout the attic space.Insulating Attic Hatch or Door
Your attic hatch or door is a potential source of significant heat loss if not properly insulated. Adhere to these steps for optimal results:- Apply weatherstripping: To prevent drafts, add durable weatherstripping around the edges of the hatch or door.
- Attach insulation: Affix rigid foam insulation to the hatch or door surface. Ensure it is cut to fit snugly and covers the entire area.
- Secure with adhesive: Use construction adhesive to firmly anchor the foam board to the hatch or door.
- Check seals: Inspect the hatch or door closure to make certain it seals tightly when shut.
Energy Efficiency Considerations
When insulating your attic, it’s essential to consider how to maximize energy efficiency. This not only reduces your energy bills but also enhances your home’s comfort.Thermal Bridging
Thermal bridging occurs when materials that are poor insulators come into contact, allowing heat to bypass insulation and reduce the overall effectiveness. To prevent this, you should insulate around construction features, such as framing members and rafters, as these can often be pathways for heat loss.Checking for Gaps
Detecting and sealing gaps is critical for energy efficiency. Examine your attic for any openings around pipes, ductwork, and chimneys. Use caulk or foam to seal these gaps. It’s important to air seal attic leaks before adding new insulation, as this will ensure that the insulation performs to its maximum potential.Professional Installation vs DIY
When choosing between professional installation and doing it yourself (DIY) for attic insulation, consider cost, time investment, and expertise. Professional installation ensures a quick and efficient job with a potentially higher material quality, but it comes at a greater cost. DIY can be significantly less expensive, but it requires your time and understanding of how to correctly insulate an attic.Hiring a Contractor
- Cost: Hiring a contractor means paying for both materials and labor. Expect to pay between $1.50-$2 per square foot for fiberglass batt insulation and between $2-$2.50 for blown-in cellulose when installed professionally.
- Expertise: Contractors possess the know-how to efficiently insulate your attic, ensuring all nooks and crannies are properly filled.
- Time: A professional job usually takes less time than a DIY project, often completed within a day, depending on your attic size.
- Equipment: Contractors come with their own equipment, which can be specialized and expensive to rent or purchase for a DIY job.
DIY Installation Tips
- Materials: If you’re considering installing fiberglass batt or roll insulation, this can usually be done without professional help. Blown insulation, however, may require renting equipment.
- Safety: Equip yourself with proper safety gear including gloves, eye protection, and a dust mask to avoid irritation from insulation materials.
- Installation Quality: Be thorough with your installation. Insulation effectiveness relies on how well it’s installed—gaps and compression reduce efficiency.
- Cost Savings: If you’re on a tight budget, DIY attic insulation can be appealing. Typical costs for DIY are $0.75-$1 per square foot for fiberglass batt and $1-$1.25 for blown-in cellulose.
Maintenance and Upkeep
Proper maintenance and upkeep are crucial for maximizing the efficacy and lifespan of your attic insulation. Regular attention ensures that any issues are identified and addressed promptly, keeping your attic well-insulated and energy-efficient.Routine Inspections
Frequency: Inspect your attic at least twice a year, preferably in the fall and spring. The aim is to identify and rectify common issues such as:- Pest Infestations: Look for signs of rodents or insects that could damage insulation material.
- Moisture: Check for any water leaks or dampness that could compromise the insulation’s performance.
Long-Term Performance Monitoring
Energy Bills: Monitor your energy bills for unexpected increases—a sign that your insulation may not be performing as well as it should. Professional Assessment: Every few years, consider having a professional assess your attic’s insulation. They can offer insights into the overall performance and suggest improvements or upgrades if necessary. By keeping up with these maintenance tasks, you ensure that your attic insulation remains effective over time, which can lead to significant energy savings and improved comfort in your home.Frequently Asked Questions
In this section, you’ll find answers to common questions about attic insulation, including types of insulation, R-values, installation techniques, and considerations for DIY projects.What types of insulation are best for attics?
For most residential applications, especially retrofits, blown-in fiberglass is a common option. Other materials like cellulose or mineral wool can also be suitable, depending on your budget and specific needs.What are the recommended R-values for attic insulation?
The recommended R-value for attic insulation varies by region, but a typical range is R-30 to R-60. Your local building codes and climate should guide your choice, with colder climates requiring higher R-values.How can one insulate attic roof rafters effectively?
Insulating attic roof rafters requires careful application to avoid blocking ventilation. Install rigid foam insulation boards between the rafters, ensuring there is space for air movement, or use spray foam insulation to create a sealed and high-performance barrier.What are the steps to properly insulate an attic meant for storage?
When insulating an attic for storage, it’s important to maintain access while maximizing insulation efficiency. Install sturdy flooring over raised rafter bays filled with insulation. This will support stored items while keeping the insulation uncompressed.Can attic insulation be a DIY project, and what should be considered?
Attic insulation can be a DIY project if you are comfortable with the process. Ensure you wear protective gear, seal all gaps before insulating, and achieve the necessary R-value. Consider the type of insulation material that suits your attic and whether you need faced or unfaced batts.How does one insulate an attic that contains floor boards?
For attics with floor boards, roll out unfaced insulation between the joists, then lay the boards back down, or use insulation specifically designed for floors. It’s vital to maintain proper ventilation to prevent moisture buildup.RECENT BLOGS
Our Reviews
Glenda Lanier Prowell
1721758635
I have ordered an 11 yard dumpster to be delivered to my house.Lonier was extremely helpful and answered all my questions. The rate was very reasonable.
Cedric Smikle
1721660395
Amber was extremely professional and courteous. She answered all of my questions and even some that I didn’t know I needed to ask.
Cait Kaider
1721243051
I highly recommend Waste Removal USA for their responsiveness and how the staff work hard to provide exceptional customer service. They have done well by us and our clients. Thank you!
Easom Family
1721223306
Louiner Pierre-Louis Is awesome! Did a great job. Will definitely be using this same company for all my dumpster needs because of his awesome customer service! Thank you!!!
tabitha Vazquez
1720539988
Wonderful and fast customer service!
LATEST BLOGS

