Embarking on a home renovation project is both exciting and daunting, especially when it involves installing vinyl plank flooring. This versatile and durable option has gained popularity for its affordability and stylish appearance. With only a few straightforward steps, you can transform your space effortlessly and without professional help. Preparing your subfloor and gathering necessary tools is a crucial part of the process to ensure seamless installation.
Creating a clean and organized work area significantly impacts the efficiency and outcome of the project. If your renovation is part of a larger endeavor, consider a convenient dumpster rental to keep the job site tidy. This preparation allows you to focus entirely on accurately measuring and laying out your flooring before starting the installation process.
As you delve into this project, knowing some maintenance tips will prolong the life of your new floor. Paying attention to the finishing touches, such as trim and transitions, creates a polished look. With careful planning, your new vinyl plank flooring can enhance your home for years to come.
 Proper installation of vinyl plank flooring involves several key steps, each essential to achieving a professional finish. Focus on preparing your subfloor, laying underlayment, and carefully placing and securing planks for a seamless look. Here’s a breakdown of what you’ll need to do at each stage.
 Regular cleaning of your luxury vinyl flooring is essential. Begin by sweeping or vacuuming daily to remove dirt and debris. Be cautious not to use a vacuum with a rotating beater bar.
Use a non-abrasive cleaner. Products like Shaw Floors Hard Surface Cleaner are recommended to maintain the flooring’s finish. Avoid harsh chemicals and detergents that can damage the surface.
For deep cleaning, a mixture of apple cider vinegar and warm water can be effective. Combine 1 cup of vinegar with 1 gallon of water. This solution helps combat grease and dirt. Adding a few drops of essential oils can help mask the vinegar’s scent.
Prevent potential damage by limiting foot traffic for the first 24 hours after laying new flooring. Avoid placing heavy furniture during this period to allow proper adhesive curing. Use floor protectors under furniture legs to avoid scratching.
Another important aspect is spills and stains. Clean them immediately with a damp cloth to prevent residue buildup. Regularly check for and address any spills promptly to keep your flooring in top condition.
By following these tips, you ensure the longevity and beauty of your luxury vinyl flooring.
Regular cleaning of your luxury vinyl flooring is essential. Begin by sweeping or vacuuming daily to remove dirt and debris. Be cautious not to use a vacuum with a rotating beater bar.
Use a non-abrasive cleaner. Products like Shaw Floors Hard Surface Cleaner are recommended to maintain the flooring’s finish. Avoid harsh chemicals and detergents that can damage the surface.
For deep cleaning, a mixture of apple cider vinegar and warm water can be effective. Combine 1 cup of vinegar with 1 gallon of water. This solution helps combat grease and dirt. Adding a few drops of essential oils can help mask the vinegar’s scent.
Prevent potential damage by limiting foot traffic for the first 24 hours after laying new flooring. Avoid placing heavy furniture during this period to allow proper adhesive curing. Use floor protectors under furniture legs to avoid scratching.
Another important aspect is spills and stains. Clean them immediately with a damp cloth to prevent residue buildup. Regularly check for and address any spills promptly to keep your flooring in top condition.
By following these tips, you ensure the longevity and beauty of your luxury vinyl flooring.
Key Takeaways
- Proper preparation simplifies the installation.
- Keeping a clean workspace boosts efficiency.
- Durable planks need minimal maintenance.
Preparation and Materials
Before installing vinyl plank flooring, ensure a smooth project by properly assessing your subfloor and gathering the necessary tools and materials. A clean subfloor is crucial for a successful installation, while the right tools and materials will ease the process significantly.Assessing Your Subfloor
Your subfloor serves as the foundation for your vinyl plank flooring, so it must be in good condition and clean. Check that the subfloor is level, dry, and free of debris. An uneven surface can lead to complications later, causing planks to misalign or become damaged. Inspect for any damage such as cracks or holes. Repair these issues before starting. If your subfloor is concrete, consider using a moisture barrier. This prevents any potential moisture issues that could cause your planks to warp or deteriorate over time. Thorough preparation here will save effort and headaches later.Gathering Tools & Materials
Collecting the correct tools and materials prior to beginning will streamline the installation process. You’ll need vinyl plank flooring, underlayment (if required), and transition strips. The essential tools include a utility knife, tape measure, tapping block, rubber mallet, pull bar, and spacers. The utility knife will allow you to cut planks cleanly and efficiently. The tape measure ensures accurate measurements, avoiding costly mistakes. The tapping block and rubber mallet help you fit planks snugly without damaging them. Lastly, spacers ensure that you maintain the necessary expansion gap from the walls for natural flooring expansion. Having these materials and tools ready will not only make the process more efficient but also help you achieve a professional-looking finish.Flooring Layout and Planning
Effective planning is crucial for a successful vinyl plank flooring installation. Properly measuring your space and strategically arranging the planks can minimize waste and ensure a professional finish.Measuring and Calculating
Begin by calculating the total area of the room using a tape measure. Measure the length and width of the floor, then multiply these dimensions to find the square footage. It’s wise to add an extra 10% to your order to allow for cuts and mishaps during installation, especially when dealing with luxury vinyl planks. Don’t forget to account for an expansion gap between the planks and the wall. This gap allows for natural movement and prevents warping. Use spacers to maintain consistent spacing around the room’s perimeter.Plank Layout Strategies
Start your layout planning by determining the focal point of the room. Align the long side of the plank with the longest wall for a seamless look. This creates an illusion of greater space, which can be particularly beneficial in narrow rooms. Plan the layout to ensure that the final row of planks is at least half the width of a full plank. This helps maintain structural integrity and aesthetic appeal. Use the first row as a guide and ensure all planks are aligned with the help of spacers. Before installation, lay out a few rows without adhesive to visualize the pattern. Adjust as needed, particularly around transitions and doorways, to maintain a harmonious flow.Installation Process
Proper installation of vinyl plank flooring involves several key steps, each essential to achieving a professional finish. Focus on preparing your subfloor, laying underlayment, and carefully placing and securing planks for a seamless look. Here’s a breakdown of what you’ll need to do at each stage.
Preparing the Subfloor
Begin by ensuring your subfloor is clean, dry, and level. Remove any existing floor coverings and thoroughly sweep the area to eliminate dust and debris. Check for any uneven areas and sand them down, ensuring the surface is flat. Moisture barriers might be necessary if you’re laying flooring in areas prone to humidity. Use a moisture meter to confirm the subfloor’s dryness. Look for any cracks or damage in the subfloor and repair them to prevent issues later.Laying the Underlayment
Underlayment provides cushioning and soundproofing. Roll out the underlayment across the entire surface, ensuring there are no gaps or overlaps. Position the underlayment sheets with their edges aligned. Secure them in place with adhesive strips or tape for added stability. Some underlayments come with a built-in moisture barrier, providing additional protection. Avoid excessive overlap, as this can lead to unevenness when the planks are installed. Carefully cut the underlayment to fit around obstructions with a utility knife for a clean finish.Installing the First Planks
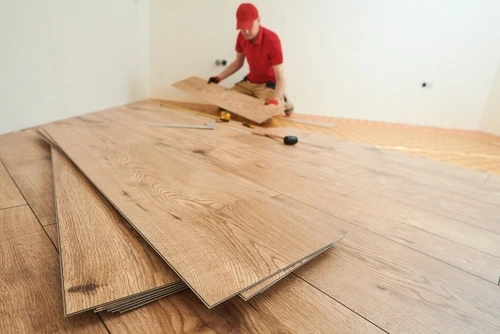
Start by placing spacers along the walls to maintain a gap for expansion. Lay the first vinyl plank with the tongue side facing the wall to ensure proper alignment. Position each plank parallel to the longest wall for aesthetic appeal. Use a tapping block and rubber mallet to join planks together firmly. Consistency in plank placement helps avoid gaps and ensures a strong foundation. Continue laying planks across the row, trimming the last plank to fit using a saw. Ensure all seams are tight to prevent future shifting.Securing Planks Together
After establishing the first row, continue placing subsequent rows. Use a pull bar to securely lock the end joints. Ensure each plank’s tongue fits snugly into the groove of the previous plank. Stagger the seams by offsetting the planks in each row. This not only looks better but also strengthens the installation. Check for alignment frequently to maintain a straight layout throughout. Employ a rubber mallet gently when necessary to ensure planks are flush against each other.Custom Cuts and Fitting
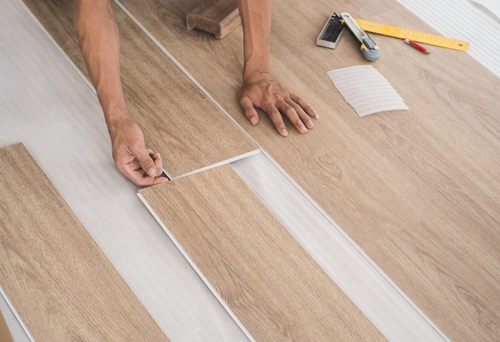
Measure and cut vinyl planks to fit around corners and obstacles such as door frames. Use a utility knife for precise cuts. For irregular spaces, create templates with cardboard for accurate fitting. Once cut, fit the planks snugly into place using a tapping block if necessary. Re-measure the area if resistance is felt during fitting to ensure accuracy. Remember to account for expansion space by keeping the cut planks slightly away from walls and obstacles. Secure each fitted plank carefully to maintain a seamless appearance across the entire floor.Finishing Touches
After the main installation of vinyl plank flooring, it’s crucial to address the final details to ensure a long-lasting and polished appearance. Focus on securing transition strips and eliminating any gaps to achieve a seamless look.Installing Transition Strips
Transition strips are essential to create a smooth flow between different flooring types and ensure no abrupt changes in level. Begin by measuring the doorway or area requiring transition strips. Cut the strip to the measured length. Align the strip between the vinyl planks and the adjacent flooring. Use adhesive to secure it to the subfloor, or screw it down if applicable, following the strip manufacturer’s instructions. Ensure that it is snug without disrupting the expansion gap that allows for natural floor contraction and expansion. This installation maintains the durability and aesthetics of your new flooring.Checking for Gaps and Alignment
Inspect the newly laid vinyl planks for any noticeable gaps or alignment issues. Gaps may occur if the planks haven’t clicked in place properly, which can affect the appearance and stability of the flooring. Use a tapping block and a rubber mallet to gently coax planks together, starting from the room’s center and moving outward. Ensure that the expansion gap around the perimeter of the room is consistent and adequate as per the flooring manufacturer’s recommendations. An appropriate gap prevents buckling if the plank flooring expands due to humidity variations. Address any inconsistencies immediately to maintain a clean, uniform look. Adjust planks as necessary and recheck alignment to ensure everything is perfectly set.Maintenance and Care
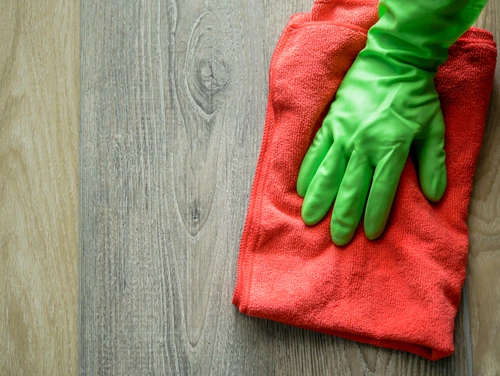
Regular cleaning of your luxury vinyl flooring is essential. Begin by sweeping or vacuuming daily to remove dirt and debris. Be cautious not to use a vacuum with a rotating beater bar.
Use a non-abrasive cleaner. Products like Shaw Floors Hard Surface Cleaner are recommended to maintain the flooring’s finish. Avoid harsh chemicals and detergents that can damage the surface.
For deep cleaning, a mixture of apple cider vinegar and warm water can be effective. Combine 1 cup of vinegar with 1 gallon of water. This solution helps combat grease and dirt. Adding a few drops of essential oils can help mask the vinegar’s scent.
Prevent potential damage by limiting foot traffic for the first 24 hours after laying new flooring. Avoid placing heavy furniture during this period to allow proper adhesive curing. Use floor protectors under furniture legs to avoid scratching.
Another important aspect is spills and stains. Clean them immediately with a damp cloth to prevent residue buildup. Regularly check for and address any spills promptly to keep your flooring in top condition.
By following these tips, you ensure the longevity and beauty of your luxury vinyl flooring.
Frequently Asked Questions
When installing vinyl plank flooring, you’ll want to avoid common mistakes and ensure you follow the correct procedures, especially on different subfloor types. Beginners can take on the challenge with the right preparation and understanding of the differences between installation methods. Proper steps are crucial for specific areas like bathrooms.What are common errors to avoid during the installation of vinyl plank flooring?
Avoid skipping the planning phase, as it’s crucial to account for expansion gaps. Ensure proper alignment and fit to avoid ending with crooked rows. Familiarize yourself with the correct tools to prevent backwards installation, which is a common issue. Considering hiring a professional can reduce these common mistakes.What steps are needed to lay vinyl plank flooring on a concrete subfloor?
Clean the concrete thoroughly to remove dust and debris. Use a moisture barrier to prevent any potential water damage. Allow the floor to acclimate by placing the planks in the room for 48 hours. Begin installation by laying the first plank along the longest wall, ensuring a 3/8″ expansion gap along the edges.Can a beginner successfully install vinyl plank flooring, and what should they take into account?
Beginners can certainly manage this project, given attention to detail and a willingness to learn. It’s crucial to plan ahead, measure accurately, and ensure all necessary tools are on hand. Following step-by-step guides such as from FlooringStores can be invaluable.How do you prepare to lay vinyl plank flooring in a bathroom?
Bathrooms require waterproof vinyl planks for longevity. Before starting, ensure the subfloor is dry and clean. Remove existing flooring and any old adhesives. Use spacers to maintain any required expansion gaps and adhere to manufacturer guidelines for installing waterproof layers, especially around fixtures and edges.Is there a difference between gluing and floating vinyl plank flooring, and which is preferable?
Glued vinyl is secured directly to the subfloor, offering more stability and less movement. Floating vinyl, however, clicks together without adhesive, allowing for easier installation and replacement. The choice depends on your specific needs; glued-down is ideal for high-traffic areas, while floating floors offer convenience and flexibility.In what order should you approach the installation of vinyl plank flooring?
Begin by preparing and cleaning the subfloor to ensure a smooth surface. Lay out the planks perpendicular to the longest wall, starting from one corner. Use spacers against the wall to maintain the expansion gap. As you progress, stagger the planks for a more natural look. Check alignment periodically to maintain a straight path.RECENT BLOGS
 A Homeowner’s Guide to Flash Flood Preparation, Cleanup, and Long-Term Protection
Date: May 27 ,2025
 Everything You Need to Know About Garbage Bin Rental: Sizes, Costs, and Practical Tips for Every Project
Date: May 14 ,2025

 Safe Disposal Methods for Refrigerators: Recycling, Donation, and Removal Options
Date: April 29 ,2025

Our Reviews


LATEST BLOGS
