May 31, 2024 - Benjamin Ehinger
How to Demo a Tile Shower: A Step-by-Step Guide
CALL NOW 844-762-8449
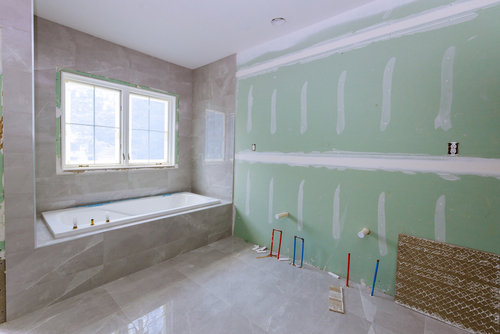
Demolishing a tile shower is a substantial task that can pave the way for a fresh and updated bathroom. Whether you’re undertaking a complete bathroom remodel or simply replacing outdated features, knowing how to remove a tile shower efficiently and safely is crucial. This process requires thorough preparation, the right tools, and an understanding of the steps involved to ensure a successful DIY project.
Safety should be your top priority. Before beginning demolition, turn off the water supply to the area to avoid any potential mishaps. Protective gear, such as gloves, goggles, and a dust mask, is essential to shield you from sharp tile fragments and dust. The process typically involves removing existing tiles, fixtures, and handling the substrate with care to prepare for the new installation. Being equipped with a clear plan, a small dumpster rental for the debris, and patience will help you navigate the complexities of demolition and set a solid foundation for your bathroom’s transformation.
Removing tile and fixtures can be labor-intensive, but the right approach keeps you efficient and safe. If you encounter plumbing or electrical work beyond your expertise, consult a professional to prevent potential mishaps.
 Before installing a new tile shower, ensuring a solid, damage-free substrate is crucial. Proper substrate preparation can prevent costly repairs due to water damage and ensure a long-lasting shower renovation.
 When setting tiles in your shower, precision is key. You will need to prepare the surface correctly, use proper tools, and pay attention to alignment to ensure a professional-looking finish. Now let’s move on to the specifics of applying the thin-set mortar and fitting tiles.
 After completing the demolition of your old tile shower, it’s crucial to properly install new features and thoroughly clean the area to ensure a pristine finish. Every step from the precise cut of the tile to the final inspection is essential for achieving a professional and lasting result.
Key Takeaways
- Removing a tile shower requires safety gear and careful planning.
- The process involves several stages, from tile removal to substrate preparation.
- A well-executed demolition sets the stage for a successful bathroom remodel.
Safety and Preparation
Before commencing the demolition of a tile shower, it’s essential to prioritize your safety and ensure the work area is suitably prepared. This preparation helps prevent injuries and facilitates a smooth demolition process.Gathering Necessary Tools
You will need a variety of tools for this project. Start by assembling the following items:- Hammer or mallet for chipping away tiles and fixtures
- Chisel for loosening and removing tiles
- Pry bar to leverage and remove larger pieces
- Utility knife for cutting through caulking or adhesives
- Buckets and a tarp for debris collection
- Screwdriver set for fixture removal
- A roll-off dumpster rental for all the debris and trash
- A mask to prevent the inhalation of dust and debris
- Goggles to protect your eyes from flying particles
- Gloves to shield your hands from sharp edges and materials
Setting Up the Work Area
Prepare the area efficiently to maintain a clean and manageable workspace. Begin by:- Clearing out all personal items and movable fixtures from the shower area.
- Laying down a tarp or drop cloth to collect falling debris and make cleanup easier.
- Ensuring that the space is well-ventilated; set up an exhaust fan or keep windows open to minimize dust accumulation.
- Shutting off the water supply to prevent any accidental spillage or leaks during the demo process.
- Covering nearby surfaces with protective sheets to prevent damage from stray debris.
Removing Existing Tile and Fixtures
The demolition of your existing tile shower is a critical step in a bathroom remodel that lays the groundwork for a new design and installation. It requires careful planning, the right tools, and a methodical approach to safely remove tiles and fixtures without damaging the underlying surfaces.Demolition Process
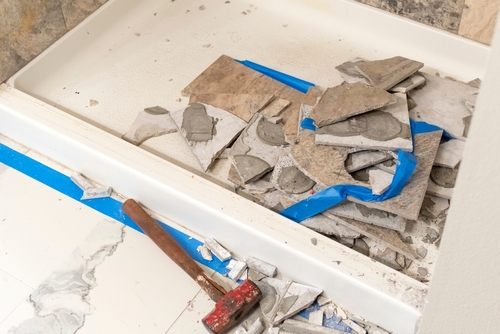
Safety First: Prior to starting, ensure you’re wearing protective gear, including safety goggles and gloves. Cut off the water supply to the shower to avoid any unexpected leaks. Begin by removing the shower fixtures; often, these can be unscrewed or pried off with a pry bar. If you find caulk sealing these fixtures, use a putty knife to cut through the seal. Next, tackle the tile. Start at the edge of the shower where the tile meets the wall or at any damaged tiles, as these will be easier to remove. Use a hammer and chisel to carefully chip away at the grout and create a starting point.Tile and Adhesive Removal Tactics
Once you’ve created an opening, continue with the hammer and chisel to lift the tiles off the wall. Be patient and work on small sections at a time. For stubborn tiles, a pry bar can provide leverage. Adhesive Removal: Cleaning up the adhesive is necessary to prepare for the new installation. Depending on the type of adhesive used, a putty knife can be used to scrape away the bulk of the material. For tougher spots, consider using a heat gun to soften the adhesive, but proceed with caution to avoid damage to the underlying wall.| Tool | Use |
|---|---|
| Hammer | Initial tile chipping and removal |
| Chisel | Precise work on tiles and grout |
| Putty Knife | Scraping off residual adhesive |
| Pry Bar | Prying off stubborn tiles and fixtures |
Substrate Preparation
Before installing a new tile shower, ensuring a solid, damage-free substrate is crucial. Proper substrate preparation can prevent costly repairs due to water damage and ensure a long-lasting shower renovation.
Inspecting and Repairing Walls
First, closely inspect the shower walls for any damage. Look for compromised studs which are essential for supporting the weight of the new cement board and tiles. If any studs are damaged, they must be repaired or replaced to ensure structural integrity. Additionally, check the existing surface for mold, mildew, or rot, especially if you’re working with a previously tiled area. Any damage must be addressed before proceeding. If the damage is extensive, it may be necessary to remove portions of the wall down to the studs to install a new, sturdy substrate.Installation of Backer Boards
Once you’ve ensured the walls are sound, install concrete backer board as your chosen substrate for the tile. Cut the boards to fit using a carbide-tipped scoring tool for a precise fit. Secure the backer boards to the studs using screws made specifically for backer board, generally spaced 6 to 8 inches apart. Ensure that the heads are flush with the board’s surface to prevent any interference with the tile adhesive. Upon securing the boards, apply a waterproof membrane over the seams to prevent water infiltration. You’ll want to overlap the membrane at the seams and corners and use a sealant that’s compatible with your membrane to bridge gaps and ensure complete waterproofing. This step is critical, especially on shower walls, as they are constantly exposed to moisture and can lead to water damage if not properly sealed.Layout and Design Choice
Before you start demolishing your shower tiles, it’s crucial to plan your new layout with precision and consider the design elements that will best fit your space. Your choices in tile size, material, and pattern play a fundamental role in the aesthetic and practical setup of your shower.Measuring and Planning Tile Layout
When you’re ready to transition from demolition to renovation, your first step is to measure your shower area accurately. You’ll need a pencil to mark reference lines on the wall, representing where tiles will be placed. Begin by finding the center point of each wall and use a level to ensure all lines are straight. This is also the time to decide on the location of any shower niches you want to integrate and how they’ll affect the overall tile layout.- Key Points for Measuring:
- Use a precise measuring tape.
- Mark the center of each wall for symmetry.
- Ensure all reference lines are level.
Selecting Tiles and Design Pattern
Tile size and material influence both the appearance and the installation process of your shower. Larger tiles can make a small shower feel more spacious but may require cutting to fit around niches and corners. On the other hand, smaller tiles can offer more design flexibility and are easier to layout around complex areas. Materials range from ceramic and porcelain to glass and natural stone, each with its own maintenance needs and visual appeal. Choose a tile pattern that complements your shower’s dimensions and style. Popular options include the timeless subway pattern, the elegant herringbone, or the geometric basketweave. Consider how each pattern will need to be adapted for your shower’s specific measurements and any unique features like benches or curbs.- Selection Checklist:
- Determine tile size based on shower dimensions.
- Choose a tile material suitable for wet areas.
- Decide on a tile pattern that fits your personal style and shower’s layout.
Setting Tiles
When setting tiles in your shower, precision is key. You will need to prepare the surface correctly, use proper tools, and pay attention to alignment to ensure a professional-looking finish. Now let’s move on to the specifics of applying the thin-set mortar and fitting tiles.
Applying Thin-Set Mortar
Begin by applying thin-set mortar to the prepared shower wall with a notched trowel. The notches create ridges that help the tiles adhere better and maintain uniform thickness across the wall. Hold the trowel at a 45-degree angle and spread an even layer. Use the flat side of the trowel to smooth a skim coat on the back of each tile before pressing it into the mortar bed. Ensure you work in small sections to prevent the thin-set from drying out. Check for level after each tile placement, and insert spacers to maintain even gaps between tiles.Tile Cutting and Fitting
You’ll need a wet saw or a tile cutter for accurate cuts when tiles must fit around edges, fixtures, or unique shapes. Measure the space for each tile and then cut it to size, ensuring you account for the space the spacers will occupy. When using a wet saw, cut the tiles with the finished side up to minimize chipping. After each cut, ensure that the tile fits the intended space correctly before setting it in the mortar. Remember that the cut edges of the tiles should face away from the center of the shower to give a clean, professional look.Grouting and Caulking
When renovating your shower, the application of grout and caulk is essential for a waterproof seal and a polished finish. Grouting fills the gaps between tiles, while caulking is used to seal joints that are prone to movement.Filling Grout Lines
To begin filling grout lines, ensure that you have a bucket of grout mixed to the manufacturer’s instructions. The consistency should be such that it holds its shape but is still workable. Use a grout float to carefully press grout into the lines between your tiles, moving at a 45-degree angle to the lines to ensure they are well packed. After applying grout, use a damp sponge to wipe away any excess on the surface of the tiles, remembering to rinse the sponge frequently.- Materials Needed:
- Grout
- Grout Float
- Bucket
- Sponge
- Steps:
- Mix grout in a bucket to the required consistency.
- Apply grout with the grout float, pressing firmly.
- Smooth the grout line and remove excess with a damp sponge.
Sealing Edges and Corners
For sealing edges and corners, areas where tile meets other surfaces or where two planes of tile converge, it’s important to use a waterproof caulk. Caulk accommodates movement and prevents water intrusion in these flexible areas. Start by cutting the caulk nozzle at a 45-degree angle to match the size of the gap you’ll be sealing. Hold the tube at an angle and gently squeeze to lay a smooth bead of caulk into the joint. Smooth it with a caulking tool or your finger, dipped in soapy water to create a clean finish. Be sure to choose a caulk that matches the grout color for a seamless appearance.- Materials Needed:
- Waterproof Caulk
- Steps:
- Cut the caulk tip to size.
- Apply caulk to the joint, maintaining steady pressure.
- Smooth the caulk bead for a finished look.
Finishing Touches and Cleaning
After completing the demolition of your old tile shower, it’s crucial to properly install new features and thoroughly clean the area to ensure a pristine finish. Every step from the precise cut of the tile to the final inspection is essential for achieving a professional and lasting result.
Installing Fixtures and Accessories
When you’re ready to install new fixtures and accessories, the precision tools like a wet tile saw are indispensable for achieving a smooth tile finish that accommodates the shower surround and shower niche insert. Keep the following in mind while you work:- Shower Surround: Ensure that the new tile’s measurements are accurate by using your wet tile saw for a custom, snug fit. It’s important for water-proofing and visual appeal.
- Shower Niche Insert: Carefully install the shower niche insert, ensuring it’s level and securely fixed within the new tile setup. Use a sealant as recommended for optimal water resistance and maintenance requirements.
Final Cleaning and Inspection
Post-installation cleaning and inspecting are vital to highlight the quality of your work with the new tile. Use this checklist to ensure nothing is missed:- Clean the Area: Remove any dust, debris, and excess grout from the tiles. Wipe down all surfaces with a damp cloth.
- Inspection Points:
- Check the alignment and spacing of tiles.
- Look for consistent tile finish and sealant application.
- Evaluate the water flow and drainage in the completed shower.
Frequently Asked Questions
When undertaking the task of removing shower tiles, it’s important to approach the job with the right techniques and tools to prevent damage and ensure safety.What is the best method to remove shower tiles without causing damage to the underlying cement board?
The best method to remove shower tiles is to use a hammer and chisel to carefully chip away at the tiles, starting from the edges and working your way in, to avoid damaging the cement board beneath.Which tools are recommended for the efficient removal of shower tiles?
For efficient tile removal, specific tools such as a hammer, chisel, pry bar, and a tile removal tool are recommended. These tools help to lift the tiles without excessive force that could damage the surrounding area.How can one safely remove a shower tile without compromising the integrity of the shower pan?
To safely remove a shower tile, start by loosening the tile with a chisel and then gently prying it up with a pry bar, being careful not to apply too much force to avoid damaging the shower pan.What steps are involved in safely replacing shower tiles and the associated drywall?
Safely replacing shower tiles involves removing the old tiles, cleaning the area, ensuring there is no moisture damage, and then installing new backer board before setting the new tiles. This also includes properly sealing to prevent water damage to the drywall.Can you remove wall tiles from the 1950s’ bathroom without breaking them, and if so, how?
It is possible to remove wall tiles from a 1950s’ bathroom without breaking them by using heat to soften the adhesive and employing a putty knife or similar tool to gently pry the tiles away from the wall.What are the estimated costs associated with demolishing existing shower tiles before a renovation?
The costs of demolishing shower tiles can vary, but you can expect to pay for labor and materials, which may include tools for removal and disposal of debris. The price can range from a couple of hundred to several thousand dollars, depending on the size and complexity of the job.RECENT BLOGS


Our Reviews

Glenda Lanier Prowell
1721758635
I have ordered an 11 yard dumpster to be delivered to my house.Lonier was extremely helpful and answered all my questions. The rate was very reasonable.

Cedric Smikle
1721660395
Amber was extremely professional and courteous. She answered all of my questions and even some that I didn’t know I needed to ask.

Cait Kaider
1721243051
I highly recommend Waste Removal USA for their responsiveness and how the staff work hard to provide exceptional customer service. They have done well by us and our clients. Thank you!

Easom Family
1721223306
Louiner Pierre-Louis Is awesome! Did a great job. Will definitely be using this same company for all my dumpster needs because of his awesome customer service! Thank you!!!

tabitha Vazquez
1720539988
Wonderful and fast customer service!
LATEST BLOGS
