May 9, 2024 - Benjamin Ehinger
Easiest Way to Remove Linoleum: A Step-by-Step Guide
CALL NOW 844-762-8449
Removing linoleum flooring can be a necessary step in updating your home, but the prospect of tackling this project might seem daunting. Whether you’re a seasoned DIY enthusiast or a homeowner looking to make some changes, knowing the easiest and most efficient way to remove linoleum is key to a successful renovation. Armed with the right tools and techniques, you can handle this task with confidence, preparing the way for a fresh, new surface.
As you prepare for your linoleum removal project, it’s essential to consider the scope of the work. Clearing the area of furniture and appliances, ensuring you have proper safety gear, and renting a local dumpster from Waste Removal USA for debris can streamline the process. Assessing the linoleum for its condition and the method of its installation will guide the most appropriate removal technique, which may range from cutting and peeling to softening the adhesive with heat.
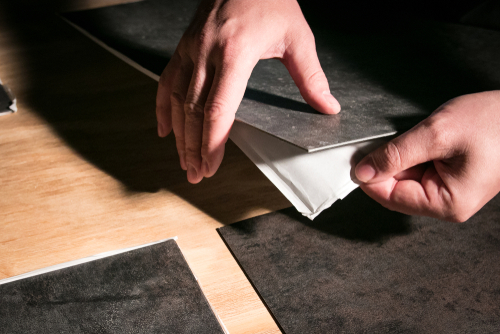 Before you begin the process of removing linoleum flooring, it’s vital to conduct a thorough assessment and ensure your safety. You’ll need to inspect the material for hazardous substances and make precise initial cuts to facilitate easier removal.
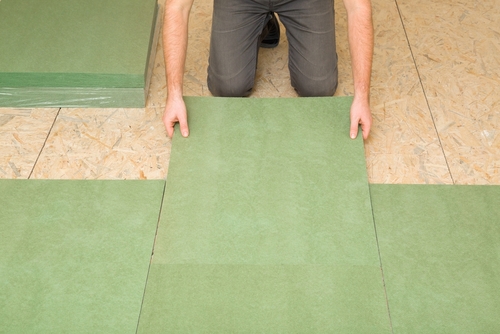 Prior to installing new flooring, it’s crucial to prepare your subfloor by addressing any damage and ensuring a clean, flat surface. Proper preparation can prolong the life of your new flooring and prevent future issues.
Key Takeaways
- Proper preparation simplifies the linoleum removal process.
- Renting a dumpster can efficiently manage project debris.
- Assessing the current flooring informs the best removal technique.
Preparation and Safety
Before you begin the process of removing linoleum flooring, it’s crucial to be well-prepared and to prioritize safety. Ensuring you have the right tools and materials on hand, and taking appropriate safety measures, will help protect you and make the task more efficient.Gather Tools and Materials
To remove linoleum effectively, start by compiling all necessary tools and materials. You will need:- A sharp utility knife to cut the linoleum into strips.
- A floor scraper or putty knife to lift the linoleum from the floor.
- An optional heat gun or hair dryer, to help loosen adhesive.
Ensure Safety Precautions
Your personal safety is paramount during this task. Always wear safety gear such as:- Gloves to protect your hands from sharp edges and scrapes.
- Respirator or dust mask, especially if the adhesive may contain harmful particles.
- Eye protection to guard against any debris.
Removing Furniture and Appliances
Before beginning the task of removing linoleum, it’s imperative to prepare by clearing the immediate area. This involves meticulous attention to transferring furniture and managing cumbersome appliances to ensure a hazard-free workspace.Clear the Work Area
Your priority is to ensure that all furniture is removed from the room. Here’s a step-by-step guide to help you clear the space efficiently:- Identify Furniture: Walk through the room and make a checklist of all items to be moved.
- Move Small Items First: Remove chairs, tables, and lamps to create more room for maneuvering larger pieces.
- Protect Your Furniture: Wrap delicate surfaces in blankets or bubble wrap to prevent damage during transit.
- Seek Assistance: For heavier items, always seek help to avoid personal injury and damage to the furniture.
Handling Heavy Appliances
Appliances such as refrigerators and washing machines require special attention due to their weight and connection to utilities. Follow these tailored steps:- Disconnect Utilities: Ensure that electrical, water, or gas supplies are safely disconnected.
- Use Appliance Dollies: Employ a dolly or hand truck specifically designed for moving heavy appliances. This tool will help you avoid strain and potential injury.
- Secure the Appliance: Strap the appliance to the dolly to prevent slipping or tipping while in motion.
- Use the Buddy System: Never attempt to move heavy appliances alone. Having an extra set of hands not only lightens the load but also adds to safety measures.
Assessing and Starting the Removal
 Before you begin the process of removing linoleum flooring, it’s vital to conduct a thorough assessment and ensure your safety. You’ll need to inspect the material for hazardous substances and make precise initial cuts to facilitate easier removal.
Inspecting Linoleum for Asbestos
Check your linoleum for asbestos before you start cutting, especially if it was installed before the 1980s. Asbestos can pose a serious health risk if disturbed, so if you suspect its presence, do not cut into the linoleum. Instead, you should have a professional asbestos inspection. If asbestos is confirmed, you’ll need to hire a licensed removal specialist to safely handle the material.Initial Cuts and Sections
Begin by making initial cuts with a utility knife into your linoleum flooring. Cut into small sections, ensuring your blade is sharp to avoid jagged edges. This step allows you to manageably score and peel sections piece by piece. Start from the room’s edges or any loose corner and slowly work your way across the room, creating a grid pattern to make the removal process systematic and organized. Remember to keep your hands safe and away from the utility knife’s path at all times.Linoleum Removal Techniques
Removing linoleum flooring can be streamlined into two main methods, each requiring a set of tools and steps. Selecting the right approach mainly depends on the adhesion strength and the condition of the underlying surface.Heat Method
Applying heat softens the adhesive beneath your linoleum, making it easier to lift and scrape away the flooring. For this, you’ll need a heat gun or a hair dryer set on high heat. Carefully move the heat source over a section of the flooring until the adhesive softens. Then, use a floor scraper or putty knife to gently push beneath the linoleum, lifting it from the subfloor.Tools Required:
- Heat gun or hair dryer
- Floor scraper or putty knife
Steps:
- Heat a section of the linoleum.
- Begin scraping where the linoleum has lifted.
- Continue until all material is removed.
Dry Method
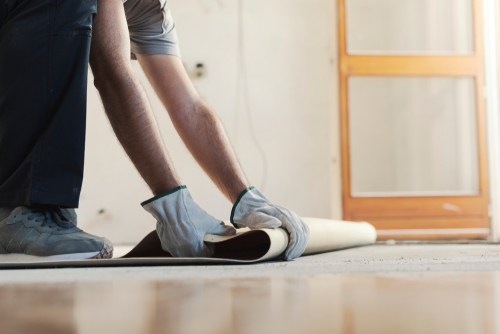
The dry method involves physically cutting and peeling the linoleum without applying heat. Start by scoring the linoleum with a utility knife, cutting it into strips to make the removal process more manageable. Lever up the cut pieces using a scraper tool or a putty knife, and peel back the linoleum from the subfloor.Tools Required:
- Utility knife
- Scraper tool or putty knife
Steps:
- Score the linoleum into strips.
- Use the scraper tool to lift an edge.
- Peel the linoleum away from the subfloor.
Adhesive and Residue Removal
After you’ve successfully removed the linoleum, you’ll likely encounter a layer of old adhesive or residue that can be tough to remove. Properly disposing of this layer is crucial for preparing your floor for a new covering. The strategies to tackle this problem rely on both chemical solutions and manual techniques.Chemical Solutions
Solvent-Based Removers: When dealing with residual glue, a solvent can be your ally. Options such as paint thinner or a commercial adhesive remover are designed to break down the bonding agents within the glue. To use them safely and effectively:- Apply the solvent to the adhesive.
- Allow it to sit for the recommended time.
- Wipe or scrape away the softened glue.
- Saturate a rag with a generous amount of isopropyl alcohol.
- Press against the adhesive spot and hold.
- Use a scraper to gently remove the residue.
Manual Scrubbing Techniques
If you prefer a more hands-on approach or want to avoid chemicals, mechanical methods can be employed. Scrapers: A scraper comes in handy for chipping away at the adhesive. You may need to apply heat using a heat gun or hair dryer to soften the glue before scraping.- Position the scraper at an angle.
- Apply firm pressure and push forward to remove the residue.
- Start with a coarse grit sandpaper.
- Progress to finer grits for a smooth finish.
Subfloor Preparation
 Prior to installing new flooring, it’s crucial to prepare your subfloor by addressing any damage and ensuring a clean, flat surface. Proper preparation can prolong the life of your new flooring and prevent future issues.
Surface Repair
If your subfloor is wood, check for any damage such as rot, warping, or broken boards. It’s essential to repair or replace defective areas before laying new material. For a concrete floor, fill in cracks or holes with a concrete patching compound. Ensure the repairs are smooth and level with the rest of the subfloor.Prepping for New Flooring
Once your subfloor surface is repaired and stable, clean the area thoroughly to remove all debris. If you’re prepping a wood subfloor, consider sanding any high spots and vacuuming up the dust. For a concrete floor, make sure it’s completely dry and consider applying a sealant if moisture levels are high. This will create a suitable surface for your new flooring, helping it to adhere properly and stay intact over time.Installation of New Floor Covering
Once your linoleum is removed, you’re ready to upgrade your space with a new floor covering that suits your style and needs. To ensure a successful installation, it’s crucial to select the right flooring and to follow the precise final steps.Choosing the Right Flooring
- Vinyl Flooring: If you’re looking for a cost-effective, durable option that’s easy to install, vinyl flooring might be your best pick. It handles moisture well and comes in a variety of patterns.
- Hardwood Flooring: For a timeless look that can increase your home’s value, consider hardwood flooring. It requires more of an investment and careful installation, but the results are often worth it.
- Tile: Tile flooring is versatile and ideal for areas prone to wetness, like bathrooms and kitchens. It can range from simple and affordable ceramic to high-end stone.
- Laminate Flooring: Offering the appearance of hardwood without the expense, laminate flooring is another user-friendly option. It’s resistant to scratches and can be perfect for high-traffic areas.
Final Steps for Installation
- Subfloor Preparation: Ensure your subfloor is level, clean, and free of debris. Any imperfections can cause issues with your new flooring.
- Follow Manufacturer’s Guidelines: Each type of new flooring comes with its own set of instructions. Adhere strictly to these for the best results.
- Acclimatization: Allow your new floor materials to adjust to the room’s temperature and humidity for at least 48 hours prior to installation.
- Tools and Materials: Prepare all necessary tools and materials ahead of time. This can include a saw for cutting planks to size, spacers, and adhesive if required.
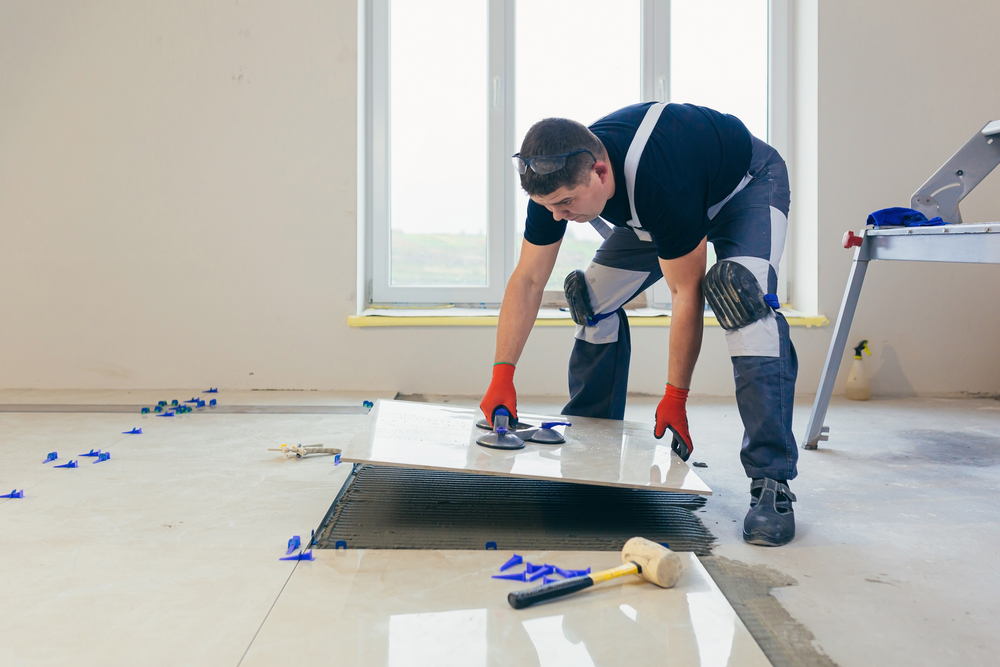
- Installation: Whether it’s laminate flooring or tile, start from the corner of the room and work methodically. Maintain the expansion gap between the flooring and the wall, as specified by the manufacturer.
- Finishing Touches: Install baseboards, thresholds, and transition strips, and apply sealant if needed. These not only add to the aesthetic but also protect the edges of your new floor.
Post-Installation Cleanup and Finishing Touches
After the main task of removing linoleum flooring, your next steps are crucial for leaving the area pristine and restoring the functionality of the space. Your focus should be on thorough cleanup and the careful reinstallation of baseboards and appliances.Cleaning the Area
Once the linoleum is removed, you’ll often find adhesive residue that needs addressing. Collect all remnants of linoleum and adhesive in disposal bags. To clean up the residue, using a scraper can be effective—just ensure to work gently to avoid damaging the subfloor. For particularly stubborn spots, consider a solvent specifically designed to remove adhesive but always follow the manufacturer’s guidelines. Allow the floor to dry completely before moving on to reinstalling trim or appliances.Reinstalling Baseboards and Appliances
With a clean floor, you can now focus on reinstalling baseboards. If you’re using the original baseboards, you might need to remove old nails and apply fresh adhesive or nails to secure them back onto the walls. If the linoleum was under your appliances, gently slide them back into place to avoid scratching your floor. Finally, check for any transitions between different flooring types and ensure these are fitted correctly. Patience is key here to ensure everything is properly aligned and secure, restoring a polished look to your room.Frequently Asked Questions
Removing linoleum flooring can be a straightforward process if you have the right tools and techniques at your disposal. The following FAQs provide specific instructions and recommendations to help you effectively remove linoleum.What tools are required to remove linoleum flooring effectively?
To effectively remove linoleum flooring, you’ll need a utility knife to cut the flooring into strips, a floor scraper to lift the linoleum, and a heat source like a heat gun to soften the adhesive. Optionally, you might need additional supplies like adhesive remover if the linoleum is stubborn.What are the steps to strip linoleum from a concrete substrate?
The first step to strip linoleum from concrete is to cut the material into sections. Next, use a heat gun to warm the adhesive and a floor scraper to lift the linoleum. If adhesive residues remain, apply an adhesive remover and scrape the substrate clean.Is it possible to remove linoleum without damaging the wood subfloor beneath?
Yes, it is possible to remove linoleum without damaging the wood subfloor. Carefully score and cut the linoleum into manageable sections and gently heat to loosen the adhesive. Use a floor scraper with caution to avoid gouging the wood.What techniques are safe for removing linoleum adhesive from hardwood floors?
Safe techniques for removing linoleum adhesive from hardwood floors include heating the adhesive with a hair dryer or heat gun and using a plastic scraper to avoid scratching. You can also consider using a solvent-free adhesive remover to protect the finish of the hardwood.How can I remove linoleum flooring that has been glued down to plywood?
To remove linoleum flooring glued to plywood, cut the flooring into sections, then use a heat gun or hair dryer to ease the adhesive. Carefully work a floor scraper under the linoleum to lift it from the plywood, being mindful not to damage the surface.Which adhesive removers are recommended for linoleum floors?
For linoleum floors, it’s recommended to use adhesive removers that are specifically formulated for the type of adhesive present. Products such as isopropyl alcohol, paint thinner, or commercial adhesive removers can be effective, but always follow the manufacturer’s guidelines and test in a small area first.RECENT BLOGS
Our Reviews
Glenda Lanier Prowell
1721758635
I have ordered an 11 yard dumpster to be delivered to my house.Lonier was extremely helpful and answered all my questions. The rate was very reasonable.
Cedric Smikle
1721660395
Amber was extremely professional and courteous. She answered all of my questions and even some that I didn’t know I needed to ask.
Cait Kaider
1721243051
I highly recommend Waste Removal USA for their responsiveness and how the staff work hard to provide exceptional customer service. They have done well by us and our clients. Thank you!
Easom Family
1721223306
Louiner Pierre-Louis Is awesome! Did a great job. Will definitely be using this same company for all my dumpster needs because of his awesome customer service! Thank you!!!
tabitha Vazquez
1720539988
Wonderful and fast customer service!
LATEST BLOGS

