February 19, 2024 - Benjamin Ehinger
How to Remove Linoleum: A Step-by-Step Guide
CALL NOW 844-762-8449
Removing linoleum flooring can be a necessary step in updating your home’s interior or preparing for a new floor installation. While the task may appear daunting, with the proper instructions and tools, you can complete this home improvement project. Begin by gathering all the required equipment and make sure to protect yourself with safety gear, such as gloves and goggles, to prevent injuries from sharp objects and debris. Preparing the area by clearing furniture and appliances is equally important, ensuring you have ample space to work efficiently.
The removal process involves carefully cutting the linoleum into strips and peeling them off the subfloor. Techniques may vary, with some opting to use a floor scraper, while others might find using a sander or applying dry ice helpful to make the task easier. After the linoleum is removed, proper disposal of the material is crucial. Renting a construction dumpster may be an efficient way to handle waste materials. These steps will pave the way for installing your new flooring, leaving your space refreshed and updated.
 The successful removal of old linoleum flooring involves a two-step approach. First, you’ll cut and pry up the linoleum itself, followed by an adhesive removal process to ensure your subfloor is clean.
Key Takeaways
- Safety gear and prepared workspace are essential for effective linoleum removal.
- Different techniques can be used to remove the flooring, with dry ice or sanding as options.
- Renting a construction dumpster is a convenient solution for disposing of old linoleum.
Tools and Materials Needed
Before embarking on the removal of linoleum flooring, it’s essential to prepare by acquiring the right set of tools and selecting materials that will assist in an efficient and safe removal process.Gather Necessary Tools
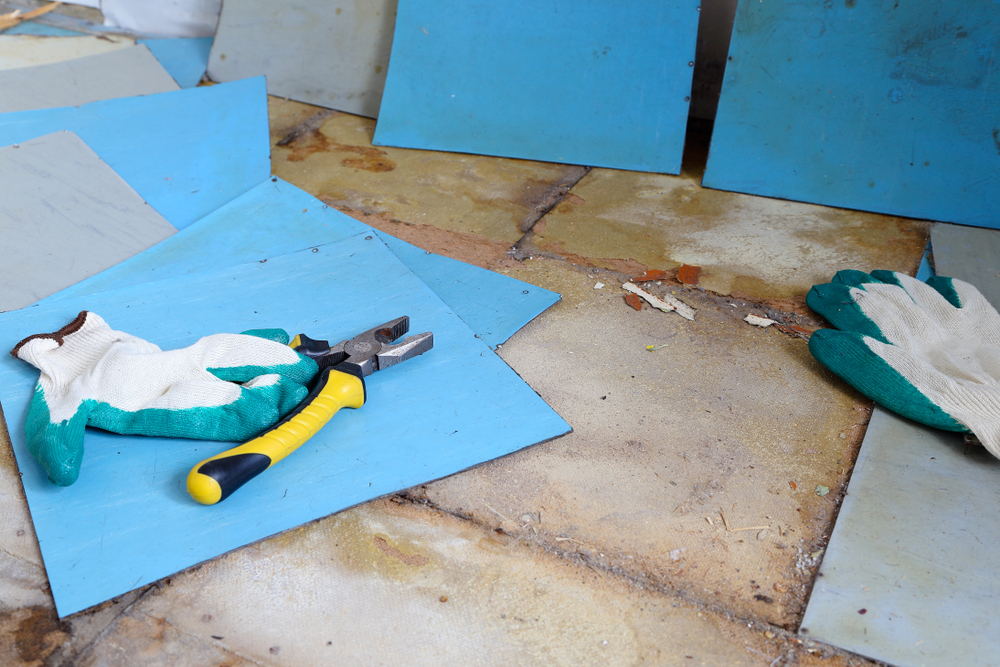
To effectively remove linoleum, you’ll need the following tools:- Utility Knife: For cutting the linoleum into manageable strips.
- Heat Gun or Hair Dryer: To soften the adhesive for easier removal.
- Floor Scraper or Putty Knife: To peel and scrape linoleum after heating.
- Pliers: To pull up linoleum pieces, especially around edges and corners.
- Heavy-Duty Trash Bags: For disposal of the old linoleum.
Select Appropriate Materials
Alongside tools, you must have these materials on hand:- Adhesive Remover: To dissolve glue residue left on the subfloor.
- Protective Gear: Safety glasses, gloves, and a dust mask to protect yourself.
- Cleaning Supplies: Including a mop, bucket, and floor cleaner for post-removal cleanup.
Preparation and Safety
Before beginning the process of removing linoleum, it’s crucial to prepare your work area and prioritize safety to avoid any accidents or damage.Clear the Work Area
- Remove all obstacles: Ensure that all furniture, appliances, and movable fixtures are removed from the area. A clear space facilitates easier access and movement.
- Cut into strips: For easier handling, slice the linoleum into 12-inch strips with a sharp utility knife.
Ensure a Safe Working Environment
- Wear protective gear: Always don a pair of thick gloves to protect your hands and goggles to shield your eyes from flying particles.
- Ventilation: Keep the area well-ventilated to avoid the inhalation of dust and any fumes from adhesives or solvents. Open windows and use fans if necessary.
Removal Process
The successful removal of old linoleum flooring involves a two-step approach. First, you’ll cut and pry up the linoleum itself, followed by an adhesive removal process to ensure your subfloor is clean.
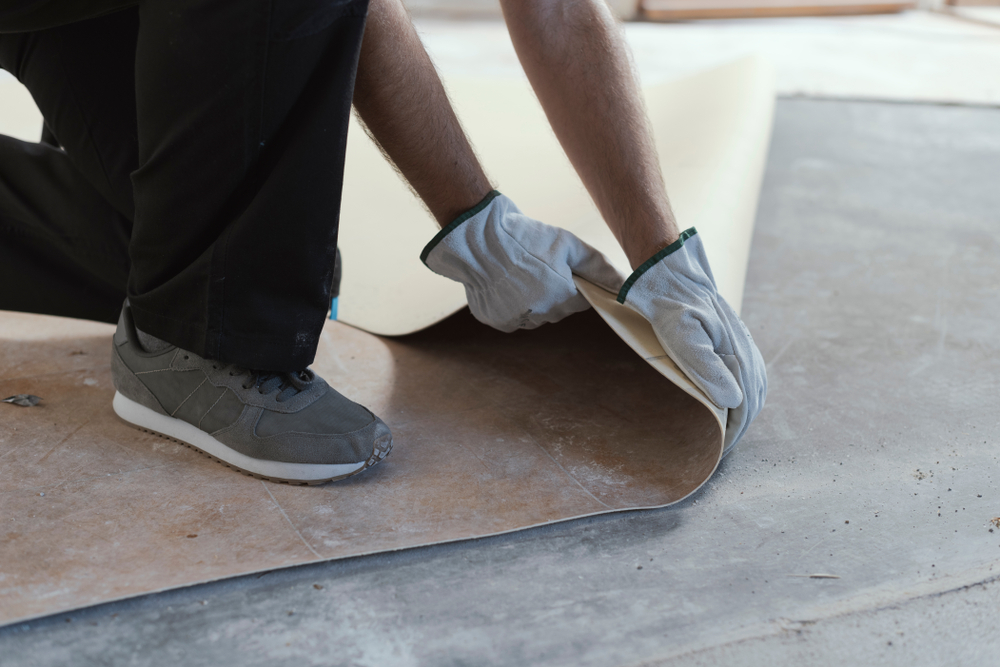
Cut and Pry Linoleum
To start, cut the linoleum into manageable strips, typically 6 to 12 inches wide, for easier handling. Score the surface with a sharp utility knife, ensuring you get through the top layer to make the prying process smoother. After scoring, use a floor scraper or pry bar to lift the edge of one of the strips, then gradually work your way down, pulling up the linoleum. You may find a heat gun useful to soften the adhesive as you go, easing the removal of material.Remove Adhesive
After you’ve removed the linoleum, you’ll often be left with a layer of adhesive on the subfloor. Start by scraping as much adhesive off as you can with a floor scraper. For any remaining adhesive, applying a commercial adhesive remover can be very effective. Follow the manufacturer’s instructions for the best results, usually applying the remover, allowing it to sit for the recommended time, and then scraping the adhesive away. Remember to provide adequate ventilation and wear protective gear during this step.Disposal and Cleanup
Proper disposal of old linoleum and thorough cleaning of the subfloor are crucial steps to ensure a safe and ready surface for new flooring installation.Dispose of Old Linoleum
Once you have removed the linoleum, you must dispose of it responsibly. Start by rolling up the strips or pieces of linoleum, and secure them with tape or twine. Check with your local waste management facilities to determine if they accept flooring materials and whether they have any specific requirements for disposal. Some materials may be recyclable, so inquire about recycling options to minimize environmental impact.Clean the Subfloor
After the linoleum is removed, there will likely be adhesive residue on the subfloor. To clean this, begin by scraping off any loose adhesive with a putty knife or a floor scraper. For stubborn areas, apply a solvent that’s suitable for the type of adhesive used, and always ensure good ventilation when using chemical products. Once loose material and residue are cleared, sweep the subfloor thoroughly, and follow up with vacuuming to eliminate all dust and debris. Before installing new flooring, make sure the subfloor is completely dry, level, and free of imperfections.Frequently Asked Questions
Below are the answers to common questions about the steps and materials needed to remove linoleum flooring efficiently.What is the most effective adhesive remover for linoleum flooring?
For removing the adhesive under linoleum flooring, commercial adhesive removers are quite effective. However, a more natural solution such as a mixture of vinegar and hot water can also be used to soften and remove the glue.What tools are essential for the removal of linoleum?
The essential tools you’ll need include a utility knife to cut the linoleum into strips, a floor scraper or a power scraper to lift the material, and possibly a heat gun to loosen the adhesive.Can you describe the steps to remove linoleum from a wood subfloor?
To remove linoleum from a wood subfloor, start by cutting the flooring into strips. Heat each section with a heat gun to loosen the adhesive and then use a floor scraper to gently lift the material to avoid damaging the wood beneath.What methods are recommended for removing linoleum from concrete surfaces?
When removing linoleum from concrete, apply a commercial adhesive remover after striping the flooring and use a heavy-duty scraper. For more stubborn adhesive, using dry ice can effectively freeze and loosen the glue for removal.What is the easiest way to remove old vinyl or linoleum flooring?
The easiest way is to score and cut the flooring into smaller sections. Use a heat gun to warm the adhesive and a scraper to lift the pieces. Power tools like a power scraper can make the job faster.How can linoleum glue be removed from plywood or wood subfloors?
After removing the linoleum, apply a solution of hot water and vinegar to the remaining glue, allow it to sit for a few minutes, then scrape the adhesive off with a floor scraper. Take care not to saturate the wood to prevent warping.RECENT BLOGS


Our Reviews

Glenda Lanier Prowell
1721758635
I have ordered an 11 yard dumpster to be delivered to my house.Lonier was extremely helpful and answered all my questions. The rate was very reasonable.

Cedric Smikle
1721660395
Amber was extremely professional and courteous. She answered all of my questions and even some that I didn’t know I needed to ask.

Cait Kaider
1721243051
I highly recommend Waste Removal USA for their responsiveness and how the staff work hard to provide exceptional customer service. They have done well by us and our clients. Thank you!

Easom Family
1721223306
Louiner Pierre-Louis Is awesome! Did a great job. Will definitely be using this same company for all my dumpster needs because of his awesome customer service! Thank you!!!

tabitha Vazquez
1720539988
Wonderful and fast customer service!
LATEST BLOGS
