May 1, 2024 - Benjamin Ehinger
Best Way to Remove Linoleum Flooring: A Step-by-Step Guide
CALL NOW 844-762-8449
Removing linoleum flooring can be a straightforward process if approached with the right tools and methodical steps. The key to effectively taking out old linoleum is understanding its adhesive characteristics and the best techniques to separate it from your subfloor. You’ll need to gather a few supplies like utility knives, heat guns, and adhesive remover. It’s important to begin by ensuring the work area is clear of furniture and other obstacles. Heating the linoleum can make the material more pliable, simplifying the removal of both the flooring and the underlying adhesive.
After you have removed the linoleum, you are likely to have a considerable amount of waste to deal with. Arranging a local dumpster rental from Waste Removal USA can help manage the debris efficiently and allow for a smooth transition to preparing your subfloor for a new flooring installation. Taking care to dispose of the old flooring responsibly not only tidies up your space but also prepares it for whatever renovation you have planned next.
 Properly removing linoleum flooring requires certain tools to ensure the job is done efficiently and safely. You’ll need a few essential removal tools, and you might consider some optional equipment to enhance the process.
 Properly preparing your subfloor is a crucial step after removing linoleum flooring to ensure the longevity and quality of your next floor installation. Whether you’re dealing with wood or concrete, attention to detail and correct tools can make a substantial difference.
Key Takeaways
- Proper preparation and the right tools are essential for removing linoleum.
- Heat application simplifies the removal of linoleum and adhesive.
- Efficient disposal of old linoleum is facilitated with a dumpster rental.
Understanding Linoleum Flooring
Before attempting to remove linoleum flooring, it’s important for you to understand its composition and the potential presence of asbestos, especially in vintage flooring.Composition and Characteristics
Linoleum is a durable, eco-friendly flooring material composed of natural ingredients. The main components of linoleum include linseed oil, which is oxidized and then mixed with pine rosin, ground cork dust, wood flour, and mineral fillers such as calcium carbonate, all of which are mounted onto a canvas or burlap backing. The result is a resilient sheet that can commonly be found in a variety of patterns and colors.- Main Components of Linoleum:
- Linseed oil
- Pine rosin
- Cork dust
- Wood flour
- Mineral fillers (e.g., calcium carbonate)
- Backing (usually canvas or burlap)
- Anti-bacterial due to the nature of linseed oil
- Fire-resistant to an extent
- Biodegradable, as it’s made from natural materials
- Versatile in terms of design options
Asbestos Considerations
When dealing with flooring installed decades ago, you must be cautious of asbestos, a group of naturally occurring, fibrous minerals that used to be widely used in building materials due to its durability and resistance to fire. Although not typically found in linoleum itself, asbestos might be present in the adhesive or the backing material of vintage linoleum flooring. It’s hazardous when fibers are airborne, as they can be inhaled and cause health issues including lung diseases. If your linoleum flooring is dated pre-1980s, it’s advisable to conduct an asbestos test before you proceed with removal. You can do this with an asbestos test kit, which is readily available for purchase. Here’s what you need to do:- Safely collect a sample of the flooring material according to the kit instructions.
- Send the sample to a lab for testing.
Preparatory Steps for Removal
Before you commence the removal of linoleum flooring, there are vital steps you must take to ensure a smooth and safe process. Proper preparation not only facilitates the removal but also ensures your safety.Clearing the Work Area
- Furniture and Appliances: Begin by completely emptying the room of all furniture and appliances. This will provide you with unobstructed access to the floor and avoid potential damage to your belongings.
- Flooring Access: Ensure you can reach all corners of the linoleum flooring. If it extends beneath appliances like the stove or refrigerator, carefully slide them out.
Safety Measures
To maintain a safe work environment, adhere to the following guidelines:- Protective Gear: Equip yourself with the necessary safety gear. At minimum, this includes:
- A respirator or mask to prevent inhalation of dust or harmful substances.
- Goggles for eye protection from debris.
- Gloves to protect your hands during the removal process.
- Ventilation: Keep the area well-ventilated to disperse fumes from adhesives and to maintain air quality. Open windows and, if possible, use fans to create airflow.
Tools and Materials
Properly removing linoleum flooring requires certain tools to ensure the job is done efficiently and safely. You’ll need a few essential removal tools, and you might consider some optional equipment to enhance the process.
Essential Removal Tools
To begin, you’ll need a utility knife for scoring the linoleum into sections, allowing for easier removal. A floor scraper or a putty knife will be your go-to tools for peeling up the scored linoleum. For more stubborn areas, a heat gun can soften the adhesive, making it easier for your scraper to get under the flooring. When dealing with tougher adhesives, solvents specifically designed for flooring applications can help in breaking down the glue.- Utility Knife: For scoring and cutting linoleum into sections.
- Floor Scraper/Putty Knife: To peel up and remove the linoleum.
- Heat Gun: To soften adhesive for easier removal.
- Solvent: To dissolve stubborn adhesive.
Optional Equipment
There are a few additional tools that can make the process of removing the linoleum flooring smoother. Knee pads will provide comfort and protection as you work on the floor. A hammer and pry bar might be necessary for removing any baseboards or trim without causing damage. An oscillating multi-tool can be incredibly helpful for getting under linoleum edges or cutting through tricky bits. Lastly, a wallpaper steamer might be used as an alternative to a heat gun for softening the adhesive.- Knee Pads: For protection and comfort while working on the floor.
- Hammer & Pry Bar: For non-damaging removal of trim or baseboards.
- Oscillating Multi-Tool: For precision work on linoleum flooring edges.
- Wallpaper Steamer: An alternative to heat guns for softening adhesive.
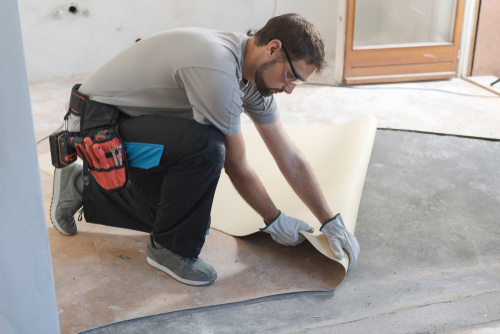
Removing Linoleum Flooring
When you decide to remove your old linoleum flooring, several key techniques can make the job easier. You’ll typically need a scraper, some form of heat source, and a solvent or chemical stripper to tackle the underlying adhesive.Cutting and Peeling Technique
Begin by cutting the flooring into strips around 6 to 12 inches wide using a utility knife. This makes it manageable to peel the floor covering away from the subfloor. Slide a scraper underneath the cut edge and carefully lift the linoleum. Work section by section to remove the material, maintaining steady pressure to prevent any tearing.Applying Heat for Easier Removal
To loosen the adhesive and make the linoleum easier to lift, employ a heat source like a blow torch carefully or, for a less intense heat, a hair dryer. Heat a manageable area and then use your scraper to remove the warmed linoleum. Move steadily along the floor, heating and scraping in succession to avoid cooling and re-hardening of the glue.Dealing With Stubborn Adhesives
After the linoleum is removed, you may encounter stubborn adhesives on the subfloor. To soften this hardened glue, a paint thinner or a specialized adhesive remover could be necessary. Apply the solution according to the manufacturer’s instructions, allow it to penetrate, and then scrape away the residue. iParam For safety, ensure the room is well-ventilated and you’re wearing protective gear when handling chemical strippers.Handling the Subfloor
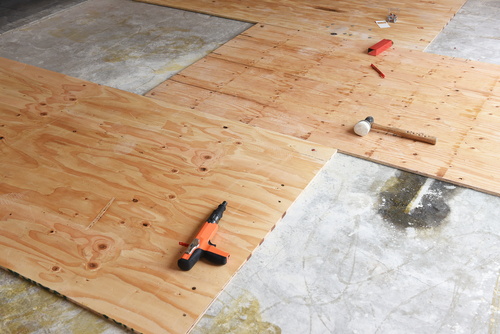
Properly preparing your subfloor is a crucial step after removing linoleum flooring to ensure the longevity and quality of your next floor installation. Whether you’re dealing with wood or concrete, attention to detail and correct tools can make a substantial difference.
Cleaning the Surface
Once you’ve successfully removed the linoleum, you’ll be faced with residue on the subfloor. For a wood subfloor, an oscillating tool can help remove stubborn adhesive without causing damage. With a concrete floor, you might need a combination of sanding and chemical removers to tackle the adhesive. Both surfaces should be thoroughly swept and vacuumed to clear all debris. If residue remains, consider using a damp mop with an appropriate cleaner to get rid of any lingering dust or particles.Damage Assessment and Repair
Inspect your subfloor for any signs of damage, such as deep gouges in wood or cracks in concrete. On a wood subfloor, small imperfections can be filled with wood filler but larger areas may require sanding down or even replacement of the affected sections. When examining a concrete floor, look for any signs of moisture issues from the lab tests and rectify them before proceeding. Cracks can usually be filled with concrete filler. For both types of subfloors, verify that the surface is level; use self-leveling compounds if necessary. Remember, attention to these details will ensure a better foundation for your new tiles or other flooring.Disposal and Post-Removal Cleanup
Once you’ve removed the linoleum, it’s crucial to dispose of the waste properly and to prepare the area for new flooring. This involves careful handling of debris and ensuring all residue is cleared away.Proper Disposal of Linoleum Waste
After removing linoleum, you need to handle the waste materials responsibly, especially if your linoleum is old and you suspect it might contain asbestos. If asbestos is present, do not cut, rip, or sand the linoleum, as this can release asbestos fibers into the air. You must consult with a professional to handle the material safely. For non-asbestos linoleum, disposal bags should be used to gather all the pieces, backing and adhesive scraps. Check with your local waste management services to understand the specific disposal guidelines, as construction materials often require special handling.Final Cleaning Before New Installation
Once all pieces have been removed and disposed of, your subfloor may be coated with adhesive residue. To prepare for the new flooring installation, you must thoroughly clean the subfloor. Here’s a step-by-step method:- Scrape to remove as much adhesive as possible.
- Apply isopropyl alcohol to the residue and allow it to sit for a few minutes.
- Scrub the surface with a brush to lift and remove the remaining adhesive.
- Wipe the area clean with a damp cloth to remove any remaining residue and alcohol.
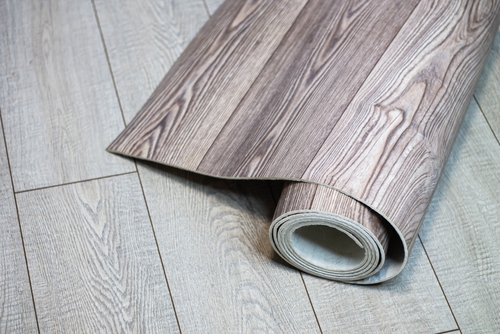
Installing New Flooring
Once your old linoleum flooring is removed, you’re on the path to revitalize your space with new flooring. Before diving in, it’s essential to consider the types of flooring materials available and understand the preparation steps involved to ensure a successful installation.Choosing New Floor Materials
Selecting the right type of floor covering for your space is crucial. Vinyl flooring is a popular choice due to its resilience and wide variety of patterns. Laminate flooring closely mimics the look of hardwood but is often more cost-effective and easier to maintain. If you’re interested in a premium look and feel, hardwood flooring remains a timeless option that can increase the value of your home. Evaluate the benefits of each type:- Vinyl Flooring: Water-resistant, durable, ideal for high-moisture areas.
- Laminate Flooring: Scratch-resistant, easy to clean, a range of styles.
- Hardwood Flooring: Natural beauty, long-lasting, classic appeal.
Preparing for New Floor Installation
Before installing your new flooring, ensure the subfloor is clean, smooth, and dry. Any remnants of old adhesive or irregularities can affect the finish, so take the time to address these issues. If you’ve chosen laminate or vinyl flooring, an underlayment might be necessary, which can aid in noise reduction and moisture protection. Here’s a streamlined approach:- Inspect the subfloor for damage and repair as needed.
- Clean the area thoroughly to remove debris and dust.
- Level the subfloor to avoid any imperfections under the new floor.
- Measure your room accurately to purchase the right amount of flooring product.
- Acclimate flooring materials to the room’s temperature and humidity by leaving them in the room for the recommended period.
Frequently Asked Questions
In this section, you’ll find targeted advice to tackle the removal of linoleum flooring, whether your subfloor is wood or concrete. Discover both the tools you’ll need and the substances that effectively dissolve adhesives.What techniques are recommended for removing linoleum flooring from a wood subfloor?
When working with a wood subfloor, heat and careful scraping are essential. Begin by softening the linoleum with a heat gun or hairdryer, then gently lift and peel away the material with a floor scraper, taking care not to damage the wood beneath.How can I effectively remove linoleum flooring from a concrete base?
For concrete bases, after initial stripping, apply a commercial adhesive remover to the leftover glue. If adhesive remains, dry ice may be used to freeze and loosen the stubborn glue for easier scraping.What is the best approach to take off old linoleum from a wooden floor?
The best approach for removing linoleum from a wooden floor includes scoring the surface into sections, heating these sections to weaken the adhesive, and then scraping the material off with caution to prevent damage to the wood.Which tools are most effective for linoleum removal?
Essential tools for linoleum removal include a utility knife for scoring, a heavy-duty floor scraper to lift the flooring, and a heat source, like a heat gun or hair dryer, to soften the adhesive for easier removal.How can I eliminate linoleum floor adhesive efficiently?
After removing the linoleum, deal with the residual adhesive by applying heat or using a solution like isopropyl alcohol, paint thinner, or adhesive remover. Always wear gloves to protect your hands during this process.What is the best adhesive remover for linoleum floors?
Selections for the best adhesive remover vary, but options such as commercial adhesive removers are generally effective. These solvents are designed to break down and dissolve the adhesive to facilitate cleanup after linoleum removal.RECENT BLOGS


Our Reviews

Glenda Lanier Prowell
1721758635
I have ordered an 11 yard dumpster to be delivered to my house.Lonier was extremely helpful and answered all my questions. The rate was very reasonable.

Cedric Smikle
1721660395
Amber was extremely professional and courteous. She answered all of my questions and even some that I didn’t know I needed to ask.

Cait Kaider
1721243051
I highly recommend Waste Removal USA for their responsiveness and how the staff work hard to provide exceptional customer service. They have done well by us and our clients. Thank you!

Easom Family
1721223306
Louiner Pierre-Louis Is awesome! Did a great job. Will definitely be using this same company for all my dumpster needs because of his awesome customer service! Thank you!!!

tabitha Vazquez
1720539988
Wonderful and fast customer service!
LATEST BLOGS
