Creating a home theater can transform your entertainment experience, bringing the magic of the cinema right into your living room. Understanding the necessary steps to set up your home theater will not only enhance your viewing experience but also ensure your investment is well spent. From planning your space to choosing the right equipment, every phase of this project requires careful consideration. If this project is a larger one, you might need a small dumpster rental for any debris and trash.
Selecting the perfect home theater system is crucial. You’ll need to consider factors such as screen size, sound quality, and the types of devices you plan to connect. Professional installation can help ensure everything works seamlessly and looks clean, with hidden wires and perfectly mounted TVs. It’s also essential to calibrate and optimize your system for the best audio-visual experience.
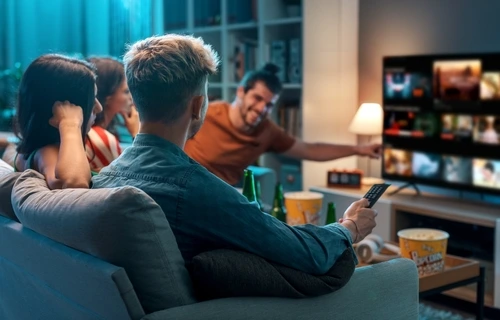
Enhancing your home theater doesn’t stop at installation. You can add comfort with plush seating and ambient lighting, creating an inviting space for friends and family. By following a detailed guide, you can enjoy a smooth and successful installation, leading to endless hours of high-quality entertainment.
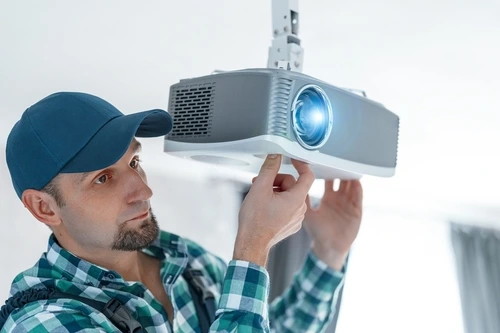 Proper installation and precise setup are essential for achieving optimal performance in your home theater system. This section covers mounting your screen and speakers, wiring and connectivity options, and configuring your receiver and source components.
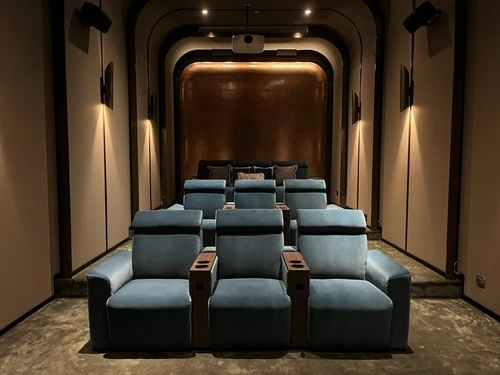 Upgrading your home theater involves integrating advanced features and carefully selecting furniture and decor to create an immersive and comfortable viewing environment. Key elements include state-of-the-art audiovisual technology and well-planned room aesthetics.
 Comprehensive Move-Out Cleaning Checklist: Essential Steps for a Spotless Exit
Date: September 16 ,2024
Key Takeaways
- Understand the steps to set up your home theater.
- Choose the right system and consider professional installation.
- Enhance your space with comfort and proper optimization.
Planning Your Home Theater Space
Creating the perfect home theater space involves careful consideration of room acoustics, equipment selection, and seating arrangements. Each of these elements contributes to an immersive and enjoyable viewing experience.Assessing Room Acoustics and Layout
Before you start, evaluate your room’s acoustics and layout. Proper acoustics reduce echoes and enhance sound quality. Carpeting and curtains help absorb unwanted sound reflections, while bass traps in corners can improve bass response. Think about the room’s shape and size. Rectangular rooms often provide better sound dynamics compared to square ones. Positioning your speakers correctly, often along the longer walls, ensures even sound distribution. Avoid placing speakers in corners or near walls to prevent sound distortion. Consider ambient light. Light control is crucial for a true theater feel. Heavy drapes or blackout shades can block out external light, creating the ideal conditions for watching movies.Choosing the Right Equipment
Select equipment that matches your room’s size and your visual and auditory preferences. Start with a high-quality projector or large screen TV. Projectors offer a larger screen size but require more light control, while TVs are easier to set up and often work better in well-lit rooms. Next, focus on the audio system. A 5.1 or 7.1 surround sound system immerses you in the movie, while soundbars can be a simpler alternative. Ensure your receiver can handle all your input devices, such as Blu-ray players, game consoles, and streaming devices. Don’t forget about wiring and cable management. Invest in quality cables that support high-definition video and lossless audio. Organize your cables to avoid clutter and ensure they don’t interfere with other equipment.Seating Arrangements and Viewing Angles
Choose seats that are comfortable and positioned for optimal viewing angles. Recliners are popular, but theater-style seating offers a traditional movie experience. Measure the distance from the screen to ensure viewers are neither too close nor too far; typically, 1.5 to 2.5 times the screen width works well. Consider tiered seating if your room allows it. This provides everyone with an unobstructed view of the screen. Make sure the seats are arranged to avoid straining necks and provide ample legroom. Lighting plays a role here too. Provide low-level ambient lighting to prevent eye strain without interfering with the picture quality. Wall sconces or dimmable LED lights along the floor can enhance the ambiance without causing glare.Selecting Your Home Theater System
Choosing your home theater system involves selecting the right display and audio components to create an immersive experience. You need to consider whether to use a TV or a projector, and what kind of surround sound setup will work best for your space.Display Technologies: TV vs. Projector
When deciding between a TV and a projector, think about your room’s size and lighting. TVs are great for smaller rooms and provide excellent image quality with less hassle. Modern TVs come in sizes ranging from 40 inches to over 85 inches and offer features like 4K resolution and HDR. Projectors are ideal for larger rooms and can produce much bigger images, up to 150 inches or more. They usually require a screen to display the image and work best in low-light conditions. Consider the resolution (1080p vs. 4K) and the brightness (measured in lumens). A higher lumen count is crucial for rooms with ambient light.Audio Components: Surround Sound and Speakers
A good audio system is crucial for a home theater. A 5.1 surround sound system (5 speakers and 1 subwoofer) is standard. This includes a center speaker for dialogue, left and right front speakers for on-screen action, rear left and right speakers for atmosphere, and a subwoofer for deep bass. For larger rooms, a 7.1 system adds two additional rear speakers. Ensure your receiver can handle the number of speakers you plan to use and supports Dolby Atmos for an even more immersive experience. Placement of speakers is key. The center speaker should be positioned directly above or below your display. Front speakers should be at ear level, equidistant from the viewing area. Subwoofers can be placed anywhere in the room, though corners are often best for bass. Consider wireless speakers for easier setup, though they may require occasional battery changes or charging. High-quality brands such as Bose, Sonos, and Klipsch offer both wired and wireless options. By carefully selecting these two critical components, you’ll be well on your way to a fantastic home theater experience.Installation and Setup
Proper installation and precise setup are essential for achieving optimal performance in your home theater system. This section covers mounting your screen and speakers, wiring and connectivity options, and configuring your receiver and source components.
Mounting Your Screen and Speakers
Mount your screen at eye level to ensure a comfortable viewing angle. Projectors should be placed in line with your screen’s dimensions, while flat-screen TVs can be securely mounted on a wall bracket. Speakers need careful placement to provide a balanced sound experience. Position your front speakers at ear level when seated. Place the center speaker below or above the screen. Surround speakers should be at ear level or slightly above, positioned behind the seating area. Subwoofers can be placed near a corner to enhance bass response. Use mounting brackets and stands to secure the speakers as needed. Consider wireless speaker options if running wires is problematic.Wiring and Connectivity
Efficient wiring and connectivity are crucial for seamless performance. Use HDMI cables for video sources like your cable box, Blu-ray, or DVD player as they support high-definition video and audio. Connect speaker wires from the receiver to the speakers. Ensure the polarity is correct to avoid sound phase issues. RCA cables may be necessary for some components, though HDMI is preferred for its superior quality. Integrate Wi-Fi for streaming services to reduce cable clutter and enable smart device control. Make sure to label your cables to simplify troubleshooting. Use cable management solutions to keep wires organized and avoid tangling.Receiver and Source Component Configuration
Your home theater receiver acts as the central hub for all audio and video components. Connect your source components (cable box, streaming devices, Blu-ray/DVD player) to the receiver using HDMI inputs. Set up the receiver’s audio calibration using its built-in microphone to tailor the sound to your space. Access the receiver’s menu to select appropriate sound modes and configure speaker settings. Ensure proper ventilation for your receiver to prevent overheating. Regularly update your receiver’s firmware to ensure compatibility with new devices and features. By focusing on these steps, you can ensure an efficient and high-quality home theater experience.Calibration and Optimization
Proper calibration and optimization of your home theater system are crucial for achieving the best audio and video performance. Ensuring accurate brightness, contrast, and color settings, as well as optimal sound through audio calibration, will significantly enhance your viewing experience.Video Calibration: Brightness, Contrast, and Color
To start with video calibration, adjust the brightness to ensure dark scenes are neither too gray nor completely blacked out. Use a test pattern to fine-tune this setting. Next, focus on contrast. Set it high enough to make white areas distinct without causing them to blur into each other. Proper contrast settings can enhance the details in bright scenes. For color accuracy, use a calibration disc or a colorimeter. These tools can help you adjust the colors to be true to life. Incorrect color settings can make the image look unnatural. It’s also essential to adjust the sharpness. Too much sharpness can introduce artifacts, while too little can make the picture appear blurry. Find a balance that maintains detail without adding noise.Audio Calibration: Achieving Optimal Sound
Start your audio calibration by positioning your speakers correctly. Ensure the front speakers are at ear level and the subwoofer is placed near a corner for better bass response. Use an SPL meter (Sound Pressure Level meter) to calibrate speaker levels. This ensures each speaker outputs sound at the same level, creating a balanced audio environment. Acoustic treatments like placing rugs or curtains can reduce unwanted echoes and reverberations. These treatments improve clarity and make dialogue more understandable. For subwoofer placement, consider the “subwoofer crawl” method. Place the subwoofer at your main listening position and play a bass-heavy track. Then, move around the room to find where the bass sounds best and place the subwoofer there. Configure your AV receiver’s settings to match your room measurements, and use automated calibration tools if available. This setup aligns your system’s output with your room’s acoustics for optimal sound.Enhancing Your Home Theater Experience
Upgrading your home theater involves integrating advanced features and carefully selecting furniture and decor to create an immersive and comfortable viewing environment. Key elements include state-of-the-art audiovisual technology and well-planned room aesthetics.
Incorporating Advanced Features
Incorporate 4K and OLED displays to achieve stunning picture quality with deep contrast and vibrant colors. For audio, consider upgrading to a Dolby Atmos sound system, which provides immersive, multi-dimensional audio that enhances your viewing experience. Use acoustic treatments like wall panels and bass traps to reduce echo and improve sound clarity. Adding a dedicated subwoofer can enhance low-frequency sounds, making your movies and music feel more impactful. Additionally, invest in a versatile entertainment system with smart capabilities to stream content seamlessly. Integrating voice controls and automation features can further elevate your theater experience.Furniture and Decor Selections
Select seating that maximizes comfort and ergonomics for extended viewing periods. Reclining chairs and loveseats with built-in cup holders and storage can add convenience and luxury. Place the seating in the center of the audiovisual setup to optimize the surround sound from your Dolby Atmos system. Choose furniture materials that complement the room’s decor while also being durable and easy to maintain. Consistent theming with movie posters, LED lighting, and blackout curtains can transform your space into a mini cinema. The lighting should be adjustable to maintain focus on the screen without creating glare. By integrating these elements, you can significantly enhance both the visual and auditory quality of your home theater, creating a truly immersive entertainment experience.Frequently Asked Questions
When installing a home theater, you may have several questions about costs, finding reputable services, and the necessary components.What are the typical costs associated with a professional home theater installation?
Professional home theater installation can cost anywhere from a few hundred to several thousand dollars. Variables include the complexity of the setup and the quality of the equipment.How do I find a reputable home theater installation service in my area?
You can find reputable home theater installation services through online reviews, word-of-mouth recommendations, and industry certifications. Websites like Angie’s List and HomeAdvisor can also be useful.Can installing a home theater system increase my home’s resale value?
A well-installed home theater system can potentially increase your home’s resale value. It’s an attractive feature for buyers who value quality entertainment setups.What should I expect in terms of labor costs when installing a home theater?
Labor costs for home theater installation can vary but typically range from $50 to $100 per hour. Complex setups, including custom installations, may incur higher labor fees.What components are necessary for a complete home theater setup?
A complete home theater setup generally includes a TV or projector, speakers, an AV receiver, and source devices like a Blu-ray player or gaming console. High-quality speaker wire is also essential; Audioholics recommends 16-gauge wire for runs of less than 50 feet.What are the steps involved in setting up a home theater system?
The basic steps for setting up a home theater system include selecting your equipment, positioning your speakers, and connecting all components. Using guidelines like those from Today’s Homeowner can help ensure optimal placement and performance.RECENT BLOGS

 Comprehensive Move-Out Cleaning Checklist: Essential Steps for a Spotless Exit
Date: September 16 ,2024


Our Reviews

Mark Ramick
1725926374
Amber was awesome in helping me schedule the right dumpster for my job. Thanks again

Brian Healy
1725553543
Heather was so very pleasant, informative and charming. Next time… I will use you again.

Brandi Childers
1724853716
Ricardo helped me with my reservation. He made everything super clear and answered all my questions to help me pick the right dumpster to rent!

Steven Hewett
1724785537
Heather made the sales and scheduling experience extremely easy. Thank you for having great employees that care about conducting great business.

Jackson Vandiver
1724703158
Great service and fantastic customer service department. I would use them again.