April 2, 2024 - Benjamin Ehinger
Yard Drainage Solutions Do It Yourself: Easy Techniques for Homeowners
CALL NOW 844-762-8449
Managing excess water in your yard through do-it-yourself drainage solutions can save your property from the damaging effects of puddles and soggy grounds. Not only can efficient yard drainage solutions protect your home and landscaping, but taking control of water flow can also enhance your outdoor space’s health and aesthetics. Whether you’re dealing with small-scale surface runoff or more extensive water collection issues, several approaches can be taken to improve your yard’s drainage.
Efficient drainage starts with understanding your yard’s specific needs and planning the right approach. This might involve installing downspouts and gutters, constructing a French drain system, or implementing a dry well to collect excess water. At times, you may need to correct soil grading or adjust the landscaping to promote better water flow. Bear in mind that implementing these solutions could involve the removal of dirt and debris, for which a yard waste dumpster rental from Waste Removal USA may become a necessary part of the project.
 When tackling DIY yard drainage projects, selecting appropriate materials and assembling the right tools are fundamental steps that will determine the success of your endeavor.
 When you’re tackling yard drainage, installing a French drain can be an effective solution. It involves digging a trench and laying a pipe to divert water away from your home’s foundation or low-lying areas of your landscape.
 Effective yard drainage doesn’t just prevent water accumulation; it can also enhance the aesthetics of your outdoor space. Landscaping solutions not only manage water runoff but can also add beauty through strategic plant placements and earth sculpting.
Key Takeaways
- DIY drainage solutions can protect your home and enhance your property.
- Proper planning and utilization of methods like French drains and dry wells are essential.
- Regular maintenance ensures long-term effectiveness of your drainage system.
Understanding Yard Drainage
Effective yard drainage is essential for maintaining a healthy landscape and preventing potential damage to your home’s foundation. Addressing drainage issues promptly can save you from costly repairs down the line.Assessing Your Yard’s Drainage
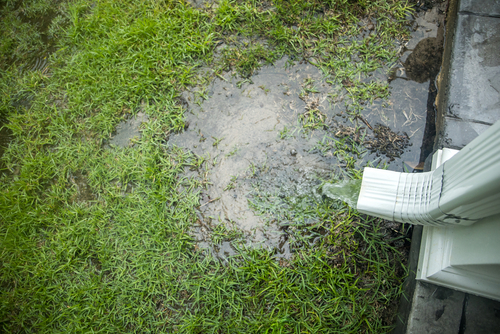
To determine if your yard has effective drainage, observe how water behaves during a heavy rain. Are there areas where water pools or does it drain away efficiently? Your yard should slope away from your house, guiding water towards a drainage system or the street. Standing water or a soggy yard are indicators of poor drainage that need attention.Identifying Common Drainage Problems
There are several telltale signs to watch out for when identifying yard drainage problems:- Wet Spots: These are areas where water gathers and remains after most of the yard has dried up.
- Soggy Yard: A consistently wet yard can be the result of a high water table or poor soil composition.
- Standing Water: This is a clear sign of poor drainage, especially if water remains for longer than 24 hours.
Planning Your Drainage Solution
Proper planning is essential for creating an effective yard drainage system that addresses water pooling issues while enhancing the aesthetic appeal of your landscape. Understanding the specific characteristics of your soil and the topology of your land is the foundation on which you will design and build your drainage solutions.Designing an Effective Drainage System
To design a drainage system that works seamlessly with your yard, begin by assessing the slope and grading of the land. The natural inclination of your yard will dictate the direction of water flow, which is crucial for deciding on the placement of features like swales or dry creek beds. If your yard has a noticeable slope, you might direct excess water into a rain garden to both manage drainage and create a visually appealing feature. When designing, remember to incorporate elements that blend with your landscape while ensuring they fulfill their functional role.Considering Soil Types
Different soil types affect drainage capabilities significantly. Clay soils tend to hold water and drain poorly, while sandy soils allow water to pass through more easily. To test your soil’s drainage, dig a small hole, fill it with water, and observe how quickly it drains. This test will help you determine if you need to amend your soil or install specific drainage solutions to combat soggy grounds. For soil with low permeability, you might opt for raised beds or adding organic matter to improve its structure and drainage potential. If your soil drains too quickly and fails to retain moisture for plants, consider using mulch or incorporating water-retentive additives.Tools and Materials Needed
When tackling DIY yard drainage projects, selecting appropriate materials and assembling the right tools are fundamental steps that will determine the success of your endeavor.
Choosing the Right Materials
To ensure efficient water movement and filtration, you need to incorporate materials such as rocks, sand, and crushed gravel. These support proper drainage and prevent soil from clogging your system. Landscape fabric is essential as it acts as a barrier, keeping the dirt away from your drainage system and preventing it from getting blocked. When using piping for your drainage, consider using a fabric sock, which wraps around your drainage pipe to increase its efficacy and longevity by preventing silt and roots from penetrating.Gathering Necessary Tools
Your toolkit for this project should include a shovel for digging trenches, a level to ensure proper slope for water flow, and garden scissors or a utility knife to cut the landscape fabric. You may also need different types of saws depending on whether you have to cut through concrete or other materials to create a trench. Ensure to have a wheelbarrow or similar container to transport materials like rocks and sand to your project site. Keeping these tools on hand will keep you prepared and efficient as you work on improving your yard’s drainage.Installing Downspouts and Gutters
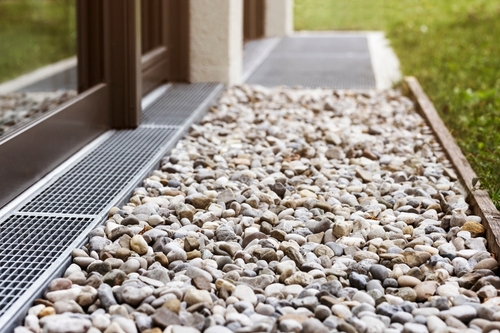
Proper installation of gutters and downspouts is crucial for effective yard drainage. They are your home’s first line of defense against water damage by directing rainwater away from your foundation.Attaching Gutter Downspouts
To attach gutter downspouts, first measure the length from the gutter to the ground to determine the downspout size. Secure the downspout outlet to the gutter with rivets or screws at the marked locations. Ensure that each section of the downspout is securely fastened together. Use straps to hold the downspout against the siding of your house, giving special attention to the joints to prevent leaks.Extensions and Connections
Downspout extensions are necessary when you want to direct the water further away from your foundation. For proper drainage, attach a flexible or rigid downspout extension to the bottom of the downspout. Ensure that the connection is tight and seal any joints with waterproof sealant to prevent leaks. The extension should slope away from the house, guiding the water towards a suitable drainage area.Creating a French Drain System
When you’re tackling yard drainage, installing a French drain can be an effective solution. It involves digging a trench and laying a pipe to divert water away from your home’s foundation or low-lying areas of your landscape.
Digging Trenches for a French Drain
To begin, assess your property for the ideal drainage area. You’ll need a downward slope from the starting point of your French drain to the exit for effective drainage – a process known as grading. Here’s how to proceed:- Mark the Trench Path: Identify and flag the route, ensuring you avoid underground utilities.
- Dig the Trench: Aim for a general width of 9-12 inches and a depth of around 18 inches to accommodate the pipe and gravel.
- Ensure Proper Slope: The trench must have a minimum slope of 1%, ensuring gravity aids in moving the water away from your property.
Laying the Drainage Pipe
After the trench is prepared, it’s time to install the drainage pipe:- Line the Trench: Lay a layer of landscape fabric, followed by gravel, to prevent soil from clogging your pipe.
- Place the Pipe: Install a perforated drainage pipe along the length of the trench, holes facing down for efficient water capture.
- Cover with Gravel: Add more gravel on top, then fold over the landscape fabric to create a barrier.
- Finish the Surface: Cover the gravel and fabric with topsoil or a finish appropriate for your landscape.
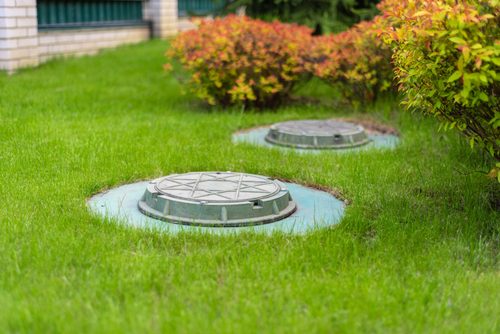
Enhancing Drainage with Dry Wells
A dry well is an effective in-ground drainage system that captures and redirects runoff. It serves as a termination point, where excess water can percolate back into the soil, away from buildings and other structures.Constructing Your Own Dry Well
Materials Needed:- Perforated Dry Well Tank
- Washed Gravel
- Landscape Fabric
- PVC Piping
- Shovel
- Choose Location: Find a spot at least 10 feet from your home’s foundation and on the natural drainage path in your yard. It should also be far from utility lines.
- Conduct a Perc Test: Ensure your soil can absorb water efficiently with a percolation test—dig a small hole, fill it with water, and monitor the absorption rate.
- Excavate the Hole: The hole should be wider and deeper than the dry well tank. Aim for about 2 to 3 feet of gravel beneath and around the tank to facilitate proper drainage.
- Lay Foundation: Line the hole with landscape fabric to prevent soil from clogging gravel. Add a 6-inch layer of washed gravel.
- Install the Tank: Place the dry well in the center of the hole. Connect it to the PVC piping that channels runoff to the dry well. Make sure the pipes have a slight downward slope towards the dry well for gravity to do its work.
- Cover with Gravel: After the tank is set and connected, fill the remaining space with gravel, ensuring the tank’s top is covered by at least 1 inch of gravel for optimal filtration.
- Wrap Up: Fold the landscape fabric over the gravel and cover the area with soil or turf, whichever suits your landscape design.
Correcting Soil and Grading
Effective drainage in your yard largely depends on proper soil composition and grading. If your yard holds water or has poor drainage, you might need to amend the soil and adjust the landscape slope to steer water away from your home.Improving Clay Content in Soil
Heavy clay soils can impede proper drainage and lead to waterlogging. To improve drainage in clay soil:- Add organic matter: Incorporate rich organic material like compost or aged manure into your soil. This increases aeration and creates a more porous soil structure allowing for enhanced water movement.
- Employ aeration techniques: Regular aerating helps combat compaction. Use an aerator tool to create holes in the soil, providing channels that facilitate water flow and root growth.
Regrading for Proper Drainage
Correct regrading can significantly minimize drainage problems:- Identify high and low points: Determine where the high and low areas of your yard are, as water flows from high to low.
- Create a gentle slope: Aim for a slope of about 5% away from your home over the first 10 feet. This requires a drop of about 6 inches to ensure proper drainage.
- If needed, consult professional landscapers or grading experts, particularly when managing large areas or severe slopes.
Landscaping for Drainage Solutions
Effective yard drainage doesn’t just prevent water accumulation; it can also enhance the aesthetics of your outdoor space. Landscaping solutions not only manage water runoff but can also add beauty through strategic plant placements and earth sculpting.
Using Plants for Drainage
Plants play a crucial role in soil stabilization and drainage management. Deep-rooted plants such as willows or rushes can absorb excess water, while a well-maintained lawn can prevent erosion and improve surface drainage. Utilize these landscaping elements by planting in areas where water pools to assist in natural absorption and enhance your yard’s appearance.- Grasses: Tall fescue and ryegrass offer deep roots that help drain water efficiently.
- Ground covers: Plants like creeping Jenny, which tolerate moist conditions, can spread across wet areas, offering cover and beauty.
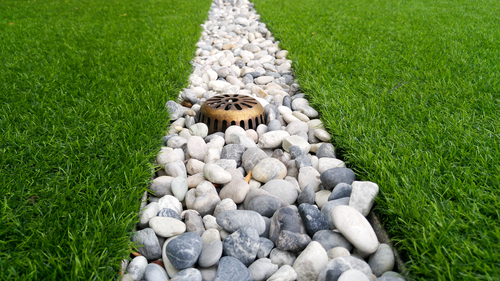
Creating Swales and Creek Beds
Swales and dry creek beds serve as charming and effective solutions for directing excess water away from critical areas such as foundations. To construct a swale:- Identify low areas where water collects.
- Excavate a gently sloping trench leading toward a suitable exit point.
- Line the trench with landscape fabric to prevent weed growth and secure the structure.
- Fill with gravel or river rock for effective drainage.
- Dig a winding course mimicking a natural creek, with varying widths for aesthetic appeal.
- Line with fabric and fill with coarse sand, gravel, then larger river stones on top.
- Accent with larger boulders or hardscape features for a more natural look.
Maintenance and Prevention
Effective yard drainage is not just about installation but also about ongoing maintenance and preventive measures. Keeping your drainage system in top shape can save you from costly repairs in the long run.Regular Cleaning and Inspections
- Weekly: Check your drainage system for any visible debris such as leaves, twigs, or trash. Remove any blockages by hand or with appropriate tools to ensure a clear flow of water.
- Monthly: Inspect for any signs of leaks or erosion around your yard drains. Early repair can prevent significant damage, so addressing these issues promptly is essential.
- Seasonally: Before the onset of heavy rain or snow, make sure all systems are clear of any obstructing materials. This includes checking grates and pipes and ensuring the lawn’s slope continues to direct water away correctly.
- Annually: Conduct a comprehensive review of your entire drainage system. Look for signs of wear or damage in pipes, and replace parts as necessary. This is also a good time to assess if your current system meets the needs of your yard or if any DIY solutions for yard drainage improvements are required.
Preventing Future Drainage Problems
- Vegetation management: Plant roots can cause blockages or pipe damage. Regularly prune and manage the plants around your drainage system.
- Observation after rainfall: Pay close attention to how water flows during a storm. This can help you identify potential problem areas that need intervention.
- Gutter linkage: Ensure that your gutter downspouts are properly connected to the yard drainage system to prevent water from pooling close to your home.
- Slope checks: Maintain the slope of your yard to prevent water from pooling. Periodically check for and correct any changes in the landscape that may affect drainage.
- Material choice: Use high-quality, durable materials for any repair or DIY project to ensure the longevity of your system.
Water Collection and Reuse
Incorporating water collection systems in your yard can greatly enhance drainage management and provide an eco-friendly supply for irrigation. This practical approach not only addresses excess runoff but also conserves water and can contribute to a healthier water table.Rain Barrels for Water Management
Rain barrels are an efficient solution for managing excess runoff and reducing the burden on storm drains. By strategically placing rain barrels beneath downspouts, you can capture rainwater which would otherwise contribute to a wet yard or overwhelm local drainage systems. Here’s how you can use rain barrels effectively:- Select the Right Size: Choose a rain barrel size based on your roof’s surface area and average rainfall. This ensures you maximize water collection without overfilling the container.
- Location: Place your barrel on a solid, level base near a downspout. Ensure it’s easily accessible for maintenance and connecting a hose or spigot.
- Connect Multiple Barrels: For greater capacity, you can link multiple barrels together. This allows for more water collection and even distribution across your property.
- Maintenance: Regularly check for leaks, debris in gutters that might block water flow, and clear the rain barrel’s filter to prevent clogs.
Frequently Asked Questions
In this section, you’ll find targeted responses to commonly asked questions regarding do-it-yourself yard drainage solutions. These answers should provide a practical starting point for tackling your yard’s specific drainage concerns.How can I resolve poor drainage in my yard by myself?
You can often resolve poor drainage by redirecting water away from problematic areas. For example, you might slope the ground away from your house or improve soil absorption by adding organic material.What steps should I take to plan an effective backyard drainage system?
Begin by identifying where excess water is pooling and determine the highest point of your yard. Then, plan a route for the water to flow downhill. You might need to dig a swale or a creek bed along this route.What are some DIY solutions for addressing a swampy yard?
For a swampy yard, installing a French drain or a curtain drain can be effective. You can also create a rain garden that uses water-loving plants to absorb excess water.What are effective water drainage systems for a sloped backyard?
In a sloped backyard, a dry creek bed can be a picturesque and practical solution. Terracing the slope and installing diverters to guide the water can also be effective.How can I create a drain catch basin for my yard drainage issues?
A drain catch basin can be created by digging a hole at the lowest point of your yard, lining it with fabric, filling it with gravel, and installing a catch basin with an outlet pipe that diverts water away from your property.What are the different types of yard drains I can install on my own?
You have several options for yard drains, including French drains, channel drains, catch basins, and dry wells. Your choice will depend on the specifics of your yard’s topography and how much water you need to manage.RECENT BLOGS


Our Reviews

Glenda Lanier Prowell
1721758635
I have ordered an 11 yard dumpster to be delivered to my house.Lonier was extremely helpful and answered all my questions. The rate was very reasonable.

Cedric Smikle
1721660395
Amber was extremely professional and courteous. She answered all of my questions and even some that I didn’t know I needed to ask.

Cait Kaider
1721243051
I highly recommend Waste Removal USA for their responsiveness and how the staff work hard to provide exceptional customer service. They have done well by us and our clients. Thank you!

Easom Family
1721223306
Louiner Pierre-Louis Is awesome! Did a great job. Will definitely be using this same company for all my dumpster needs because of his awesome customer service! Thank you!!!

tabitha Vazquez
1720539988
Wonderful and fast customer service!
LATEST BLOGS
