February 9, 2024 - Benjamin Ehinger
Removing Lath and Plaster: A Comprehensive Guide for Homeowners
CALL NOW 844-762-8449
Removing lath and plaster is often a significant step in the remodeling process of older homes. If your home improvement plans involve updating or completely changing the layout of your space, you’ll have to tackle this task with care. Lath and plaster, a traditional building method, involves a series of wood strips (lath) covered by a plaster made of sand, lime, and horsehair or other fibers. This method provided a sturdy and insulative wall surface but is no longer compatible with the needs of modern electrical and plumbing updates.
Before taking a swing at your old walls, it’s essential to be prepared for what can be a dust-laden and labor-intensive project. Ensuring proper safety gear and procedures is crucial, as is having a strategy for the disposal of material. Plaster and lath removal generates significant debris, but a remodeling dumpster rental can ease the process. These rentals provide a convenient way to handle waste and keep your project site clean. When disposing of plaster and other renovation debris, be sure to check with your rental provider for any disposal guidelines or restrictions.
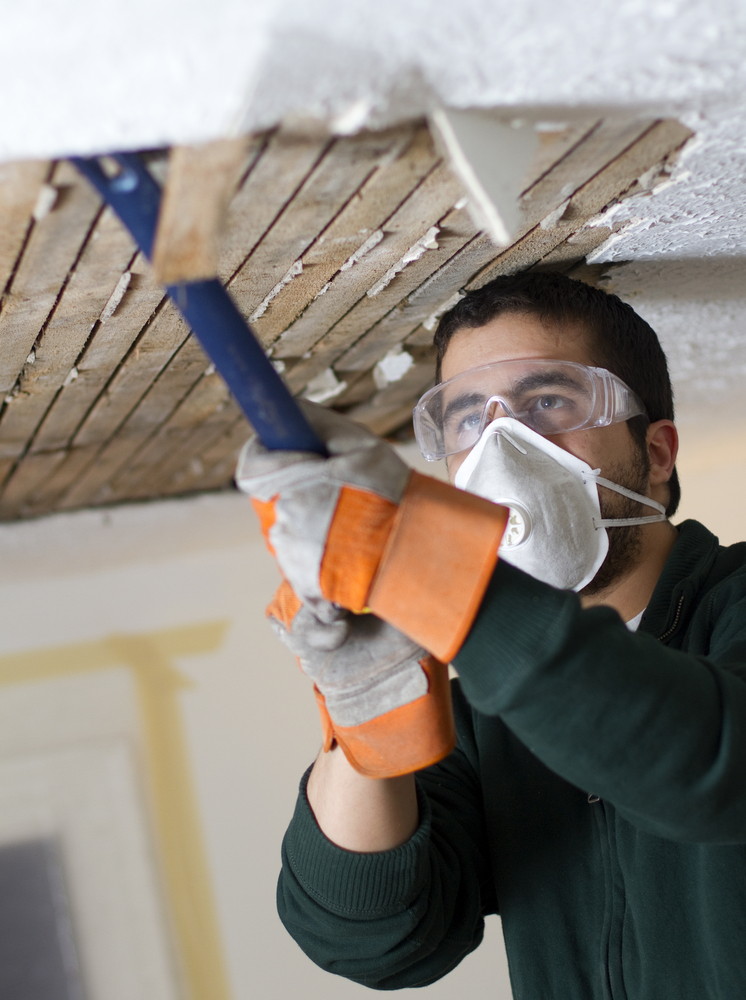 When you’re ready to remove lath and plaster, the correct approach can save you time and reduce mess. Be sure to wear appropriate personal protective gear due to the dust and debris that will ensue.
Key Takeaways
- Lath and plaster removal is a common, yet intensive, part of modernizing older homes.
- Adequate preparation, including safety measures and debris management, is essential.
- Secure a remodeling dumpster rental for an efficient cleanup and debris disposal process.
Understanding Lath and Plaster
Before diving into the process of removal, it’s essential to grasp what lath and plaster involve. You’ll encounter the history, composition, and common applications, all of which will inform your approach to handling these materials.History and Composition
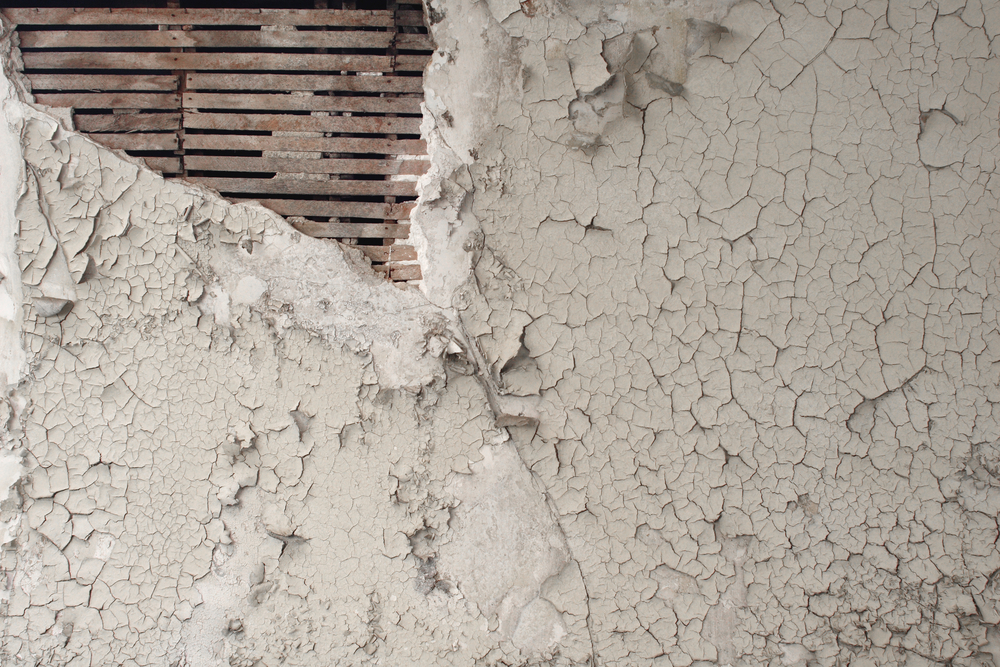
Lath and plaster have been fundamental in building for centuries, providing an effective way to create sturdy, fire-resistant walls before the advent of drywall. Traditionally, lath refers to the wooden slats that are nailed to the structural framing of the walls. On these laths, plaster, a mixture typically composed of powdered lime, sand, and fibers like horsehair, is applied. These fibers add strength and flexibility to the plaster, creating a durable surface.- Composition of Traditional Plaster:
Material Purpose Powdered Lime Binds the mixture Sand Provides bulk and structure Fibers (e.g., horsehair) Adds strength and flexibility
Common Uses and Applications
Lath and plaster were widely used for interior walls and ceilings, especially between the 1700s and the mid-20th century. This method was favored for its fire resistance, insulation properties, and soundproofing capabilities, advantages that were significant in an era before modern building materials were available.- Advantages of Lath and Plaster:
- Fire resistance: Slow to combust, providing more protection than early drywall variants.
- Insulation: Dense material composition helps to keep spaces warm.
- Soundproofing: Thickness and density of walls dampen sound transmission.
Preparing for Removal
Before you begin the removal of lath and plaster, it’s essential to set the stage for a safe and efficient process. This involves taking the right safety precautions, having all the necessary tools and materials at hand, and making a thorough initial assessment and planning of the task ahead.Safety Considerations
Your safety is paramount when undertaking the removal of lath and plaster. Dust and debris are major concerns, so wear a dust mask or a respirator to avoid inhaling particles. Eye protection in the form of safety goggles is also critical. Additionally, ensure the room is well-ventilated and that you’ve sealed off the work area with plastic sheeting to prevent dust from spreading to other parts of the house.Tools and Materials Required
Here’s a list of tools and materials you’ll need for this project:- Crowbars or pry bars: For prying off lath strips.
- Hammer: To remove nails and help in prying.
- Reciprocating saw: For cutting through large sections of plaster.
- Utility knife: For scoring plaster and cutting plastic sheeting.
- Heavy-duty trash bags and shovels: To dispose of smaller debris.
- Residential dumpster rental: This is crucial for an efficient cleanup and disposal of large amounts of waste material.
- Personal Protective Equipment (PPE): Including gloves, long-sleeve clothing, and protective footwear.
Initial Assessment and Planning
Inspect the walls and ceilings you plan to remove for any signs of asbestos or lead paint. If you suspect the presence of these hazardous materials, consult a professional before proceeding. Take note of any electrical wiring, plumbing, or fixtures that could be hidden in the wall. It’s important to map out these elements to avoid accidental damage. Plan your waste disposal strategy—ensuring that your home dumpster rental is in place and confirm that it will be able to handle the volume of debris expected. By following these guidelines and planning effectively, you can tackle the task of removing lath and plaster with confidence.Execution of Removal
When you’re ready to remove lath and plaster, the correct approach can save you time and reduce mess. Be sure to wear appropriate personal protective gear due to the dust and debris that will ensue.
Removal Techniques
1: Preparation- Ensure the work area is secure and that dust sheets are laid out.
- Remove any furniture and fixtures to prevent damage.
- Use a hammer and a stout trowel to break the plaster away from the lath.
- Start from the top and work your way down, tapping gently to avoid unnecessary damage to the underlying structure.
- Once the plaster is down, remove the individual laths by prying them away from the studs or joists.
Handling and Disposal of Debris
Debris Segregation- Keep plaster and lath separate to facilitate easier transport and possible recycling options.
- Bag the plaster debris in heavy-duty contractor bags.
- Bundle the lath for easy carrying, and check if it can be recycled or should be disposed of as construction waste.
Post-Removal Procedures
Once the bulk of the lath and plaster has been removed, it’s essential to carefully inspect and prepare the underlying surfaces. This sets the stage for a successful restoration or renovation.Wall Inspection and Repair
After you remove all the plaster, ensure the exposed studs and framework are structurally sound. Look for signs of damage like cracks, rot, or mold. If you discover any compromised areas, address these issues immediately. For example, if you notice a crack in a supporting beam, it may require reinforcement or replacement.- Check for:
- Structural integrity
- Insect infestations
- Moisture damage
- Repair:
- Use appropriate materials like new timber for studs.
- Ensure all repairs comply with local building codes.
Surface Preparation for Finishing
Your next step is to prepare the surfaces for finishing. Whether you’re planning to install drywall, apply new plaster, or another wall finish, the preparation is the same. Start by removing all nails and debris from the studs and ensuring the surface is smooth and level. You should also:- Clean: Remove all dust and debris to create a clean working environment.
- Smooth: Sand any rough spots on the studs or surrounding surfaces.
- Prime: If you’re moving to paint or wallpaper, apply a primer suited for the specific material that will cover the walls.
Frequently Asked Questions
When tackling the removal of lath and plaster, safety and technique are paramount. Each question below addresses specific aspects of the process to guide you safely and efficiently through your project.What is the safest way to remove lath and plaster from walls and ceilings?
Your safety is the priority when removing lath and plaster. Wear protective gear, including a dust mask and safety goggles, and prepare for a dust storm by covering furniture and sealing the room. Work systematically to prevent unnecessary damage to the underlying structure.What are the potential hazards of removing lath and plaster, and how can they be mitigated?
Removing lath and plaster can expose you to dust and potential allergens. Mitigate these risks by ensuring good ventilation, wearing protective clothing, and conducting lead or asbestos tests if your house predates 1978. Anticipate structural integrity risks by consulting a professional when in doubt.How can lath and plaster be effectively removed for insulation purposes?
To remove lath and plaster for insulation, first disconnect any electrical fittings. Then, methodically detach the plaster from the lath to expose the stud cavity using a utility knife and a hammer. Ensure that you dispose of debris safely and prepare the exposed area thoroughly for new insulation.What tools are most effective for cutting through plaster and lath during removal?
A reciprocal saw or an oscillating tool with a sharp blade efficiently cuts through plaster without damaging the lath. However, in situations requiring greater precision or control, a utility knife and a hammer may be preferable for cutting the plaster walls.What are the average costs associated with removing lath and plaster walls?
The costs vary depending on the project’s size, location, and potential disposal fees. Generally, hiring a professional may run into several thousand dollars, while DIY methods will mainly incur the cost of tools, protective gear, and waste disposal.What are the benefits and considerations of replacing lath and plaster walls with drywall?
Replacing lath and plaster with drywall modernizes your home, improves insulation, and can be a more stable option. Consider the characteristics of your lath and plaster walls and weigh them against the cleaner finish and easier maintenance that drywall provides, along with the investment of time and money the process requires.RECENT BLOGS


Our Reviews

Glenda Lanier Prowell
1721758635
I have ordered an 11 yard dumpster to be delivered to my house.Lonier was extremely helpful and answered all my questions. The rate was very reasonable.

Cedric Smikle
1721660395
Amber was extremely professional and courteous. She answered all of my questions and even some that I didn’t know I needed to ask.

Cait Kaider
1721243051
I highly recommend Waste Removal USA for their responsiveness and how the staff work hard to provide exceptional customer service. They have done well by us and our clients. Thank you!

Easom Family
1721223306
Louiner Pierre-Louis Is awesome! Did a great job. Will definitely be using this same company for all my dumpster needs because of his awesome customer service! Thank you!!!

tabitha Vazquez
1720539988
Wonderful and fast customer service!
LATEST BLOGS
