April 1, 2024 - Benjamin Ehinger
Removing Baseboards: A Step-by-Step Guide for Clean and Damage-Free Results
CALL NOW 844-762-8449
Removing baseboards is a common task for homeowners looking to update their space, repair walls, or replace old molding. As a DIY project, it’s essential that you approach the job with careful planning to avoid damaging your walls or flooring. Whether you’re removing a single section or tackling an entire home renovation, understanding the correct technique is crucial for a successful outcome.
If this process is part of a larger renovation, you may find that the debris and old baseboards require a significant disposal effort. In such cases, considering the rental of a small 10-yard dumpster could facilitate an efficient cleanup. Remember, patient and methodical work ensures the smooth removal of baseboards and prepares you for the subsequent steps, whether it’s repairing the walls for painting or installing new baseboards.
 Removing baseboards can be a straightforward process, but you may encounter sections that are challenging due to obstacles, adhesives, or nails. Tackling these difficult sections requires a strategic approach and the right tools.
 After successfully removing your baseboards, it’s crucial to prepare them properly before reattaching them to ensure a neat and secure fit against the wall and flooring.
Key Takeaways
- Proper preparation ensures efficient baseboard removal without wall damage.
- Renting a small dumpster can simplify the disposal of renovation debris.
- Knowing removal and reinstallation techniques supports successful DIY home projects.
Preparation Before Starting
Before you begin the process of removing baseboards, it’s crucial to have your tools ready and to prepare the work area to prevent damage to your floors and walls.Assembling Tools
To successfully remove baseboards, you need the right set of tools. Here’s a checklist of what you’ll need:- Utility Knife: For cutting through the caulk or paint seal.
- Pry Bar: A thin, flat tool for prying the baseboards away from the wall.
- Crowbar: Optional, for increased leverage if baseboards are particularly stubborn.
- Hammer: To assist in gently tapping the pry bar or crowbar behind the baseboards.
- Gloves: To protect your hands during the process.
Prepping the Work Area
Your work area needs to be clear of obstructions and protected:- Clear the Space: Move furniture away from the walls to give yourself ample room to work.
- Protect the Floors: Lay down a drop cloth to catch any debris and prevent damage to your flooring.
- Wall Safety: Apply painter’s tape above the baseboards to protect the drywall or paint when prying off the molding.
Baseboard Removal Technique
Removing baseboards carefully ensures that both your walls and the trim remain intact. The keys to achieving a clean removal are gently breaking the paint seal, prying the baseboard away without damaging the drywall, and using the right tools for leverage.Scoring Caulk and Paint
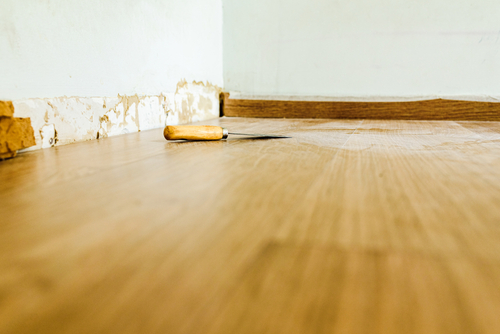
Begin by scoring the caulk where your baseboards meet the wall. This is done to prevent tearing the paint off the wall as you remove the baseboards. A sharp utility knife should be run along the edge where the baseboards and the wall connect. Take your time with this step to ensure you do not damage the wall or the baseboard, making future repairs unnecessary.Starting the Pry Process
Once the scoring is complete, you need to start the prying process. For this task, use a putty knife to create a gap between the wall and the baseboard. Carefully insert the putty knife into the scored line and gently push it downwards to create an opening. It’s advisable to work your way down the length of the baseboard, moving the putty knife along to gradually separate the baseboard from the wall.Leverage and Pressure Application
Now, it’s time to employ leverage to remove the baseboard gently. To protect the wall, place a fulcrum—like a small wood block—against the wall, beneath your pry bar. This allows you to evenly distribute the pressure as you leverage out the baseboard. Apply steady, even pressure to the pry bar to avoid damaging the wall or the trim. If your baseboard was caulked, this step might take a bit more effort to ensure that the trim comes off clean.Handling Difficult Sections
Removing baseboards can be a straightforward process, but you may encounter sections that are challenging due to obstacles, adhesives, or nails. Tackling these difficult sections requires a strategic approach and the right tools.
Working Around Obstacles
When you’re dealing with obstacles such as pipes, built-in cabinets, or irregular walls, you’ll need to apply careful pressure and precision. Use a trim puller to gently work around these areas, which offers more control compared to a standard pry bar. Should you encounter a particularly tight spot, a block of wood can be used as a buffer to distribute pressure evenly and avoid damaging the wall or the baseboard. In some cases, pliers and a chisel might be necessary to reach and remove finishing nails or screws without causing damage to the surrounding area.Dealing with Adhesives and Nails
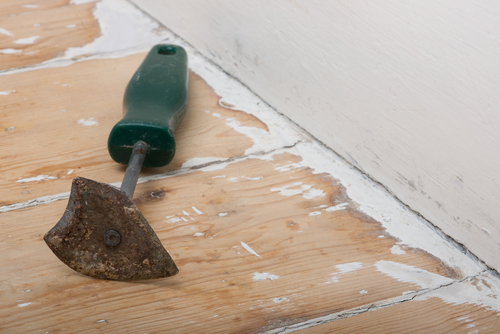
Adhesive materials such as glue can make baseboard removal more difficult, as they are meant to firmly secure the trim in place. Carefully run a utility knife along the top seam of the baseboard to break the seal of any adhesive and paint layers. For stubborn adhesive, consider using a heat gun to soften it before gently prying the baseboard away with a trim puller or a putty knife. When it comes to nails, it’s important to remove them with finesse to maintain the integrity of your walls and baseboards. Finishing nails are common, and the claw end of a hammer or nail puller is your go-to tool for extracting these. For larger nails or screws, use a drill or screwdriver to remove them. If you discover nails that are difficult to reach, grip them tightly with pliers and pull straight out to avoid bending them or causing additional damage.Post-Removal Procedures
After successfully removing the baseboards, your attention should shift to the condition of the walls and the workspace to ensure a smooth transition to your next project phase.Wall and Trim Repair
As you inspect the walls, remove any leftover nails with pliers to prevent accidents or damage to future installations. Small holes and dents in the drywall may be present; these require filling with a spackle or putty. Apply it evenly with a putty knife and allow it to dry completely. Once dry, lightly sand the surface for a smooth finish. If the wall needs painting, wait for the putty to cure as per the manufacturer’s recommendations before applying a new coat.Cleaning the Workspace
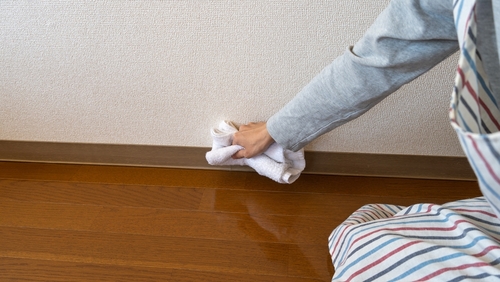
The process of removing baseboards often leaves behind scrap materials and dust. Begin your clean-up by collecting larger debris and disposing of them properly. For fine dust and smaller particles, use a vacuum followed by damp mopping the floors to capture any residual dust. Finally, address any caulking that might have fallen during the project by scraping it off surfaces for a neat and tidy work area. Remember, patience during the clean-up ensures your workspace is safe and ready for future projects.Reinstallation of Baseboards
After successfully removing your baseboards, it’s crucial to prepare them properly before reattaching them to ensure a neat and secure fit against the wall and flooring.
Assessing and Preparing Baseboards
First, inspect your baseboards for any damage such as dents or chips. If you’re reusing existing baseboards, remove remnants of old caulk and paint. Sand the edges to create a smooth surface for a tighter fit and better paint adhesion. Confirm that the baseboards fit the wall, especially at inside corners, where precise angles are necessary for a seamless look. If you’re working with new material, like MDF or hardwood, ensure all pieces are cut to the correct length.Reattachment Process
- Positioning Baseboards: Check that the baseboards align correctly with the wall and the flooring, whether it’s laminate, hardwood, or another material. For an expert finish, use shoe molding to cover any gaps between the baseboard and the flooring.
- Nailing: Secure the baseboard to the wall studs using finish nails. Drive one nail into each stud, placing them at a downward angle for a stronger hold. Use a nail set to countersink nails, making them ready for putty application.
- Caulking: Caulk along the top of the baseboard to fill any gaps between the baseboard and the wall. Smooth out caulk with a wet finger or a caulk finishing tool for a clean, professional edge.
Frequently Asked Questions
In this section, you’ll find straightforward answers about the best practices for removing baseboards, whether for renovation, painting, or repair purposes.What is the proper method for removing baseboards if I plan to reuse them?
To remove baseboards for reuse, carefully score the caulk line along the top edge with a utility knife to prevent tearing the paint or wall covering. Use a trim puller or a flat pry bar to gently loosen the baseboard from the wall, starting at one end and working your way down.What precautions should I take when removing baseboards from plaster walls to avoid damage?
When dealing with plaster walls, exercise extra caution. Score the seam thoroughly and use a wide putty knife to gently tap behind the baseboards to loosen them. This helps distribute force and minimizes potential cracks in the plaster as you pry the baseboards away.Is it recommended to remove baseboards prior to painting to achieve the best results?
Removing baseboards before painting is generally recommended for a professional finish. It allows for easier access to the bottom edges and prevents paint from getting on the boards. If you opt not to remove them, protect the baseboards with painter’s tape and be meticulous in your edge painting.Which tool is most effective for prying away baseboards with minimal effort?
For prying baseboards, a trim puller is highly effective. Its wide blade distributes forces evenly, which means less damage to both the trim and the wall. A flat pry bar can also work but requires more careful handling.How can I safely detach baseboards that are installed over carpet?
When baseboards are over carpet, slip a putty knife or pry bar under the edge to lift slightly, being mindful not to snag the carpet fibers. Gently rock the tool back and forth to free the nails and ease the baseboard up from the carpet.Can an oscillating tool be used to remove baseboards, and if so, how?
Yes, an oscillating tool with a cutting blade can be used to cut through caulk, paint, and even nails behind the baseboard. Slide the tool along the top edge and behind the baseboard, but be sure to use a steady hand to prevent wall damage or cutting too deep into the material behind.RECENT BLOGS


Our Reviews

Glenda Lanier Prowell
1721758635
I have ordered an 11 yard dumpster to be delivered to my house.Lonier was extremely helpful and answered all my questions. The rate was very reasonable.

Cedric Smikle
1721660395
Amber was extremely professional and courteous. She answered all of my questions and even some that I didn’t know I needed to ask.

Cait Kaider
1721243051
I highly recommend Waste Removal USA for their responsiveness and how the staff work hard to provide exceptional customer service. They have done well by us and our clients. Thank you!

Easom Family
1721223306
Louiner Pierre-Louis Is awesome! Did a great job. Will definitely be using this same company for all my dumpster needs because of his awesome customer service! Thank you!!!

tabitha Vazquez
1720539988
Wonderful and fast customer service!
LATEST BLOGS
