April 19, 2024 - Benjamin Ehinger
Removing a Chain Link Fence: A Step-by-Step Guide
CALL NOW 844-762-8449
Removing a chain link fence can be a necessary task when you’re renovating your property or making way for new construction. It’s a process that demands careful planning and the right tools. Whether you’re tackling this project on your own to save money or to take on a new DIY challenge, having a solid understanding of the steps involved ensures a smoother operation. Remember that safety should always be your top priority, so equip yourself with the necessary protective gear and consider enlisting a helper to make the job easier.
If you’re preparing for a chain link fence removal, understanding the scope of the work involved is key. This includes knowing how to dismantle the fence fabric and posts, and how to deal with potential obstacles such as rusty hardware or concrete footings. Once you have removed the fence, it’s important to have a plan for cleanup and disposal. For an efficient and hassle-free way to handle debris, consider using a small dumpster rental from Waste Removal USA.
 Before beginning the process of removing your chain link fence, it’s important to first understand how to properly dismantle the fence posts and rails without causing damage to your property. This involves carefully separating the rails from the posts and dealing with concrete bases that may anchor the posts.
 When removing a chain link fence, excavating the post footings is a necessary step to freeing the posts from their cemented bases. This section will guide you through the use of specialized tools and techniques that ensure a smooth excavation process.
Key Takeaways
- Proper preparation ensures a safer and more efficient chain link fence removal process.
- It’s important to dismantle and remove all parts of the fence, including posts, fabric, and hardware.
- Cleanup is streamlined with a dumpster rental, allowing for easy disposal of fence materials and debris.

Planning and Preparation
Before embarking on removing a chain link fence, it’s essential to properly understand the scope of the project and take necessary safety measures. This includes recognizing the magnitude of work ahead and gathering the appropriate tools required for the task at hand.Assessing the Project Scope
Evaluate the fence posts and the ground conditions affecting them to estimate the effort needed. Determine if your work area contains standard-sized posts or if there are additional features such as concrete footings that require attention. Accurately mark the boundaries of the fence line to clearly define the area you’ll work within.Safety Precautions
Prioritize your safety by wearing sturdy gloves and eye protection to prevent injuries. Assess the work area for potential hazards and ensure that the space is clear of obstructions. Secure any loose materials to maintain a safe environment throughout the duration of your project.Gathering Necessary Tools
Prepare a list of necessary tools which should include:- Pliers or a socket wrench for nuts and bolts removal
- A shovel for digging around fence posts
- Bolt cutters or wire cutters for mesh removal
- A bucket for keeping small hardware
Removing Fence Fabric
When removing the chain link fabric from your fence, it’s important to methodically disconnect the fence ties and roll up the fabric. This will ensure a clean and efficient removal process.Disconnecting Fence Ties
First, locate the fence ties that secure the chain link fabric to the fence posts. These ties are essential in maintaining the fabric’s tension and position. To remove them, you can use bolt cutters or pliers to cut fence ties that are tightly wound around the framework. Make sure to set these aside as you work your way along the fence, removing all connections that hold the fabric in place.- Tools Needed:
- Bolt cutters or sturdy pliers
- Container to hold removed ties
Rolling up the Chain Link Fabric
After you have disconnected all the fence ties, the next step is to roll up the chain link fabric. Commence from one end of the fence, gathering the fabric in an orderly manner. This can be done by hand or with the assistance of a rope to keep the roll tight and manageable. If your fence is in sections, manage one section at a time for ease of handling. Rolling up the fabric reduces its bulkiness, making it easier for transport or disposal.- Procedure:
- Start at one end, use hands or rope for assistance
- Proceed section by section
- Ensure the roll is tight and compact
Dismantling Fence Posts and Rails
Before beginning the process of removing your chain link fence, it’s important to first understand how to properly dismantle the fence posts and rails without causing damage to your property. This involves carefully separating the rails from the posts and dealing with concrete bases that may anchor the posts.
Separating Rails from Posts
To separate the rails from the fence posts, start by locating the bolts and nuts that secure the rails to the posts. With a wrench, you will loosen and remove these fasteners, taking special care not to strip the nuts or damage the bolt threads. Once the hardware is removed, you can lift the rails off the mounting brackets or caps. Here’s a simple list to follow:- Identify and unscrew the bolts on the brackets that hold the rails to the posts.
- Gently but firmly remove the rails from each post.
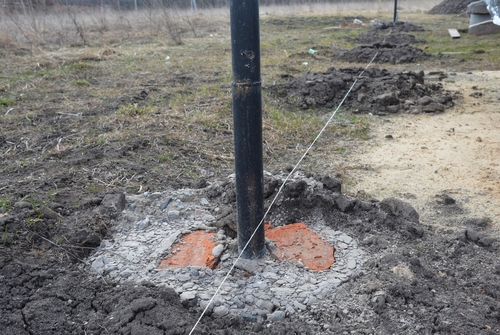
Dealing with Concrete Bases
Fence posts are often set in concrete to ensure stability. When removing fence posts, it is possible to extract them with the concrete base intact. Start by soaking the ground around the post to loosen the soil. Use a digging tool to clear space around the concrete base, then attempt to rock the post back and forth. This motion may help to break the concrete’s grip on the post. If necessary, employ a sledgehammer to carefully break the concrete into smaller, more manageable pieces. A lever can also be helpful in loosening the post.- Soak the surrounding area to soften the ground.
- Dig around the post to expose the concrete base.
- Apply force to the post with a rocking motion to loosen it.
- Break up the concrete base if necessary, using controlled sledgehammer blows.
Handling Special Considerations
When removing a chain link fence, it’s crucial to account for the surrounding environment and the fence’s condition to avoid unforeseen complications. Pay close attention to these specific factors to ensure a smooth removal process.Working Around Vegetation
If your fence has plants or vegetation growing around it, remove them carefully to prevent damage to both the plants and the fence. If the vegetation is valuable or part of a garden design, consider transplanting it to a safe location before starting your work.Navigating Property Lines
Verify your property lines to ensure that you are legally permitted to remove the fence. This often requires consulting a detailed property survey or a professional assessment to avoid disputes with neighbors. If the fence sits on the boundary, you may need joint permission to proceed with its removal.Managing Rust and Damage
Inspect the fence for any signs of rust or damage, as these conditions can complicate removal. Rust can be treated with a rust remover or by using a wire brush to scrub off the corrosion before dismantling. For severe damage, such as bent posts or torn mesh, use tools designed for cutting metal to safely remove the affected sections.Excavating Post Footings
When removing a chain link fence, excavating the post footings is a necessary step to freeing the posts from their cemented bases. This section will guide you through the use of specialized tools and techniques that ensure a smooth excavation process.
Using Post Pullers
To extract chain link fence posts neatly and efficiently, utilizing a post puller or a farm jack can significantly reduce labor. Here’s a structured approach:- Position the Post Puller: Align the post puller with the fence post.
- Secure the Grip: Attach the puller’s jaws or chain securely around the post.
- Leverage for Lift: Use the tool’s leverage to lift the post out of the ground.
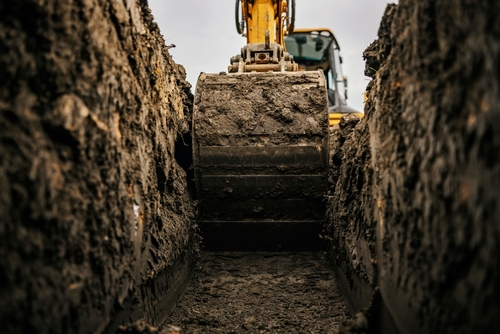
Digging out Concrete Footings
To tackle concrete footings, the process often involves a bit more effort:- Expose the Concrete:
- Start by digging around the post footing with a shovel to expose the top of the concrete.
- If necessary, use a jackhammer to break up thicker concrete conglomerates.
- Loosen the Post:
- Once exposed, you might need additional tools such as a chisel and fence pliers to further weaken the concrete’s grip on the post.
- Rock the post back and forth to create some wiggle room.
- Lift and Remove:
- A farm jack can be used here as well to pull the post out of the loosened concrete footing.
- Afterwards, be sure to fill in the hole left behind with soil to prevent hazardous openings.
Cleanup and Disposal
After you’ve successfully removed your chain link fence, the focus shifts to the proper cleanup and disposal of materials. You need to decide what can be recycled, discarded, or even sold, and ensure that the area where the fence once stood is left clean and safe.Sorting Materials for Disposal or Recycling
Begin by sorting the fence materials. Metal posts, rails, and chain link fabric are typically made of steel, which is a valuable scrap metal that many recycling centers will accept. To organize your materials:- Scrap Metal: Separate all metal components and confirm with your local recycling center for their specific guidelines.
- Concrete Footings: Concrete can often be crushed and recycled, so check if there’s a facility nearby that handles construction debris.
- Miscellaneous Hardware: Put all small metal items, such as nuts, bolts, and clamps, in buckets or sturdy containers to prevent spillage during transport.
Clearing and Cleaning the Work Area
Once all materials are sorted, your next step is to clean the work area:- Remove any lingering debris, such as small rock pieces or broken metal bits, to prevent injury or environmental hazard.
- Fill in any holes where the fence posts were located to prevent tripping hazards and to tidy the landscape.
- If necessary, reseed any bare patches where the fence stood to return the area to its natural state.
Finalizing the Project
Once the physical labor of removing your chain link fence is complete, it’s crucial to ensure that everything is in order and consider the future use of the now open space.Inspection and Quality Check
After the removal process, it is essential to conduct a thorough inspection. You’ll want to ensure that all components of the fence have been effectively removed, which includes:- Posts
- Rails
- Chain link fabric
Options for the Cleared Space
Now that you have reclaimed your space, it’s time to consider your options for its use. An upgrade to your outdoor area can be both exciting and beneficial. Some possibilities include:- Building a new, modern fence for privacy
- Creating a garden or green space
- Laying down a patio or outdoor seating area
Frequently Asked Questions
Removing a chain link fence can be simpler than you think with proper guidance. These questions cover various aspects from DIY removal to professional services.How can you remove a chain link fence post without specialized tools?
You can remove a chain link fence post set in dirt using a shovel to dig around the post. If the post is in concrete, wetting the area may ease the removal.What are some effective methods for removing an entire chain link fence?
Begin by detaching the fence fabric from the posts and rolling it up. Then, remove posts by digging around them or loosening the concrete footing.What is the average cost to have a chain link fence professionally removed?
Professional removal of a chain link fence depends on the fence’s length and condition, but costs generally range between a few hundred to over a thousand dollars.Can you temporarily remove and later reinstall a section of chain link fence?
Yes, you can carefully dismantle a section of a chain link fence for temporary access and reinstall it using the same hardware.How can a car jack be used to remove a chain link fence post?
A car jack can be positioned to apply upward force at the base of the post, assisting in lifting it out of the ground.What should you consider when looking for chain link fence removal services?
When searching for services, consider their experience with fence removal, cost, and the disposal plan for the removed fence materials.RECENT BLOGS


Our Reviews

Glenda Lanier Prowell
1721758635
I have ordered an 11 yard dumpster to be delivered to my house.Lonier was extremely helpful and answered all my questions. The rate was very reasonable.

Cedric Smikle
1721660395
Amber was extremely professional and courteous. She answered all of my questions and even some that I didn’t know I needed to ask.

Cait Kaider
1721243051
I highly recommend Waste Removal USA for their responsiveness and how the staff work hard to provide exceptional customer service. They have done well by us and our clients. Thank you!

Easom Family
1721223306
Louiner Pierre-Louis Is awesome! Did a great job. Will definitely be using this same company for all my dumpster needs because of his awesome customer service! Thank you!!!

tabitha Vazquez
1720539988
Wonderful and fast customer service!
LATEST BLOGS
