February 28, 2024 - Benjamin Ehinger
Pool Table Removal: The Ultimate Guide to Safe and Efficient Disassembly and Transport
CALL NOW 844-762-8449
Removing a pool table from your home or business premises can be a substantial task, requiring a fair amount of planning and physical effort. Whether it’s an upgrade to a newer model or simply reclaiming space, the process involves more than just physical removal. You’ll need to safely disassemble, pack, and transport the bulky and heavy parts. For those who are also clearing out additional junk or undertaking renovations, incorporating a home dumpster rental can be a convenient way to dispose of your old pool table along with other trash.
Disassembling your pool table is the first critical step, ensuring each component is carefully removed and protected for the move. This can be a complex process, but with the right tools and a bit of patience, you can systematically take apart the table, starting with the felt, slate, and frame. After it’s properly dismantled, you’ll need to pack each piece securely to avoid damage during transit. Understanding the proper technique to move these heavy components is crucial for preventing injury and preserving the integrity of the parts for future reassembling.
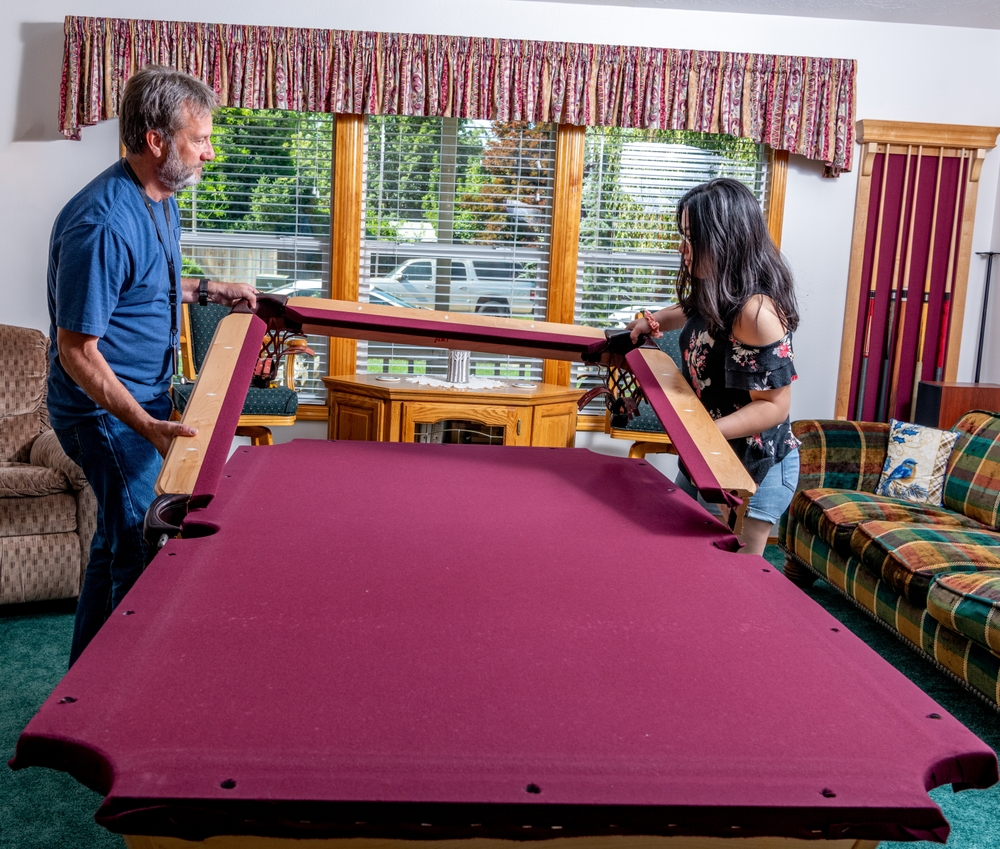 When disassembling your pool table for removal, proper packing and protection of each component is crucial to prevent damage during transport.
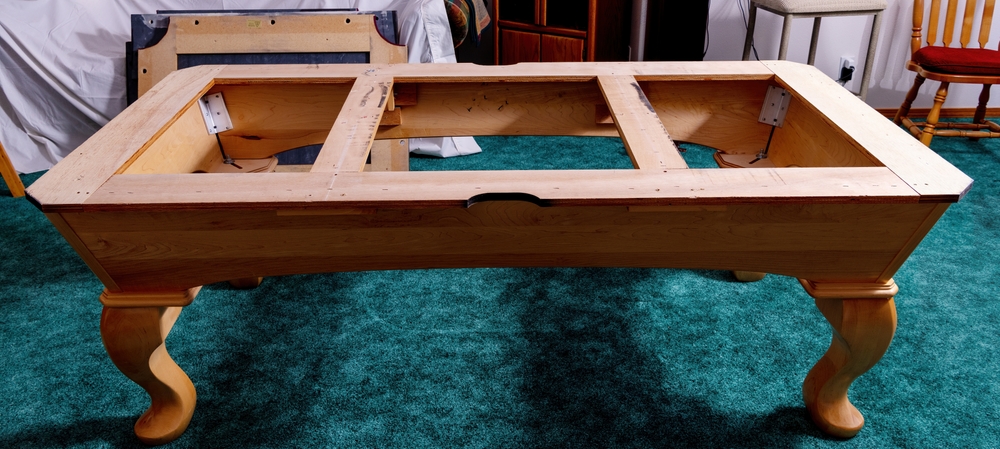 After successfully moving your pool table to a new location, the reassembly process is crucial for ensuring that the gameplay remains smooth and accurate. You will need to proceed with precision and care through each step to avoid any damage or misalignment.
Key Takeaways
- Safe disassembly and packing are crucial for pool table removal.
- A home dumpster rental offers a convenient disposal solution.
- Correct reassembling ensures your pool table is ready for future use.
Overview of Pool Table Removal
When you decide to remove a pool table from your space, understanding the correct procedures and safety measures is crucial. This detailed guide will walk you through the essential considerations for a safe and effective pool table removal.Safety Considerations
- Personal Safety: Ensure you wear protective gloves and sturdy footwear to prevent injuries while handling heavy parts of the pool table.
- Lifting Techniques: Use proper lifting techniques by bending at the knees, keeping your back straight, and lifting with your legs, not your back, to avoid strain.
Tools and Equipment Required
- Basic Tools: A set of socket wrenches, screwdrivers, and a drill are necessary for disassembling the various components.
- Moving Equipment:
- Moving blankets to protect parts from damage.
- Straps to secure the components during transport.
- A heavy-duty dolly or hand truck designed to handle substantial weight.
Disassembling the Pool Table
When you begin the process of pool table removal, careful disassembly is crucial to prevent damage. You will need a set of specific tools and a clear understanding of the table’s structure to accomplish this task effectively.Removing the Felt
The felt is delicate and should be removed with caution to avoid tears. Start by locating the staples or glue that hold the felt in place. If stapled, gently pry each one using a staple remover or a flat-head screwdriver. For glued felt, gently pull the felt away at one corner and work slowly along the edges.- Tools Needed:
- Staple remover or flat-head screwdriver
- Gentle hands
Taking Apart the Slate
The slate of a pool table is extremely heavy and requires at least two people to remove safely. Unscrew the bolts or screws fixing the slate to the frame using the appropriate screwdriver or drill. Once free, carefully lift the slate with assistance and set it aside on a flat, stable surface.- Caution:
- Do not attempt to lift the slate alone.
- Protect your back with proper lifting techniques.
Dismantling the Frame
After the slate has been taken apart, it’s time to dismantle the frame and legs. With a socket wrench, unscrew the bolts connecting the legs to the frame. Then, disassemble the remaining frame carefully, keeping track of all hardware for reassembly.- Steps:
- Remove bolts from legs using a socket wrench.
- Carefully separate the frame pieces.
- Organize and store hardware.
Packing and Protecting Components
 When disassembling your pool table for removal, proper packing and protection of each component is crucial to prevent damage during transport.
Wrapping Individual Parts
After disassembling the table, wrap each part separately. Use moving blankets or bubble wrap for the rails, legs, and frame to avoid scratches and dings. For the slate, which is particularly vulnerable, ensure that it’s securely wrapped with padding and properly labeled as “fragile.”Securing Loose Components
Hardware, such as bolts and screws, should be gathered and placed in clearly marked bags to avoid loss. Components like pockets and cushions must be securely wrapped and banded together. This step ensures that reassembling the table at your new location goes smoothly without any missing pieces.Moving the Pool Table
When it comes to pool table removal, ensure that you have a clear plan for disassembling, carrying, and loading the table. Your focus should be on safety and protecting the integrity of the table.Carrying Techniques
- Balance and Support: You must ensure that you balance the weight of the pool table evenly while carrying it. Always have helpers on each side to maintain stability.
- Lift with Your Legs: To avoid injury, bend your knees and lift with your legs, not your back.
- Slow and Steady Movements: Move carefully and avoid sudden jerks to prevent damage to the table and minimize the risk of dropping it.
Loading for Transportation
- Secure Padding: Before loading the pool table onto your moving vehicle, line the surface with padding to protect against scratches and dents.
- Proper Placement: Place the main frame and slate of the pool table in such a way that movement during transportation is minimized.
- Strapping Down: Use ratchet straps to secure the pool table to the sides of the moving vehicle to prevent any shifting or sliding.
Reassembling the Pool Table
 After successfully moving your pool table to a new location, the reassembly process is crucial for ensuring that the gameplay remains smooth and accurate. You will need to proceed with precision and care through each step to avoid any damage or misalignment.
Reassembling the Frame
Start by placing the frame in the desired location. It’s important that the frame is level; use a carpenter’s level and make any adjustments to the legs as needed. Once the frame is positioned and level, secure the legs to the frame, typically by bolting them back together. Ensuring the frame is stable is essential to prevent any wobbling during play.Laying the Slate
Your pool table’s performance largely depends on the slate’s condition and installation. First, position the slate pieces onto the frame. This can be a delicate process due to the slate’s weight and fragility. Align the slate carefully according to the screw holes. Before fastening, check that the surface is completely level. Bolt the slate down and use shims if necessary. Filling the seams between the slate pieces is done with a special wax or putty for a smooth, continuous play area.Stretching and Attaching the Felt
The felt should be stretched evenly over the slate to prevent wrinkles or looseness that could affect game play. Begin from the center and work your way towards the edges, using a staple gun to attach the felt to the underside of the table. It’s imperative to achieve a taut and even felt surface. Trim any excess felt around the edges. Once attached, reattach the rails and pockets, ensuring a snug fit against the new felt.Frequently Asked Questions
When it comes to removing a pool table from your property, the details can vary significantly. This section covers the most pertinent information you need to address your pool table removal inquiry effectively.How can I have a pool table removed from my property?
To have a pool table removed, you can hire a professional or do it yourself with a roll off dumpster rental. They will dismantle and haul away your pool table, often ensuring things like recycling or donation are handled properly.What is the typical cost range for professional pool table removal services?
Professional pool table removal services can cost around $400 on average, but this price can vary depending on your location, the table’s size, and additional services like disassembly.Are there any companies that offer free pool table removal?
It is uncommon to find companies that offer pool table removal for free, as there are significant labor and disposal fees involved. However, it’s worth contacting local charities as they sometimes have the resources to remove and repurpose pool tables.How do I find a service to remove and then set up my pool table elsewhere?
When looking to relocate a pool table, it’s best to contact professional movers who specialize in pool tables. They can ensure it is properly disassembled, transported, and reassembled at the new location.Where can I donate a used pool table?
You can often donate a used pool table to local community centers, youth clubs, or organizations such as the Salvation Army or Goodwill. Make sure to verify if they offer pickup services for large items like pool tables.What are the options for selling a used pool table?
To sell a used pool table, consider listing it on online marketplaces, local classified ads, or at billiard supply stores. Offering to deliver or provide the option for the buyer to organize professional removal can make your pool table more attractive to potential buyers.RECENT BLOGS
Our Reviews
Glenda Lanier Prowell
1721758635
I have ordered an 11 yard dumpster to be delivered to my house.Lonier was extremely helpful and answered all my questions. The rate was very reasonable.
Cedric Smikle
1721660395
Amber was extremely professional and courteous. She answered all of my questions and even some that I didn’t know I needed to ask.
Cait Kaider
1721243051
I highly recommend Waste Removal USA for their responsiveness and how the staff work hard to provide exceptional customer service. They have done well by us and our clients. Thank you!
Easom Family
1721223306
Louiner Pierre-Louis Is awesome! Did a great job. Will definitely be using this same company for all my dumpster needs because of his awesome customer service! Thank you!!!
tabitha Vazquez
1720539988
Wonderful and fast customer service!
LATEST BLOGS

