Is It Linoleum, Vinyl, or Another Sheet Floor?
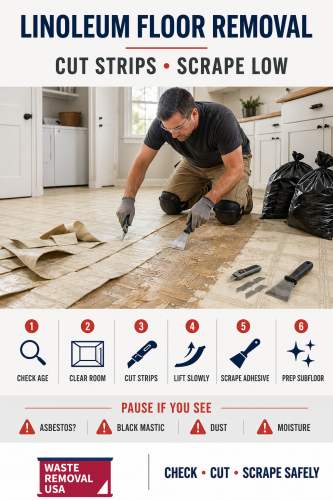 Many people use the word linoleum for almost any old sheet floor, but true linoleum and vinyl flooring are not the same. Linoleum is made from materials such as linseed oil, cork dust, wood flour, and backing materials. Vinyl flooring is a synthetic product. Older floors may also include multiple layers, felt backing, paper backing, underlayment, adhesive, or tile installed over earlier flooring.
For removal, the exact label matters less than three practical questions:
- How old is the floor?
- What is underneath it?
- What kind of adhesive or backing is attached?
Why Linoleum Floor Removal Can Be Difficult
Linoleum flooring can be difficult to remove because the floor is only one part of the system. The adhesive, backing, subfloor, age, moisture history, and previous installations all affect how hard the job will be. Common challenges include:- Hardened adhesive
- Brittle flooring that breaks apart
- Paper or felt backing stuck to the subfloor
- Multiple layers of flooring
- Staples or nails around edges
- Trim trapping the flooring
- Water-damaged subfloor
- Adhesive residue left behind
- Possible asbestos concerns in older flooring systems
The Easiest Way to Remove Linoleum Flooring
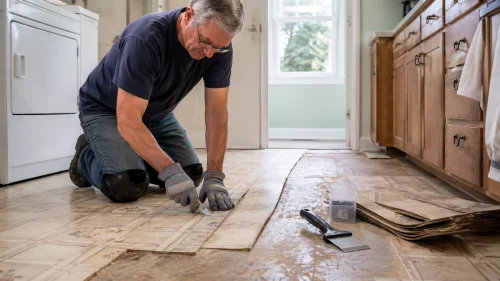 The easiest way to remove linoleum flooring is to work in narrow sections. Instead of trying to pull up the whole floor as one large sheet, cut it into strips about 6 to 12 inches wide. Smaller strips reduce the amount of adhesive fighting you at once and give you better control with a scraper.
Use this basic approach:
- Remove furniture, appliances, baseboards, and transition strips.
- Check the floor for age, layers, and asbestos concerns.
- Cut the linoleum into narrow strips.
- Lift each strip with a scraper at a shallow angle.
- Use gentle heat only when appropriate.
- Remove backing and adhesive residue separately.
- Clean and repair the subfloor before new flooring.
Tools You Need for Linoleum Floor Removal
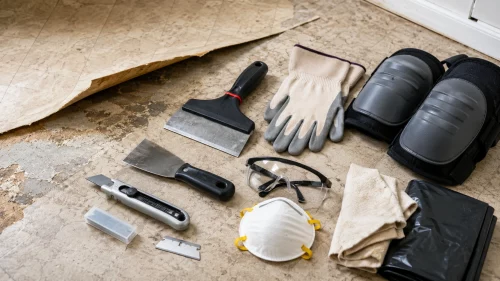 The right tools make the job safer and less frustrating.
For most projects, gather:
- Utility knife with extra blades
- Floor scraper with replaceable blades
- Stiff putty knife
- Knee pads
- Work gloves
- Eye protection
- Dust mask or respirator
- Pry bar for trim
- Pliers
- Trash bags or contractor bags
- Painter’s tape and marker
- Heat gun or hair dryer, if safe for the flooring
- Adhesive remover approved for the surface
- Bucket, rags, and mild cleaner
- Shop vacuum with appropriate filtration
- Drop cloths or plastic sheeting
Step 1: Prepare the Room
Start by emptying the room completely. Remove furniture, appliances, rugs, doors if needed, and anything that blocks the floor. Then remove baseboards, quarter-round, and transition strips so the floor edges are exposed. Take photos of the room before you begin. Photos can help when reinstalling trim, checking appliance locations, or remembering how transitions were fitted. Next, create a disposal path. Linoleum strips and adhesive scraps can be messy. Decide where pieces will be bagged and how they will leave the house. If this project is part of a larger remodel, keep flooring debris separate from reusable material, scrap metal, cardboard, and household trash.Step 2: Check for Safety Issues
Before cutting, look for signs that the floor should be tested or handled professionally. Stop and investigate if you find:- Flooring installed before the 1980s
- Black mastic or tar-like adhesive
- Brittle paper or felt backing
- Multiple old flooring layers
- 9-inch square tiles below the sheet flooring
- Crumbling backing that releases dust
- Unknown adhesive
- Water damage or mold
- Floor areas near old boilers, ducts, or pipe insulation
Step 3: Cut the Linoleum Into Strips
Once the floor is safe to disturb, use a sharp utility knife to score the linoleum into strips. Six to 12 inches wide is a good working range. Narrower strips are easier to pull, especially when adhesive is stubborn. Press firmly enough to cut through the flooring layer, but do not gouge the subfloor. If you are on wood, plywood, or particle board, be careful with blade depth. If you are on concrete, you can usually be a little firmer, but controlled cuts still matter. Replace dull blades often. A dull blade requires more pressure and is more likely to slip.Step 4: Lift the First Strip
Start at an exposed edge, doorway, vent opening, or corner. Slide a floor scraper or stiff putty knife under the strip and push forward at a shallow angle. The goal is to separate the flooring from the adhesive without digging into the subfloor. Pull gently with one hand while guiding the scraper with the other. If the strip tears, shorten the section and keep working. Tearing is common and does not mean the project has failed. If the flooring will not release, do not yank harder. Try a narrower strip, a different starting edge, or gentle heat if the floor is safe for heat.Step 5: Use Heat Carefully
Heat can soften some adhesives and make removing linoleum easier. A heat gun or hair dryer can be helpful, especially for stubborn spots. Use heat carefully:- Keep the heat source moving.
- Work in small areas.
- Avoid scorching the flooring or subfloor.
- Keep heat away from flammable materials.
- Do not use heat near unknown adhesives or possible asbestos-containing material.
- Ventilate the room.
Step 6: Adjust for the Subfloor
The subfloor determines how aggressive you can be. Wood Subfloors Wood requires patience. Keep the scraper shallow and avoid digging into the grain. Gouges, splinters, and torn plywood layers can create more repair work before new flooring goes down. Plywood or Particle Board Plywood and particle board are more vulnerable than concrete. Particle board can swell, crumble, or peel if it has been exposed to moisture. Scrape lightly and be prepared to replace damaged underlayment if necessary. Concrete Concrete can handle more pressure, but adhesive may remain bonded in low spots, pores, and cracks. Avoid damaging the surface if the new flooring requires a smooth base.Step 7: Remove Adhesive Residue
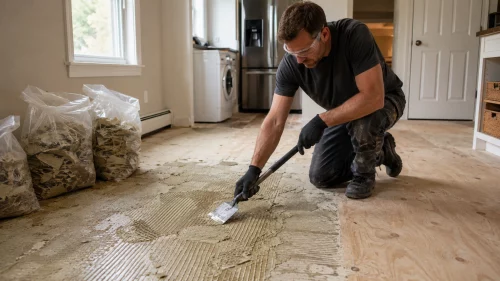 Adhesive removal is not a separate surprise. It is part of linoleum floor removal. Even when the flooring lifts cleanly, residue often remains.
Before choosing a method, check the new flooring manufacturer’s requirements. Some floors can be installed over certain well-bonded residues after proper preparation, while others require a cleaner, smoother surface.
Common adhesive removal methods include:
- Hand scraping
- Warm water for water-soluble adhesive
- Manufacturer-approved adhesive remover
- Gentle heat
- Floor scraper with replaceable blades
- Professional grinding or mechanical prep only when the material is known to be safe
Step 8: Prepare the Subfloor for New Flooring
Once flooring and adhesive residue are removed, inspect the subfloor. Look for:- High spots
- Soft areas
- Loose underlayment
- Nails or staples
- Water damage
- Cracks
- Uneven patches
- Adhesive ridges
- Dust and debris
- Moisture concerns
Dry Method vs. Heat Method
Most DIY linoleum removal uses one of two approaches.Dry Method
The dry method means cutting the flooring into strips and lifting it with scrapers without heat or chemicals. This is often the best first attempt because it keeps the process controlled and avoids fumes. Use the dry method when:- The floor releases reasonably well.
- You want to avoid chemicals.
- The subfloor is sensitive.
- You are working in a small room.
- You are unsure how the adhesive will react to heat.
Heat Method
The heat method uses controlled warmth to soften adhesive before scraping. This can help with stubborn spots, but it should be used carefully. Use the heat method when:- The flooring is confirmed safe to disturb.
- The adhesive softens with warmth.
- You can ventilate the room.
- You can avoid scorching, fumes, or fire risks.
- The subfloor can tolerate the heat.
What About Chemical Adhesive Removers?
Chemical adhesive removers can help in some cases, but they are not always the easiest solution. They may require dwell time, ventilation, scraping, neutralizing, drying, and careful cleanup. Before using one, ask:- Is it approved for this adhesive and subfloor?
- Will it affect the new flooring installation?
- Does it require special ventilation or PPE?
- Can it be used indoors safely?
- How will residue be cleaned?
- How will used rags and scrapings be disposed of?
How Long Does Linoleum Floor Removal Take?
Removal time depends on room size, adhesive strength, flooring layers, subfloor type, and whether adhesive cleanup is included. A small bathroom or laundry area may take a few hours. A kitchen, hallway, or large room with old adhesive may take a full day or more. Multiple layers can extend the project significantly. A realistic schedule includes:- Room prep
- Safety check
- Flooring removal
- Adhesive scraping
- Bagging debris
- Subfloor repair
- Final cleaning
Should You Remove Linoleum or Cover It?
Removal is not always the best first choice. If the existing floor is flat, firmly attached, dry, and known to be safe, some new flooring systems may be able to go over it with the proper underlayment or floor preparation. That can avoid unnecessary dust, labor, and subfloor damage. Removal usually makes more sense when the floor is loose, curled, water damaged, uneven, too thick at transitions, or incompatible with the new flooring. It also makes sense when old adhesive ridges, soft spots, or multiple layers would create an unstable base. Before deciding, check the installation instructions for the flooring you plan to use next. Some manufacturers allow installation over existing resilient flooring only when it is single-layer, well-bonded, clean, and level. Others require full removal or a specific underlayment. The right choice is the one that gives the new floor a stable base without disturbing questionable older materials unnecessarily.Removing Linoleum Around Cabinets and Appliances
Kitchens and laundry rooms can be harder than open rooms because the flooring often runs under appliances, cabinets, vanities, or built-ins. Do not assume the flooring stops at the visible edge. For appliances, disconnect and move them carefully before cutting. Protect water lines, gas lines, electrical cords, and appliance feet. If a refrigerator, washer, dryer, or range is too heavy to move safely, get help before pulling it across the floor. For cabinets and vanities, use a sharp knife to cut cleanly along the toe-kick or cabinet edge. Work slowly so you do not damage finished surfaces. If the old flooring continues under cabinets, it is often left in place under the cabinet footprint unless the cabinet is being removed as part of the remodel. Transitions also matter. Doorways, thresholds, and adjoining floors need a clean edge so the new flooring can finish properly. Remove metal strips, loose nails, and old fasteners before final subfloor prep.Subfloor Repair After Linoleum Removal
After the linoleum and adhesive are gone, you may find issues that were hidden for years. This is common in bathrooms, kitchens, laundry rooms, mudrooms, and entryways. Common repairs include:- Pulling staples and nails
- Refastening loose underlayment
- Replacing swollen particle board
- Patching small concrete cracks
- Filling low spots
- Sanding high spots on wood
- Removing loose adhesive dust
- Replacing damaged trim
- Checking moisture before new flooring
What to Do With Removed Linoleum
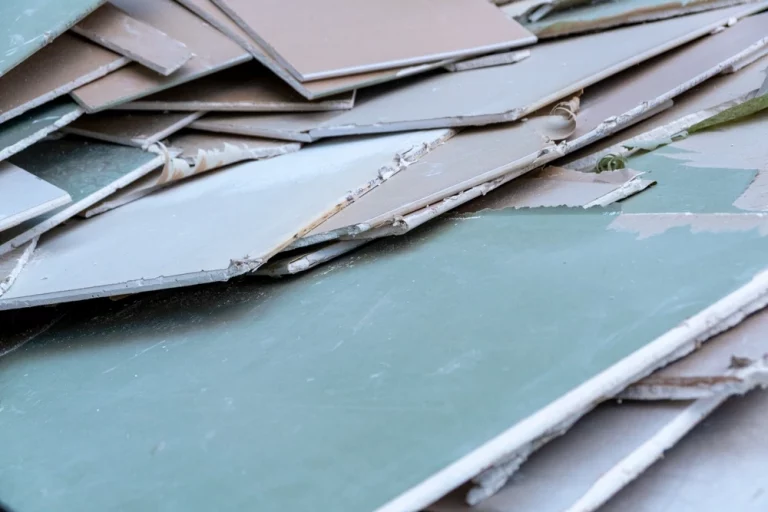
Removed linoleum, backing, adhesive scrapings, and underlayment pieces are usually treated as renovation or construction debris. EPA explains that construction and demolition debris includes materials generated during construction, renovation, and demolition projects, and that building materials containing asbestos are regulated separately. For ordinary non-asbestos flooring debris, bag small pieces as you work and keep the area clean. Heavy bags are harder to carry and more likely to tear, so do not overfill them. If the flooring tested positive for asbestos or is otherwise regulated, do not use normal renovation-debris handling. Follow the required containment, transport, and disposal process for your area. For broader remodel cleanup, see our guide to construction debris removal. If the flooring project exposes damaged drywall or plaster, our guide to drywall and plaster waste may also help.Common Linoleum Removal Mistakes
Avoid these mistakes:Pulling Large Sheets
Large sheets create too much resistance and usually tear. Strips are easier and cleaner.Skipping the Asbestos Check
Older resilient flooring, backing, and adhesive may be risky to disturb. Check before cutting, sanding, or scraping.Cutting Too Deep
Deep utility-knife cuts can scar wood or plywood subfloors.Scraping Too Aggressively
Forceful scraping can gouge wood, chip concrete, or damage underlayment.Ignoring Adhesive Residue
New flooring may fail if it is installed over ridges, dust, loose backing, or incompatible adhesive residue.Starting Without a Disposal Plan
Flooring scraps pile up quickly. Bag and stage debris as you work.When to Call a Professional
DIY removal can work for newer, single-layer floors that lift cleanly. A professional may be the better choice when the floor is old, the adhesive is suspicious, the room is large, or the subfloor must be preserved. Call a professional when:- The floor may contain asbestos.
- There are multiple old flooring layers.
- Black mastic is present.
- Adhesive is extremely stubborn.
- The subfloor is fragile or valuable.
- The room is large and time-sensitive.
- You need the subfloor prepared for tile or another exacting material.
- The project involves commercial space or tenant turnover.