February 21, 2024 - Benjamin Ehinger
How to Remove Tile from a Wall: A Step-by-Step Guide
CALL NOW 844-762-8449
Removing wall tiles is often a necessary step in updating a bathroom or kitchen. With the right approach, it can be a manageable DIY project. Safety is paramount. You should always wear protective gear, such as gloves and goggles, to shield yourself against sharp tile shards and debris.
Before you begin prying off tiles, it’s essential to prepare the work area. Make sure to cover any drains and fixtures to prevent damage and ease the cleanup process afterward. Organizing waste disposal ahead of time will help keep the area clean and safe as you work. Consider renting a small dumpster to handle the discarded tiles and materials. This will ensure that you have adequate space for all the debris.
As you undertake the tile removal process, take care to remove grout and mortar carefully to avoid unnecessary damage to the underlying wall.
 Removing wall tiles is an involved project requiring precision and the right tools. This section outlines the step-by-step methodology to help you tackle the task with confidence.
Key Takeaways
- Personal safety gear is essential to protect against injuries during tile removal.
- Appropriate preparation of the work area can prevent damage and facilitate cleanup.
- A small dumpster rental is beneficial for the efficient disposal of tile debris.
Safety Precautions
When removing wall tiles, it is critical to prioritize safety to prevent injuries and accidents. The key areas to focus on include wearing the right protective gear, ensuring electrical safety, and preparing the working environment.Personal Protective Equipment
Before beginning your work, equip yourself with the necessary safety gear. Essential items include:- Safety Goggles: Protect your eyes from sharp tile fragments and dust.
- Heavy-duty Gloves: Use gloves to shield your hands from cuts and scrapes.
- Long-sleeved Shirt and Pants: Wear to minimize skin exposure to sharp edges and debris.
- Work Shoes: Choose closed-toe, heavy-duty shoes to protect your feet.
Electrical Safety
- Power Tools: Ensure any power tools are in good condition and have a ground-fault circuit interrupter (GFCI).
- Outlets and Switches: If you’re removing tiles near electrical outlets or switches, turn off the power at the circuit breaker to avoid electrical shocks.
Working Environment
Maintain a secure work environment as follows:- Remove Hazards: Clear the space of furniture and other obstacles to prevent trips and falls.
- Protective Coverings: Lay down drop cloths or tarps to protect floors and surfaces from damage.
Preparation Steps
Before starting the task of removing wall tiles, it’s essential to properly prepare. Taking these initial steps will ensure a smoother removal process and help prevent damage to your workspace.Clearing the Work Area
Firstly, ensure safety by donning protective gear. You’ll need safety goggles, gloves, and appropriate attire to shield yourself from debris. Protect yourself and your surroundings as sharp tile fragments can cause injury. Remove any furniture or obstacles from the area, and cover fixtures or immovable items with durable sheeting to shield from tile shards. Experts from Homes & Gardens also emphasize safeguarding the floor and adjacent surfaces with thick drop cloths or cardboard.Gathering Necessary Tools
Next, compile the tools and supplies you will need for tile removal. The basic toolkit should include:- Heavy-duty work gloves
- Safety goggles
- Dust mask
- Plastic sheeting
Tile Removal Process
Removing wall tiles is an involved project requiring precision and the right tools. This section outlines the step-by-step methodology to help you tackle the task with confidence.
Loosening Tiles
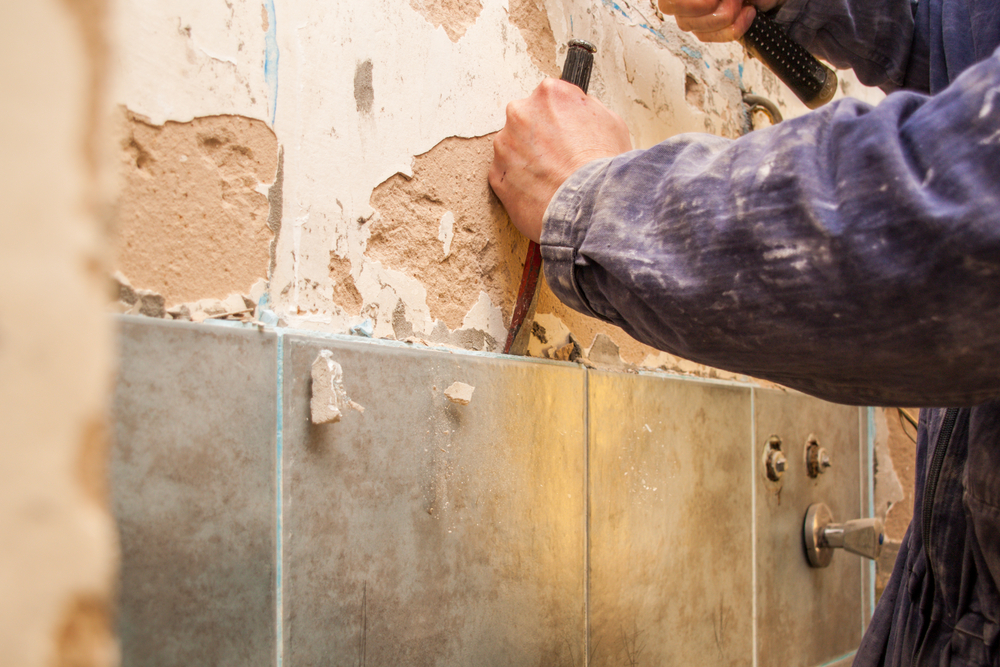
To begin, you’ll need to loosen the tiles without damaging the surrounding areas. Start by scoring the grout with a grout saw to separate the tiles. For sections that are particularly stubborn, apply heat with a heat gun to soften the adhesive beneath. This will make it easier to pry the tiles away.Removing Tiles
Once the tiles are loosened, gently remove them. You can do this using a putty knife to lift the edges and a hammer to tap the tool underneath the tile. Work your way from the outer edge towards the center, removing one tile at a time. Be cautious to avoid injury from sharp tile edges or debris.- Tools Needed:
- Putty knife
- Hammer
- Chisel (for tougher spots)
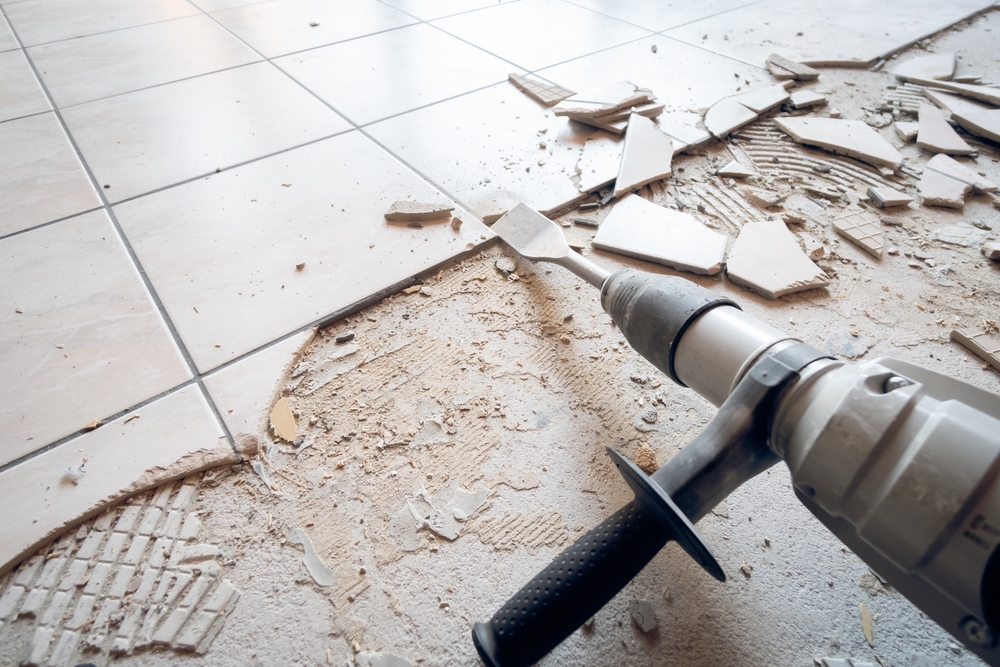
Handling Adhesive
With the tiles off, you will still need to deal with the adhesive residue. A wide chisel or scraper can clean off large sections. Meanwhile, sanding may be necessary for smoothing over the area. Remember to protect yourself from dust and particles with appropriate safety gear.- Safety Gear:
- Dust mask
- Safety goggles
- Work gloves
Cleanup and Disposal
Proper cleanup and disposal are crucial to finishing your tile removal project safely and efficiently. These steps will leave the workspace prepared for any new installations.Cleaning the Wall
After removing your tiles, you will need to clean the wall thoroughly to remove any excess adhesive or grout. This might involve:- Scraping off any remaining adhesive with a putty knife
- Sanding the wall to create a smooth surface
- Wiping down the wall with a damp sponge or cloth to remove dust and debris
Disposing of Old Tiles
When disposing of old tiles, consider the following guidelines to ensure you are adhering to safety and environmental standards:- Wrap sharp tile pieces in paper or plastic to prevent injury during handling.
- Check local guidelines for the disposal of building materials.
- Broken tiles can often be disposed of with your regular trash, but it’s worth checking if there’s a local recycling center that accepts ceramics.
Post-Removal Wall Treatment
After removing wall tiles, addressing the wall’s condition is crucial to prepare for a new surface treatment or tile installation.Wall Inspection
Examine your wall closely for any damage. Look for divots or areas where the adhesive has left a residue. It’s important to remove residual mastic or thinset to ensure a smooth base for whatever comes next.Repairing Wall Damage
For deeper grooves or holes, using a premixed joint compound will be most effective. Apply it carefully, smoothing it into the defects, and allow it to dry completely. Be meticulous with smoothing to avoid future complications when installing new tiles or painting.Frequently Asked Questions
When tackling the task of removing wall tiles, you may have several questions concerning the best approach, tools required, and methods to minimize damage. This section addresses your queries with precision.What is the most efficient method for removing wall tiles?
The most efficient method involves using a chisel or scraper to remove the grout around the wall tiles, followed by prying the tiles off with a putty knife or similar flat tool.Can I remove bathroom tiles without damaging the underlying wall?
Yes, with caution and the correct technique, such as softening old adhesive before prying and avoiding the use of excessive force, you can remove bathroom tiles without significant damage to the wall.What are some effective techniques for taking down ceramic wall tiles?
Effective techniques include using an oscillating tool with a grout-removal blade or employing a hammer and chisel to gently tap the edges of the tiles after grout removal to loosen them from the wall.How can you extract wall tiles with the intent to reuse them?
To extract wall tiles for reuse, carefully remove the grout and apply a slow, steady pressure to pry the tiles away. Make sure not to bend or twist them, which could cause breakage.What tools are recommended for DIY removal of kitchen or bathroom wall tiles?
You’ll need safety equipment (goggles, gloves), a chisel or scraper, hammer, oscillating tool with a grout-removal blade, putty knife, and potentially pliers for removing broken tiles.Is it possible to remove wall tiles without breaking them, and how?
Yes, you can remove wall tiles without breaking them. First, methodically and gently cut through the grout. Then, ease the tiles off from the wall using a putty knife. Take care not to apply uneven force.RECENT BLOGS


Our Reviews

Glenda Lanier Prowell
1721758635
I have ordered an 11 yard dumpster to be delivered to my house.Lonier was extremely helpful and answered all my questions. The rate was very reasonable.

Cedric Smikle
1721660395
Amber was extremely professional and courteous. She answered all of my questions and even some that I didn’t know I needed to ask.

Cait Kaider
1721243051
I highly recommend Waste Removal USA for their responsiveness and how the staff work hard to provide exceptional customer service. They have done well by us and our clients. Thank you!

Easom Family
1721223306
Louiner Pierre-Louis Is awesome! Did a great job. Will definitely be using this same company for all my dumpster needs because of his awesome customer service! Thank you!!!

tabitha Vazquez
1720539988
Wonderful and fast customer service!
LATEST BLOGS
