May 21, 2024 - Benjamin Ehinger
How to Remove Rocks from Soil: Efficient Techniques for a Clear Garden
CALL NOW 844-762-8449
Removing rocks from soil can be a necessary step to prepare your garden for planting or to improve the condition of existing beds. Whether your goal is to enhance plant growth, promote better drainage, or simply to tidy up your garden, knowing how to effectively remove rocks is important. A variety of methods exist for clearing stones, ranging from manual techniques suitable for small areas to mechanical means for larger patches of land.
One consideration throughout the process is the disposal of the rocks and soil you remove. It’s practical to plan ahead by arranging for a yard waste dumpster rental to handle the dirt and rocks that need to be discarded. This ensures that as you clear the area, you have an immediate and efficient solution for waste.
 Before starting your rock removal project, it’s important to have the right tools on hand to ensure efficiency and safety. The size of your project will largely determine the type of equipment you need, ranging from simple hand tools for small tasks to heavy machinery for larger projects.
 To enhance your garden’s soil quality, soil sifting and screening are essential processes. These methods separate rocks and debris from soil, making it ideal for planting.
Key Takeaways
- Employ appropriate methods to remove rocks for healthier soil and improved plant growth.
- Consider renting a yard waste dumpster for efficient disposal of rocks and soil.
- Utilize a range of tools, techniques, and safety measures to ensure successful rock removal.
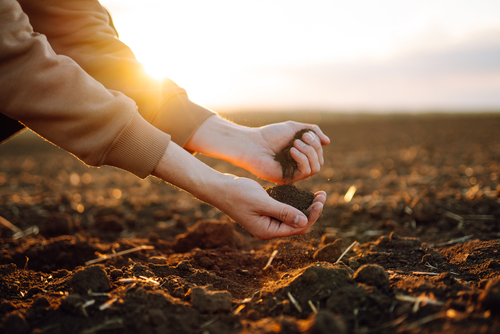
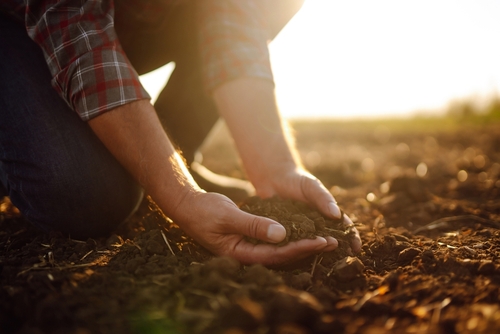
Understanding Soil Composition
Before modifying your soil, it’s important to recognize that soil composition directly influences drainage, plant growth, and root development. The type of rocks and organic matter in your soil can affect its texture and ability to retain moisture.Types of Rocks in Soil
Soil typically contains a variety of rocks ranging from large boulders to small pebbles and gravel. These rocks are categorized based on size; large rocks are over 256 mm, while small rocks, like gravel, range from 2 to 75 mm. Sand particles, though not considered rocks, are coarse fragments from 0.05 to 2 mm, and they also influence soil texture.Impact on Drainage and Plant Growth
The presence of rocks in your soil can significantly affect drainage and plant growth:- Drainage: Coarse rocks, such as gravel, improve drainage by creating spaces within the soil for water to flow through. However, an excess can lead to rapid water loss, reducing moisture availability for plants.
- Plant Growth: Rocks can obstruct root growth, hindering plants from securing a firm foundation or reaching necessary nutrients. Conversely, they may also provide essential minerals that contribute to soil fertility.
Initial Soil Assessment
Before you begin the labor-intensive task of removing rocks from your garden, an initial soil assessment is essential to determine the rock content and identify the best removal strategy for your specific situation.Evaluating Rock Content
First, inspect your garden soil to gauge the amount of rock present. Look for visible surface rocks and assess their sizes. Identifying different sizes – whether you’re dealing with small gravel or larger rocks and boulders – will influence the method you will use for removal. If your garden is large or you suspect there’s a significant rock presence, consider using a tractor or other machinery to assist in the initial assessment, especially if boulders are involved.Determining Removal Strategy
Based on the rock content evaluation:- For Fewer Rocks: A manual approach may suffice where you can hand-pick rocks or use garden tools like rakes to assist you.
- For Moderate to High Rock Content: You might need a more systematic approach such as sifting soil with a screen.
- For Extensive Rock Issues, especially with Larger Rocks or Boulders: Heavy equipment like a tractor may be necessary. In such cases, evaluate if the tractor can maneuver through your garden space without causing damage to soil or vegetation.
Tools Required for Rock Removal
Before starting your rock removal project, it’s important to have the right tools on hand to ensure efficiency and safety. The size of your project will largely determine the type of equipment you need, ranging from simple hand tools for small tasks to heavy machinery for larger projects.
Hand Tools
- Shovels: A sturdy spade is essential for digging around and leveraging rocks out of the soil.
- Rakes: Use a garden rake for gathering smaller stones and a landscape rake for leveling the area after rock removal.
- Gloves: Protect your hands with durable gloves during the rock removal process.
- Wheelbarrow: Necessary for transporting rocks and soil from one location to another.
Machinery for Larger Projects
- Tiller: A rototiller can break up the soil, making it easier to sift through and remove rocks.
- Machinery: For extensive rock removal, machinery such as a tractor or backhoe might be required to handle the volume and weight of the rocks.
Safety Measures
When removing rocks from your soil, prioritizing your safety is essential. It’s important to take certain precautions to avoid injury while handling heavy materials.Gardening Gloves
Wearing gardening gloves isn’t just about keeping your hands clean—it’s a crucial safety measure. Thick gloves protect your hands from sharp edges and reduce the risk of cuts and blisters. Choose gloves that provide a good grip to enhance your handling ability and prevent slips. Gloves also offer a barrier against potential irritants in the soil.Proper Lifting Techniques
The process of removing rocks from soil often involves heavy lifting. To prevent strain or injury, engage in proper lifting techniques. Always lift with your legs, not your back, to utilize the strength of your leg muscles and reduce back strain. Bend at the knees and keep the back straight, maintaining the natural curve of your spine. When carrying heavy rocks, hold them close to your body to improve leverage and stability, using gravity to your advantage. It’s important to know your limits; if a rock is too heavy, seek assistance or use tools designed to multiply force.Preparation of the Soil
Before removing rocks, it’s essential to prepare the soil properly. This process will ensure that your efforts in rock removal are both efficient and effective, ultimately creating a conducive environment for plants to thrive.Clearing Vegetation
Firstly, clear the vegetation from the area. Use a spade or a hoe to uproot weeds and any other undesired plants. Be thorough, as leftover roots can obstruct the rock removal process and potentially affect new plants later. Removed vegetation can also become part of your compost heap if you wish to recycle the organic material effectively.Watering Before Removal
Applying water can greatly ease the task of rock removal, as it helps soften the soil. However, be mindful not to overwater, as excessively muddy conditions can make the job messier and more challenging. Ideally, water the area a day before you plan to remove the rocks—this allows for the moisture to penetrate the soil, making it more pliable. The right moisture level reduces strain on your tools and makes the physical removal of rocks less laborious.Manual Removal Techniques
Effective removal of rocks from soil requires a hands-on approach, utilizing common garden tools. These techniques provide precision and the ability to adapt to different types of rocks and soil conditions.Digging and Prizing
When you encounter larger rocks, a shovel and a trowel are your best allies. Begin by inserting the shovel into the soil at an angle around the stone, creating leverage to pry the stone from the ground. For smaller and more stubborn stones, use a trowel to dig around the rock, loosening the soil and granting you better grip and leverage.- Tools You’ll Need:
- Shovel
- Trowel
- Steps:
- Loosen the soil around the rock with your shovel.
- Use the trowel for smaller rocks, prizing them out gently.
Sifting and Sorting
To remove smaller stones from your soil, a sieve is indispensable. Sifting allows fine soil particles to fall through while trapping small stones. Use a garden rake or landscaping rake to gather the sifted rocks and dispose of or repurpose them as desired. Heavy-duty sieves work best for this job, and consistent shaking or stirring ensures efficiency.- Tools You’ll Need:
- Sieve
- Garden Rake / Landscaping Rake
- Steps:
- Place your sieve over a wheelbarrow.
- Shovel soil onto the sieve.
- Shake or push the soil back and forth.
- Collect the stones.
Mechanical Rock Removal
In effectively clearing your soil of stones and rocks, mechanical methods often offer the most efficient solution, especially for larger areas with extensive rock contamination. These methods range from using hand-operated tillers to heavy machinery designed for industrial-scale landscaping tasks.Using Tillers and Rototillers
When dealing with rocky soil on a moderate scale, a tiller or a rototiller can be your best ally. These machines work by agitating the soil, bringing rocks to the surface for easier removal. To effectively use a tiller or rototiller:- Start by surveying your land to determine the extent of rock contamination.
- Select a tiller that suits your land’s size and rock density; smaller tillers for manageable areas and heavy-duty rototillers for more challenging landscapes.
Operating Rock-Removing Machinery
For an even more powerful solution, specialized rock-removing machinery attached to a tractor can be utilized. This machinery is specifically built to handle heavy and deeply embedded rocks. Here are the steps you should follow:- Attach a rock picker or a rock windrower to your tractor. Make sure it’s securely fastened and operational.
- Drive through the field systematically, covering every inch to ensure maximum rock collection.
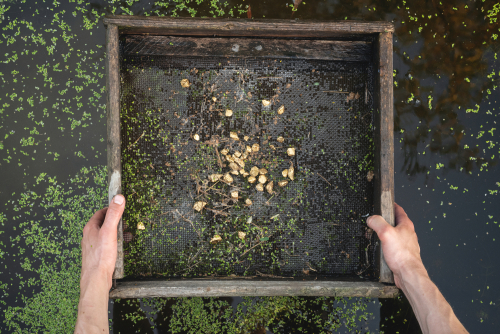
Soil Sifting and Screening
To enhance your garden’s soil quality, soil sifting and screening are essential processes. These methods separate rocks and debris from soil, making it ideal for planting.
Building a Soil Sifter
When constructing your soil sifter, you’ll need materials such as boards for the frame and metal bars or mesh for the screen. Build a frame to your desired size using sturdy boards, ensuring it can comfortably hold the weight of the soil and rocks. Affix the mesh or metal bars securely to the frame, maintaining tension to prevent sagging. This mesh will act as the filter for separating smaller rocks from the soil.- Materials Needed:
- Boards (for the frame)
- Metal bars or mesh (for the screen)
- Screws or nails
- Hinges (optional, for a more manageable sifter)
- Assembly Steps:
- Cut the boards to create a square or rectangular frame.
- Join the corners using screws or nails.
- Stretch the mesh across the frame and secure it.
- (Optional) Add hinges to connect two frames, creating a box that can be shaken.
Using Soil Screens
To effectively use a soil screen, shovel soil onto the screen and either shake the frame or use your hands to work the soil back and forth. The fine soil will fall through, and the rocks and debris will remain on top.- Sifting Method:
- Place the screen over a container or wheelbarrow.
- Shovel soil onto the screen.
- Shake the screen or use hands to move the soil over the mesh.
- Remove the remaining debris from the screen.
Enhancing Soil Post-Rock Removal
Removing rocks from your garden soil improves its structure and workability, allowing you to enhance it further for optimal plant growth. After extraction, enriching the soil with organic matter and improving drainage are pivotal to preparing for successful planting.Adding Compost and Organic Matter
Adding compost to your garden soil becomes significantly beneficial post-rock removal. Integrate a proportional blend of compost and well-rotted manure to your soil. This will introduce vital nutrients and microorganisms, promoting healthy plant growth.- Types of organic matter to add:
- Finished compost
- Well-rotted manure
- Leaf mold
- Grass clippings
Improving Drainage
Enhanced drainage is crucial for preventing waterlogged soil conditions which can be detrimental to plants. Examine your soil’s composition and consider adding materials like sand or fine gravel to improve soil drainage.- Strategies for improving drainage:
- Amend with sand or fine gravel if necessary
- Create raised beds
- Avoid compacting the soil when wet
Landscaping After Rock Removal
Once you’ve successfully removed rocks from your soil, you’re ready to revitalize your landscape. The foundation is set for a thriving garden or a well-maintained lawn. With the obstruction gone, let’s look at how to make the most of your rock-free soil.Gardening and Planting
With the rocks out of the way, it’s time to enrich the soil. You’ll want to add compost or a soil amendment to provide essential nutrients. This will improve the soil structure and fertility which is crucial for healthy plants. Afterwards, plan where each plant will go based on its sunlight and space requirements. Remember, proper spacing is key to good air circulation and sunlight exposure, which reduces the likelihood of plant diseases.Installing Landscape Fabric
When considering long-term weed control, landscape fabric can be invaluable. After smoothing out the soil, lay the fabric over the areas you want to protect. Cut X-shaped slits to place your plants, then secure the fabric’s edges with garden staples. Overlap any seams by at least 6 inches to prevent weeds from finding an opening. Finally, cover the fabric with mulch or gravel to enhance the garden’s aesthetics and further suppress weed growth. Keep in mind, though, that landscape fabric is more suited for areas where plants are spaced out, like in a shrub bed, rather than densely planted vegetable beds. By following these steps, your rock-free soil will serve as a rich foundation for whatever garden or lawn vision you have in store.Maintenance and Prevention
Maintaining a rock-free lawn and garden requires consistent care and strategic prevention measures. These practices are essential for preserving the integrity of your soil and ensuring a hospitable growing environment for your plants.Regular Lawn Care
Improve your lawn’s condition and deter rock emergence by practicing regular lawn care. This should include:- Aeration: Annually aerate your lawn to prevent soil compaction, promoting better drainage and reducing the likelihood of stones moving upwards.
- Mowing: Keep your grass at an optimal height to ensure a dense lawn, which can prevent erosion and reduce the exposure of hidden rocks.
Preventing Rock Build-Up
Limiting the accumulation of rocks on your rocky terrain involves preemptive measures:- Mulching: Apply a layer of mulch in garden areas which can discourage the migration of stones to the surface.
- Ground Covers: Plant ground cover species, which can stabilize the soil and reduce the upward shift of rocks due to frost heaving and other natural processes.
Frequently Asked Questions
Removing rocks from soil can be a labor-intensive process, but knowing the right techniques and tools can make it much more manageable. Whether you have a small garden or a large landscape, these FAQs will guide you in choosing the most suitable method for rock removal.What is the most efficient method to sift rocks from garden soil?
For sifting rocks from garden soil, using a soil sifter or screen is highly efficient. The finer the mesh of the screen, the smaller the rocks that can be separated from the soil.Can a rock screening rake be effective for clearing small stones from landscaping?
Yes, a rock screening rake can be quite effective for clearing small stones from landscaping. It allows you to collect and remove pebbles and smaller rocks without disturbing the soil too much.What type of machine is recommended for removing rocks from a large yard?
When dealing with a large yard, heavy-duty equipment like a rock picker or stone burier is recommended. These machines are designed to collect and bury stones efficiently, making them ideal for large areas.Is there a tractor attachment that helps in the extraction of rocks from soil?
Yes, there are several tractor attachments such as rock buckets or landscape rakes that can assist in the extraction of rocks from soil. They are attached to the tractor and collect rocks as the machine moves across the land.What techniques are available for rock removal before planting grass or seeding?
Before planting grass or seeding, you can manually remove larger rocks and use soil sieves for finer material. Additionally, employing a rototiller can help bring smaller rocks to the surface for easier collection.How can homeowners deal with extensive gravel deposits in their soil?
Homeowners dealing with extensive gravel deposits in their soil may consider a multi-step process starting with a rock picker machine followed by raking and sifting. Composting can also be integrated to break down smaller stones over time.RECENT BLOGS


Our Reviews

Glenda Lanier Prowell
1721758635
I have ordered an 11 yard dumpster to be delivered to my house.Lonier was extremely helpful and answered all my questions. The rate was very reasonable.

Cedric Smikle
1721660395
Amber was extremely professional and courteous. She answered all of my questions and even some that I didn’t know I needed to ask.

Cait Kaider
1721243051
I highly recommend Waste Removal USA for their responsiveness and how the staff work hard to provide exceptional customer service. They have done well by us and our clients. Thank you!

Easom Family
1721223306
Louiner Pierre-Louis Is awesome! Did a great job. Will definitely be using this same company for all my dumpster needs because of his awesome customer service! Thank you!!!

tabitha Vazquez
1720539988
Wonderful and fast customer service!
LATEST BLOGS
