April 1, 2024 - Benjamin Ehinger
How to Remove Drywall from the Ceiling: A Step-by-Step Guide
CALL NOW 844-762-8449
Removing drywall from a ceiling can seem like a daunting task, but with the right approach, it can be accomplished smoothly and efficiently. Whether you’re looking to renovate your space, address water damage, or simply update your ceiling, understanding the removal process is key. Essential to this process is ensuring that you have the appropriate tools and materials on hand, including protective gear to ensure your safety during the operation.
As you embark on this project, preparation is paramount. You’ll need to clear the room, protect the floor and furniture, and secure any fixtures. Additionally, it is vital to be aware of potential hazards like electrical wiring and plumbing that may be concealed above the drywall. Once everything is in place, the removal process involves carefully breaking down the drywall into manageable sections, minimizing dust and debris. For the disposal of these materials, consider using a small dumpster rental from Waste Removal USA to make clean-up easier and more efficient.
 Removing drywall from your ceiling is a straightforward process when you’re equipped with the right tools and materials. Here’s what you’ll need to efficiently and safely get the job done.
 Removing drywall from a ceiling requires precision and safety. Equip yourself with the right tools—a utility knife, drill, and screwdriver—to efficiently cut, detach, and clear away drywall and any accompanying materials.
Key Takeaways
- Proper safety gear and preparation of the work area are crucial before starting.
- Remove the drywall in sections, being cautious of electrical and plumbing systems.
- Rent a dumpster for convenient debris disposal after removal.
Safety Precautions
Removing drywall from a ceiling requires careful attention to safety. Protecting yourself from physical harm and health hazards should be your top priority. It’s crucial to use appropriate personal protective equipment, be aware of hazardous materials such as asbestos and lead paint, and ensure the work area is safe and secure.Personal Protective Equipment
- Safety Glasses: You need to protect your eyes from dust and debris. Always wear safety glasses or a face shield when working overhead.
- Respirator Mask: A respirator mask is essential to avoid inhaling fine particles. For protection from drywall dust, use an N95 mask or better. When dealing with potential asbestos or lead paint, wear a respirator mask with the appropriate filters.
- Protective Gear: Wear a hard hat to shield your head from falling debris. Ensure that you have a pair of heavy-duty work gloves to protect your hands and safety boots to safeguard your feet.
- Clothing: Loose clothing should be avoided. Wear long sleeves and pants to protect your skin from irritation due to contact with drywall materials.
Handling Asbestos and Lead Paint
Asbestos Awareness: If your home was built before 1980, there’s a risk of asbestos in the drywall. Before proceeding, have the material tested by professionals. If asbestos is present, do not attempt to remove it yourself—hire a certified asbestos removal specialist. Lead Paint: Similar precautions apply to lead paint. If your ceiling has layers of old paint, get it tested for lead. If there’s a presence of lead, it’s crucial to follow the Environmental Protection Agency’s (EPA) guidelines or hire a professional for removal.Securing the Work Area
Clear the Space: Remove furniture and cover the floor with a drop cloth to catch falling debris. This makes cleanup easier and prevents tripping hazards. Barrier: If possible, use plastic sheeting to isolate the work area to prevent dust from spreading to other parts of your house. Ladder Safety: Use a sturdy ladder or scaffolding that allows you to comfortably reach the ceiling without stretching. Always maintain three points of contact when climbing or descending to prevent falls.Tools and Materials
Removing drywall from your ceiling is a straightforward process when you’re equipped with the right tools and materials. Here’s what you’ll need to efficiently and safely get the job done.
Gathering the Necessary Tools
To start, you must have a set of essential tools at your disposal. The process will involve cutting, prying, and dismantling the drywall, so prepare the following:- Utility Knife: For scoring drywall paper before making breaks.
- Screwdriver: Needed to remove any screws securing the drywall to the framing.
- Pry Bar: Leveraging old drywall panels away from the joists.
- Hammer: For removing nails or providing additional force when using a pry bar.
- Sledgehammer (optional): For breaking up larger sections, if necessary.
- Drywall Saw: For making precision cuts or holes.
- Drill: With a screwdriver bit to quickly remove screws.
- Ladder: To safely reach the ceiling.
- Shop Vac: For cleaning up dust and debris as you go.
- Oscillating Saw: If you encounter any metal fasteners or need to make detailed cuts.
Choosing the Right Materials
Selecting appropriate materials is key to ensuring the work proceeds smoothly:- Joint Compound: Necessary for patching any mistakes or sealing joints after new drywall installation.
- Drywall Panels: Have a supply of new drywall that matches the existing ceiling in thickness.
- Drywall Tape: For reinforcing joints between new drywall panels.
- Fasteners: Drywall screws or nails, depending on your preference, to secure new drywall.
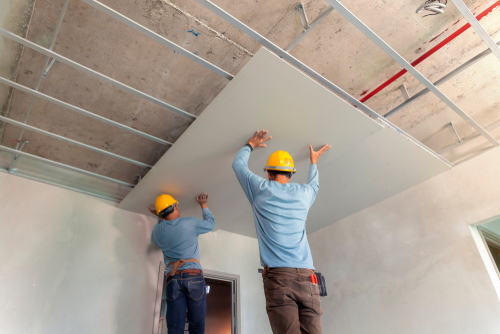
Preparation Steps
Before removing drywall from a ceiling, it’s essential to prepare the area to ensure a safe and clean work environment. The following steps will guide you through the necessary preparations.Removing Fixtures and Obstacles
You’ll need to remove any fixtures such as light fixtures and electrical outlet covers. This process helps prevent damage and allows for easier access to the ceiling. First, turn off the power at the breaker box to ensure your safety. Then, using a screwdriver, carefully detach the fixtures and cover exposed wires with wire nuts for protection.Covering Furniture and Flooring
Protect your furniture and flooring from dust and debris by covering them with canvas or plastic sheeting. Canvas drop cloths are ideal for draping over furniture as they’re less slippery than plastic and provide better protection. For flooring, lay down thick plastic sheets, securing the edges with tape to prevent any dust from escaping.Locating Studs and Utilities
Using a stud finder, locate and mark the ceiling joists, since these will be your reference points when cutting the drywall. It’s also critical to identify any concealed utilities like pipes or wiring to avoid accidental damage. Scan the ceiling thoroughly and mark any areas that must be avoided during the removal process.Drywall Removal Process
Removing drywall from a ceiling requires precision and safety. Equip yourself with the right tools—a utility knife, drill, and screwdriver—to efficiently cut, detach, and clear away drywall and any accompanying materials.
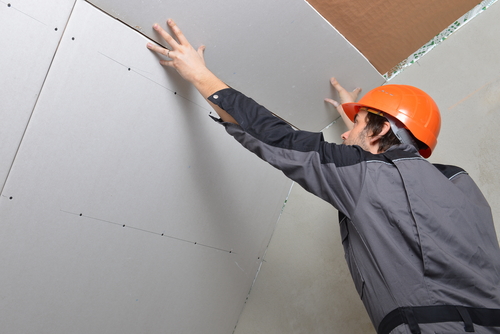
Cutting and Scoring Drywall
To begin, identify the boundary where you plan to remove drywall. With your utility knife, carefully score along the ceiling joists. You need to make these lines deep enough to weaken the drywall but not so deep as to damage any structures behind it. Always start from the edges and work your way to the center. This step-by-step guide to remove a drywall ceiling demonstrates the scoring process.Detaching Drywall Panels
Once scored, position yourself safely under the panel you intend to remove. Using a screwdriver or a drill with the appropriate bit, remove all drywall screws securing the panel to the ceiling joists. Start from one side and support the panel as you progressively loosen the screws to avoid the sheet falling unexpectedly. Guidance on screw removal is provided by The Home Depot’s drywall removal tips.Clearing Insulation and Debris
After panel removal, you will likely encounter insulation above the drywall. Remove this material while wearing protective gear to avoid irritation or inhalation of fibers. Collect and bag all debris for disposal. Ensure the work area is clear of any fallen insulation, using a vacuum if necessary to capture smaller particles. Proper debris management is important for a clean workspace and is highlighted in Storables’ drywall removal article.Handling Wiring and Plumbing
Before removing drywall from a ceiling, it’s crucial to address any wiring and plumbing found within the space. Ensuring the safety of these features is necessary to prevent damage and personal injury.Identifying Electrical Components
Turn off the power at the circuit breaker to the area you’re working on for safety. You can verify the power is off using a non-contact voltage tester. Look for electrical outlets, wires, and related components, which may be hidden above the drywall. Label these components carefully, not only to avoid damage but also to facilitate easy reinstallation or repairs in the future.- Use Caution: Be especially careful if the ceiling is part of a space with high moisture or if the attic above has exposed wiring.
Navigating Around Plumbing
When dealing with plumbing, it’s important to identify the locations of pipes before proceeding. Examine the ceiling area for any signs of pipes or irregularities that may indicate their presence. Use a stud finder with a metal detection feature or an inspection camera to accurately locate hidden pipes.- Avoid Damage: Do not cut into the drywall directly below plumbing fixtures to prevent damaging connections or causing leaks.
- Ceiling Below Bathrooms: If the ceiling is beneath a bathroom, take extra caution as you may encounter both wires and pipes in close proximity.
Finishing Touches
Once your ceiling is free from old drywall, it’s essential to address any damage before installing new material. Focus on creating a clean canvas for whatever comes next to ensure a professional finish.Repairing Damaged Areas
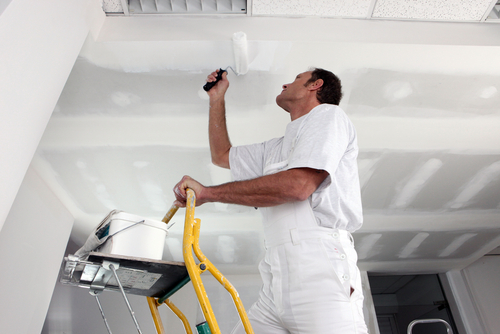
To mend any imperfections, use a putty knife to apply drywall compound to dents or holes. Ensure you fill the gaps until they’re flush with the surrounding surface. Once the compound dries, sand it down to achieve a smooth, level area. If there’s significant damage to the framing, this may require additional structural repair before continuing.Prepping for New Drywall or Other Ceiling Treatments
Before adding new drywall, affix drywall tape along the joints to reinforce them. Apply a liberal amount of joint compound over the tape, smoothing it out with your putty knife. It may take a few layers to build a seamless surface, with ample drying time between applications. Use drywall adhesive if needed to secure new materials, especially when working with ceiling molding. Trim and molding should fit snugly against the repaired areas to form a clean edge.Clean-Up and Disposal
After successfully removing the ceiling drywall, your next priority is managing the resulting dust and debris and ensuring responsible disposal of the old drywall material. A thorough clean-up process is essential for both safety and maintaining a tidy work environment.Dealing with Dust and Debris
As you remove drywall from your ceiling, dust will inevitably become a concern. To minimize the spread of dust throughout your home, seal off the work area with plastic sheeting and keep the room well-ventilated. Wear a dust mask to prevent inhalation of fine particles. Use a shop vac equipped with a HEPA filter to clean up the dust and smaller debris from the floor and surfaces. For larger pieces of debris, gather them by hand, ensuring you wear protective gloves to avoid injury.Disposing of Old Drywall Material
Disposal of old drywall requires you to take a responsible approach to prevent environmental harm. Rent a construction dumpster specifically for the drywall removal waste, as renovating can generate substantial amounts of debris that need to be dealt with efficiently. Check with your local waste management services for regulations on drywall disposal, as some may require special handling due to potential gypsum content. When loading the dumpster, use a drywall lift if available to ease the strain on your back and to safely handle large or awkward pieces of drywall. Once your dumpster is full, the rental company will take care of the proper disposal of the material.Frequently Asked Questions
Removing drywall from your ceiling requires specific tools, careful steps, and an understanding of the materials involved. These FAQs are designed to help you navigate the process effectively.What tools are needed for efficient drywall ceiling removal?
To remove drywall from a ceiling efficiently, you will need a utility knife for scoring the drywall, a pry bar to remove larger sections, a drill or screwdriver to remove screws, and a ladder to access the ceiling.How can I remove a drywall ceiling without disturbing the underlying insulation?
Carefully create a hole in the center of the drywall ceiling to assess the situation of the insulation. Then, cut along the edges rather than tearing large pieces to prevent the insulation from becoming disturbed.What are the steps to safely remove a ceiling to expose the beams?
Begin by removing light fixtures and other obstructions, turn off the power if needed, and protect the floor with drop cloths. Use a utility knife to score the drywall, and gently pull the drywall away from the joists to expose the ceiling beams without applying excessive force.How much does it typically cost to have a drywall ceiling removed professionally?
Professional removal of a drywall ceiling varies based on room size, ceiling height, and regional labor rates; it typically costs between several hundred to over a thousand dollars.What is the process for replacing water-damaged ceiling drywall?
After removing the damaged drywall, cut a new piece to fit the opening, secure it with screws to the joists, and finish the edges with paper drywall tape and joint compound.How should one handle mold when removing a drywall ceiling?
If you find mold on your drywall ceiling, stop your work and consult a professional. Mold can present health hazards, and a specialist can assess the situation and safely remove the mold-infested drywall.RECENT BLOGS


Our Reviews

Glenda Lanier Prowell
1721758635
I have ordered an 11 yard dumpster to be delivered to my house.Lonier was extremely helpful and answered all my questions. The rate was very reasonable.

Cedric Smikle
1721660395
Amber was extremely professional and courteous. She answered all of my questions and even some that I didn’t know I needed to ask.

Cait Kaider
1721243051
I highly recommend Waste Removal USA for their responsiveness and how the staff work hard to provide exceptional customer service. They have done well by us and our clients. Thank you!

Easom Family
1721223306
Louiner Pierre-Louis Is awesome! Did a great job. Will definitely be using this same company for all my dumpster needs because of his awesome customer service! Thank you!!!

tabitha Vazquez
1720539988
Wonderful and fast customer service!
LATEST BLOGS
