February 14, 2024 - Benjamin Ehinger
How to Remove Carpet: A Step-by-Step Guide
CALL NOW 844-762-8449
Removing old carpet can be a transformative step in updating your home. Whether you’re preparing for new flooring or simply looking to restore the original hard surfaces beneath, the removal process demands attention to detail and a methodical approach. One fundamental aspect often overlooked is the disposal of discarded carpets and materials. Having a construction dumpster rental at your disposal can greatly facilitate the clean-up process, ensuring you have a streamlined method to manage waste as you work.
Before tearing up the first corner of the carpet, it’s crucial to have all the necessary tools on hand and the work area cleared. This preparation phase will not only make the process smoother but also help mitigate any potential damage to the subflooring. During removal, you’ll deal with tack strips, staples, and padding, all of which require careful handling to avoid injury and damage. After the carpet and padding are out, assessing the condition of the floor is an essential step to prepare for new flooring or other renovations.
 After you’ve successfully removed your carpet, the next step is to address the carpet padding. It’s important that you remove padding cautiously to avoid damage to your subfloor.
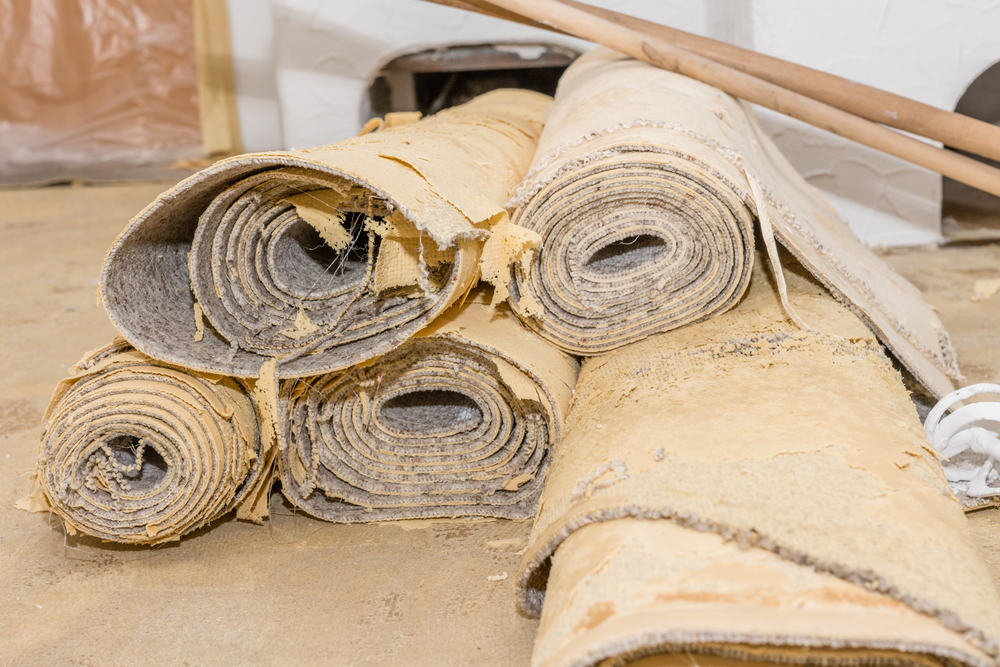 When removing carpet, it’s vital to consider the environmental impact of disposal or recycling. Making an informed choice can minimize landfill waste and reduce your ecological footprint.
Weigh the cost of renting tools and potentially making mistakes against the expense of hiring a professional. Remember that professional services often include removal and disposal of the old carpet, which can add value beyond just the labor of removal.
Key Takeaways
- Renting a construction dumpster can simplify the disposal of old carpets and materials.
- Proper preparation and having the right tools are key for efficient removal.
- Inspect the subfloor post-removal to prepare for subsequent flooring installation.
Preparation
Removing your carpet efficiently requires a few important preparation steps. These include clearing your space, ensuring it’s clean, and having the right tools and materials at hand.Furniture Removal
You need to empty the room of all furniture to provide unhindered access to the carpet. Start by removing chairs, tables, and electronics. For larger items, seek assistance to avoid injury or damage.Cleaning the Area
Before removing the carpet, vacuum the surface to eliminate dust and debris. This step is vital for a clean working environment and reduces the chance of airborne particles during removal.Gathering Tools and Materials
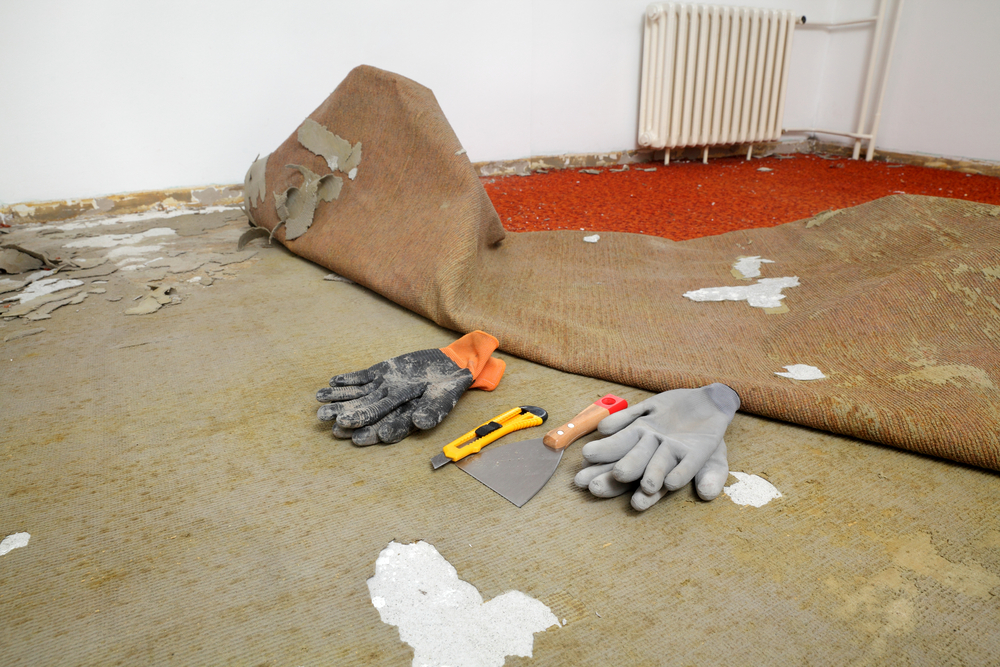
Make sure to have all necessary tools and materials ready:- Utility knife or carpet cutter
- Pliers
- Pry bar or claw hammer for removing tack strips or staples
- Dust mask and gloves for safety
- Contractor bags for disposing of the old carpet
Carpet Removal Process
Removing your old carpet involves specific steps to ensure clean and efficient work. Below is the detailed process broken down into critical stages.Detaching Carpet Edges
Begin by using pliers to grip and pull the carpet away from the tack strips securing it to the edges of the room. You should start in a corner and work your way around the room, detaching the carpet from the sharp tack strip that holds it to the floor.Cutting the Carpet
Once the edges are free, cut the carpet into strips using a utility knife. Be sure to cut from the back to avoid damage to the floor. Strips should be about 3 to 4 feet wide for easy handling and removal. Regularly sharpen or change your blade to maintain ease of cutting.Rolling and Removing Carpet
After cutting, roll each strip of carpet and secure them with duct tape for easy transportation. Lift the rolls carefully to prevent back strain and remove them from the house. Remember to also remove the padding underneath in a similar fashion if present.Tack Strips and Staples Removal
Removing tack strips and staples is a necessary step in the carpet removal process to prepare the subfloor for new flooring or treatments. Proper tools and techniques ensure a clean and efficient job.Tack Strip Lifting
To lift tack strips, you need a sturdy flat pry bar and a hammer. Gently wedge the pry bar under the tack strip and pry it up. For particularly stubborn strips, lightly tapping the pry bar with your hammer can help to loosen the nails holding the tack strip in place. Be cautious to avoid damaging the subfloor. One effective technique involves using a shovel to get underneath the tack strips and pry them up.Staple Extraction
After removing the carpet, you’ll likely encounter numerous staples. To extract them, equip yourself with a pair of pliers or a staple remover. Firmly grasp each staple with the tool and roll it to pull the staple out of the subfloor. If resistance is met, use a small flat-head screwdriver to gently lift the edge of the staple before grasping it. For a visual guide on the process, consider watching this tutorial on how to remove Carpet tack strip staples from old flooring. Remember to collect the removed staples safely to avoid injury or damage to the floor.Padding Removal
 After you’ve successfully removed your carpet, the next step is to address the carpet padding. It’s important that you remove padding cautiously to avoid damage to your subfloor.
Padding Sectioning
Begin by cutting the padding into strips approximately 2-3 feet wide using a utility knife. Be sure to cut carefully and apply pressure uniformly to avoid tearing the padding or damaging the floor underneath. Once you’ve cut the sections, roll them up for easier handling.Padding Disposal
Dispose of the padding responsibly by checking local waste management guidelines. Often, padding needs to be bagged in specific ways. Consider recycling if the padding is made from recyclable materials. Carry the rolled-up padding sections out of the room and place them in a suitable disposal area or bin.Floor Inspection
After removing your carpet, it’s crucial to assess the subfloor for any necessary repairs and ensure cleanliness for the installation of new flooring.Identifying Repairs
Inspect your subfloors for squeaks and any signs of damage. Visible cracks or unevenness can indicate the need for repairs. If you do find issues, address them before laying new flooring. The video titled How to Remove Old Nasty Carpet demonstrates how important it is to check for problem areas after removing carpet.Ensuring Cleanliness
Once repairs are addressed, sweep and vacuum the entire subfloor area to remove all dust and debris. Analyzing your subfloor’s condition also involves checking for any leftover tack strips or staples; these should be removed to create a smooth base. The DIY carpet removal guide at Advantage Inspection Service outlines how a clean subfloor is crucial for new flooring adherence.New Flooring Preparation
Before installing new flooring, ensure your base is solid and even. Addressing the subfloor and planning for the type of new flooring are vital steps for a successful installation.Subfloor Repair
Assess the Subfloor: Check your subfloor for damage. Look for protruding nails, loose boards, or squeaky sections that need securing. Repairing any damage is crucial for the longevity of your new floor. Clean and Level: Ensure the subfloor is clean, dry, and level. Any high spots can be sanded down, and low spots filled with a leveling compound. A properly prepared subfloor helps avoid issues after your new flooring is installed.Planning for New Carpet or Flooring
Measure Your Space: Accurately measure the area where you’ll install the flooring. This will help you purchase the correct amount of materials and avoid waste. Acclimate Your Flooring: Especially for wood or laminate, it’s essential to acclimate the flooring to your home’s environment. Leave the materials in the room for 48 hours before installation to reduce expansion and contraction post-installation. Use these guidelines to prepare for your new flooring and ensure a smoother installation process.Environment Considerations
 When removing carpet, it’s vital to consider the environmental impact of disposal or recycling. Making an informed choice can minimize landfill waste and reduce your ecological footprint.
Proper Disposal with a Dumpster Rental
Renting a dumpster can be an efficient way to handle your old carpet’s disposal if recycling isn’t an option. Use a reliable dumpster rental service to ensure the carpet is disposed of in a way that complies with local regulations. It’s important to:- Check the size: Ensure you choose a local dumpster that fits the amount of carpet you plan to dispose of.
- Understand the fees: Some materials may incur additional fees, so clarify this with your rental provider.
- Know the rules: Certain components, like carpet padding, might have special disposal requirements.
Recycling Options
Carpet recycling lessens the environmental burden, turning your old carpet into new products. To find recycling programs in your area, you could research local carpet recycling options. When preparing carpet for recycling:- Remove all contaminants like nails and tack strips.
- Cut the carpet into manageable sections.
Professional Help
When dealing with carpet removal, you have the option to hire a professional service, which can save time and ensure the job is done correctly.Hiring a Professional
If you’re not comfortable undertaking the task of carpet removal yourself, a professional flooring contractor can help. Professionals will often have the necessary tools and experience to efficiently remove your old carpet without damaging the subfloor. When you hire a professional, you are also paying for their expertise in dealing with unforeseen issues like mold or subfloor damage that might arise during the removal process.DIY vs. Professional Costs
When deciding between DIY and professional carpet removal, consider both the cost and the scope of the job:| Consideration | DIY | Professional Service |
|---|---|---|
| Cost | Low (mainly just tools) | Higher (labor + service) |
| Time | Potentially lengthy | Generally faster |
| Tools/Equipment | Must be rented or purchased | Provided by the service |
| Experience | Varies (may be your first time) | Expertise guaranteed |
| Convenience | Disposal on your own | Often included with service |
| Risk | Potential mistakes or injuries | Minimized, insured professionals |
Frequently Asked Questions about Removing Carpet
What tools are needed for DIY carpet removal?
You will need pliers, a utility knife, and a pry bar or a hammer. The pliers help to tightly grab the carpet, while the utility knife is used to cut it into strips for easier handling.Which size dumpster rental will work best for disposing of old carpet?
The size of the dumpster rental depends on the amount of carpet you are removing. For a single room, a 10-yard dumpster might be sufficient, but larger projects will require bigger dumpsters.What steps should be taken to remove carpet from concrete floors?
Begin by pulling up a corner of the carpet and then cut it into strips. You may need to use a floor scraper to remove any remnants or adhesive from the concrete.How can one remove old carpet without causing damage?
Work carefully when pulling the carpet away from the tack strips and walls. If there is hardwood beneath, use tools that won’t cause gouges or scratches when removing staples or tack strips.What is the process for removing carpet from stairs effectively?
For stairs, the process involves cutting the carpet into sections and then prying it up step by step. Employ patience and attention to detail to avoid damage to the underlying stairs.How should one prepare the floor for new installations after carpet removal?
Once the carpet is removed, clear any debris, and ensure the floor is smooth. It’s important to remove all staples, tack strips, and adhesives to create a clean, even surface for the new installation.What are the considerations for determining whether to hire professionals or remove carpets DIY?
Consider your skill level, the size of the project, and the time you can commit. If the carpeted area is large or if you’re not confident in handling the tools, it might be better to hire professionals.RECENT BLOGS
Our Reviews
Glenda Lanier Prowell
1721758635
I have ordered an 11 yard dumpster to be delivered to my house.Lonier was extremely helpful and answered all my questions. The rate was very reasonable.
Cedric Smikle
1721660395
Amber was extremely professional and courteous. She answered all of my questions and even some that I didn’t know I needed to ask.
Cait Kaider
1721243051
I highly recommend Waste Removal USA for their responsiveness and how the staff work hard to provide exceptional customer service. They have done well by us and our clients. Thank you!
Easom Family
1721223306
Louiner Pierre-Louis Is awesome! Did a great job. Will definitely be using this same company for all my dumpster needs because of his awesome customer service! Thank you!!!
tabitha Vazquez
1720539988
Wonderful and fast customer service!
LATEST BLOGS

