April 22, 2024 - Benjamin Ehinger
How to Find a Leak on a Shingle Roof: A Step-by-Step Guide
CALL NOW 844-762-8449
Discovering a leak in your shingle roof can be unsettling, but addressing it promptly is crucial to prevent further damage to your home. When you spot telltale signs of a leak, such as water stains on your ceiling or walls, it’s essential to act quickly. Your shingle roof, while designed to withstand the elements, can still fall prey to wear and tear or sudden damage that lets moisture seep through.
To tackle a leak effectively, start with a methodical approach to identify the source. This may involve inspecting individual shingles, examining the flashing around chimneys, looking at the condition of roof vents and fixtures, and ensuring gutters and downspouts are clear and functional. Assessing the damage from the interior of your home can also provide clues. If substantial repairs are needed, consider getting a roofing dumpster rental to manage the debris efficiently. By remaining proactive about roof maintenance and adopting preventive measures, you can extend the life of your roof and mitigate the risk of leaks.
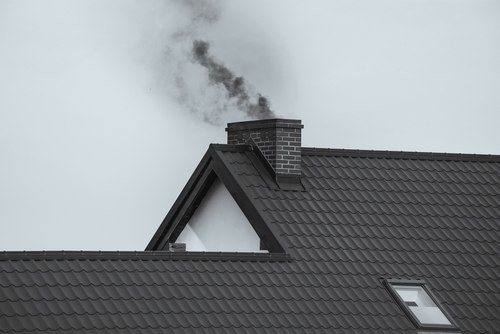 When ensuring the integrity of your roof, special attention must be paid to the areas around flashing and chimneys, as these are common sites for leaks to develop.
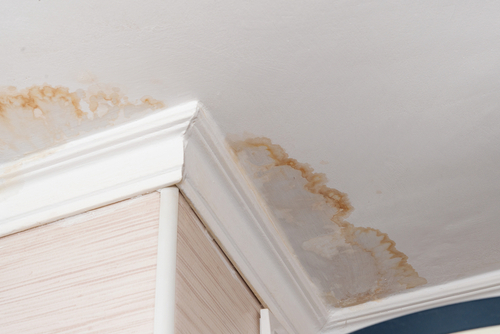 When you’re dealing with a roof leak, the signs often first manifest within the interior of your home. Paying close attention to these signs, particularly in your attic and on your ceilings and walls, can help you pinpoint the source of water intrusion.
Key Takeaways
- Quick identification and repair of a leak can save your home from extensive damage.
- An examination of shingles, flashings, vents, and gutters is critical in leak detection.
- Regular maintenance and clear gutters are proactive ways to protect your roof integrity.

Identifying Roof Leaks
Discovering a leak in your shingle roof early can prevent extensive damage. This section will guide you through the necessary safety precautions, the initial signs to look for in your home, and the proper way to inspect your attic.Safety First
Before you begin, ensure you prioritize your safety. Use a sturdy ladder to access your roof or attic and wear non-slip footwear to prevent falls. When using a flashlight in dark areas, make sure it’s securely fastened to you to keep both hands free for climbing or inspection.Initial Signs of Water Damage
Inspect your ceiling for water stains or discolorations, which are often the first indicator of a roof leak. Look also for signs of mold or moisture in the corners of rooms and along the edges where the ceiling meets the walls. Use natural light where possible to scrutinize for faded areas or peeling paint, as these can be subtle signs of water intrusion.Using Your Attic Access
Access your attic during daylight hours to identify any streams of light coming through the roof, as these can point to leakage areas. With your flashlight, closely examine the underside of the roof for darker spots or trails, signs that water is or has been present. Pay particular attention to the areas around roof penetrations like vents or chimneys, where leaks often occur. It can be helpful to use a bright-colored marker to note any suspicious areas for further inspection or repair.Inspecting Shingles
When inspecting your roof for leaks, closely examining the shingles is crucial as they are the outermost layer of protection for your home. Look for damaged or missing shingles, as these are often the culprits of water intrusion.Spotting Damaged Shingles
Damaged Shingles:- Visual Inspection: Start by looking for shingles that are visibly damaged – this would include shingles that are cracked, torn, or have missing granules.
- Touch Test: Gently running your hand over the shingles can help you feel for subtle damages like small cracks or chips.
- Missing Shingles: Areas with missing shingles are highly vulnerable and should be addressed immediately to prevent water from entering the roof structure.
Repairing Cupped or Curled Shingles
Cupped or Curled Shingles:- Cupping: When the edges of a shingle are higher than the center, it is referred to as cupping. This can lead to water accumulation and potential leaks.
- Curling: Shingles that are curling can allow water to seep underneath, leading to damage.
- Replace cupped or curled asphalt shingles as soon as possible to maintain your roof’s integrity.
- For shingles that are not severely damaged and have minor curling, roofing cement can sometimes be applied under the shingle to flatten it against the roof. However, this is a temporary solution, and replacement is often the more durable option.
Flashing and Chimneys
When ensuring the integrity of your roof, special attention must be paid to the areas around flashing and chimneys, as these are common sites for leaks to develop.
Checking Roof Flashing
Your first step is to inspect the roof flashing carefully, which includes looking for any signs of damage or wear around the chimney. Step flashing—the material that creates a water-tight seal between the chimney and roof shingles—should be checked for proper installation and condition. This involves examining the flashing for rust, gaps, or bends that may allow water penetration. If metal flashing is installed, ensure that it hasn’t become dislodged or corroded over time.Sealing Around Chimneys
After inspecting the flashing, it’s critical to assess the seal around the chimney. If you find gaps or cracked seals, using a high-quality caulk designed for exterior use can help create a waterproof barrier. When sealing, apply caulk to all joints and edges where the flashing meets the chimney and roof. It’s essential to use products appropriate for an asphalt shingle roof, as the wrong type of sealant can cause further damage or ineffective sealing.Roof Vents and Fixtures
Assessing and maintaining the integrity of roof vents and fixtures is crucial for preventing water entry and subsequent damage to your home. Regular inspection can save you from costly repairs by identifying and addressing leaks early on.Examining Roof Vents
Your first step should be to carefully inspect the roof vents. Look for cracks, breaks, or signs of wear in the housing of the vents. If you find any damage, applying roofing sealant with a caulk gun can often provide a temporary fix. However, if damage is extensive, replacing the entire vent may be necessary.Securing Plumbing Vent Boots
Check your plumbing vent boots, as these can often be the culprits when it comes to leaks. They should fit snugly and be free of cracks. If you notice loose or missing nails, replace them and cover the nail heads with roofing sealant to prevent further leakage. If the boot is damaged, remove and install a new one, sealing it properly to ensure no water can penetrate.Skylights and Dormer Windows
Lastly, inspect any skylights or dormer windows. These features are common leak sources due to their design and placement. Ensure that the flashing around them is intact and that the seals hold firm. If you spot any gaps or signs of wear, using a caulk gun apply a bead of roofing sealant as a preventative measure against water damage.Gutters and Downspouts
Maintaining your gutters and downspouts is crucial to prevent water damage to your roof. Clogged gutters, ice dams, and overflow can all contribute to leaks and damage to your home’s structure.Unclogging Gutters
To prevent water damage due to clogged gutters, it’s important to regularly remove leaves, twigs, and debris. After heavy rains, ensure that gutters are not retaining water which indicates a blockage. Clean gutters allow for proper water flow away from your roof and house foundation.- Wear gloves and use a gutter scoop.
- Flush the gutters with water to check for proper flow.
- Install gutter guards to minimize future clogs.
Assessing for Ice Dams
Ice dams can form when melted snow refreezes at the roof’s edge, preventing water from draining properly. This can lead to water backing up under shingles and causing leaks.- Inspect the edges of your roof after snowfalls.
- Look for icicles as they may be a sign of potential ice dams.
- Consider installing heated cables to prevent ice dam formation.
Overflow and Water Seepage
During heavy rains, water should flow freely through gutters and downspouts. Overflowing gutters can lead to water seepage and potentially cause damage to the interior and exterior of your home.- Monitor your gutters during rainstorms for overflow.
- Ensure downspouts discharge water at least 5 feet away from your home’s foundation.
- Regularly trim tree branches near your roof to reduce debris and minimize clogs.
Interior Damage Assessment
When you’re dealing with a roof leak, the signs often first manifest within the interior of your home. Paying close attention to these signs, particularly in your attic and on your ceilings and walls, can help you pinpoint the source of water intrusion.
Detecting Mold Growth
Mold is often a strong indicator of ongoing water damage, thriving in damp and poorly ventilated spaces. If you detect a musty odor or notice black, green, or white specks along the walls or ceiling, you’re likely seeing mold growth. These spots can especially proliferate in corners or near any possible water stains. It’s crucial to address mold quickly, as it can spread and contribute to health issues.Assessing Insulation for Moisture
Your attic’s insulation can absorb moisture from roof leaks, leading to compromised efficiency and potential mold issues. Check your insulation for any signs of moisture, such as clumping, wetness, or a general damp feeling. Pay special attention to insulation near any staining or bubbling paint on adjacent walls, as these areas are common indicators of water infiltration. If your insulation is wet, it’s important to find the leak’s origin to prevent further damage and potential energy loss.Temporary and Permanent Fixes
When dealing with a leaky roof, it’s crucial to address the problem quickly with temporary measures and plan for a more permanent repair to maintain the integrity of your home.Implementing Quick Repairs
If you’ve discovered a leak, immediate action is necessary to prevent further damage. For a quick fix, you can apply a waterproof tarp over the affected area, making sure it extends past the damaged zone. This can provide a temporary shield against the elements. For smaller punctures, roofing cement or specialized tape designed for roof repair can seal the gap temporarily. Always be cautious when working on a roof and consider safety first.Planning for Long-Term Solutions
After managing the immediate issue, it’s vital to think about permanent roof repair. This usually involves removing and replacing damaged shingles or, in more severe cases, an entire section of roofing. A proper DIY roof repair requires matching new shingles to your existing ones in both color and material. For substantial or complicated damage, hiring a professional is recommended to ensure a complete and lasting repair. Remember, a durable fix not only stops current leaks but also helps prevent future issues.The Importance of Professional Help
When dealing with a shingle roof leak, enlisting the expertise of a professional can mean the difference between a well-executed repair and potential ongoing issues. A trained roofer has the ability to assess damage accurately, recommend appropriate solutions, and execute repairs following safety standards.When to Call a Professional Roofer
You should contact a professional roofer when:- You locate signs of water damage but cannot identify the source of the leak.
- The location of the leak is not easily accessible, posing a risk for personal injury.
- Damage to your roof is extensive, signaling the need for potentially complex repairs or a roof replacement.
Understanding Repair Costs
Repair costs can vary greatly depending on the:- Extent of the damage
- Materials required for repairs
- Complexity of the job
- Materials: Shingles, underlayment, flashing, etc.
- Labor: The cost for the professional time and skill.
- Additional Repairs: Sometimes leaks can lead to structural damage requiring more extensive work.
Preventative Measures and Maintenance
To safeguard your home from roof damage and costly repairs, implementing preventative measures is essential. Regular maintenance and inspections can catch early signs of wear and prompt action can deter more serious issues.Regular Roof Inspection
Undertake biannual roof inspections to detect potential problems like cracked, warped, or missing shingles. Check for:- Moss or algae growth: Can lead to shingle damage.
- Rust on metal parts: Indicates deterioration.
- Shingle granules in gutters: Sign of shingle wear.
Addressing Potential Problem Areas
Identify and fix common problem areas:- Flashings: Ensure they are not corroded or broken.
- Debris: Keep your roof and gutters clear of leaves and branches.
- Tree limbs: Trim branches hanging over your roof to prevent tree damage.
Navigating Insurance Claims
When you discover a leak in your shingle roof, effectively navigating your insurance claim is essential to cover repair costs. You will need to meticulously document the damage and understand the specifics of your policy coverage.Documenting Roof Damage
As soon as you identify roof damage, it’s crucial to document everything. Take clear photos of the affected area from different angles and make written notes detailing the extent and presumed cause of the leak. This evidence is vital when filing a claim with your insurance provider, as it helps to establish a timeline and the seriousness of the damage.- Photographs: Snap multiple, well-lit photos of the damaged shingles and any water damage inside your home.
- Description: Note the size, pattern, and location of the leak on your roof.
- Immediate Action: If any temporary repairs are made, document those as well.
Understanding Policy Coverage
Before proceeding with a claim, thoroughly reviewing your insurance policy is imperative to gauge what types of damage are covered. Most policies will cover damage that is considered sudden and accidental. However, they typically do not cover issues arising from neglect or normal wear and tear.- Determine your deductible and whether it’s a fixed amount or a percentage of your home’s insured value.
- Examine the policy for coverage limits and any exclusions that might affect your claim.
- Consider the age of your roof as some insurers may factor this into the settlement amount.
Frequently Asked Questions
When dealing with a leaky roof, it’s essential to accurately locate the source in order to implement an effective repair strategy. These FAQs are designed to guide you through common issues and solutions associated with shingle roof leaks.How can I locate a leak on my roof when there is no visible damage to the shingles?
Even without visible damage, leaks can occur due to underlayment failures or around roof penetrations. Start by checking the attic for water stains, mold, or wet insulation, which can indicate the leak’s location. If attic access isn’t available, you may perform a water test using a hose to simulate rain and observe where water enters.What methods are effective for detecting leaks in roofs during heavy rainfall?
During heavy rain, look for any active dripping or dark spots on the ceiling, as they often point to the leak’s entry point. Use a bucket to catch the drip and minimize damage, then when safe, inspect the attic or the highest point in your ceiling where the leak is visible. Tracing the water back to its entry point can lead to the leak’s source on the roof.Is it possible to discover a roof leak using infrared technology, and how does it work?
Infrared technology can be used to detect roof leaks by identifying temperature variations on the roof’s surface. These temperature differences are often due to moisture accumulation, which retains heat differently than dry areas. Infrared cameras can visualize these anomalies, making it possible to spot the leak’s location.What steps should be taken to identify the origin of a roof leak from inside the house?
To pinpoint a roof leak from the inside, visit your attic and look for signs of moisture, such as damp rafters or water stains. Take note of the leak’s position and measure its location in relation to a fixed point, like a chimney. Transpose these measurements to the roof outside to find the corresponding spot above.What strategies can be employed to pinpoint leaks in wood shingle roofs, particularly in common problem areas?
For wood shingle roofs, check for common issues like split or curled shingles, which can allow water entry. Examine the areas around flashings, valleys, and eaves. Tips for finding hard-to-spot leaks suggest looking above the leak in a straight line, as water can run down the roof deck before dripping off.What are the typical steps to repair a leaking roof found beneath the shingles?
Once you’ve located a leak beneath the shingles, assess the damage to the underlayment and roof decking. If the damage is localized, you can replace the affected underlayment and shingles. For more significant issues, it may be necessary to remove a larger section of shingles to repair the decking before installing new underlayment and shingles.RECENT BLOGS


Our Reviews

Glenda Lanier Prowell
1721758635
I have ordered an 11 yard dumpster to be delivered to my house.Lonier was extremely helpful and answered all my questions. The rate was very reasonable.

Cedric Smikle
1721660395
Amber was extremely professional and courteous. She answered all of my questions and even some that I didn’t know I needed to ask.

Cait Kaider
1721243051
I highly recommend Waste Removal USA for their responsiveness and how the staff work hard to provide exceptional customer service. They have done well by us and our clients. Thank you!

Easom Family
1721223306
Louiner Pierre-Louis Is awesome! Did a great job. Will definitely be using this same company for all my dumpster needs because of his awesome customer service! Thank you!!!

tabitha Vazquez
1720539988
Wonderful and fast customer service!
LATEST BLOGS
