April 4, 2024 - Benjamin Ehinger
How to Build a Fireplace Mantel: A Step-by-Step Guide
CALL NOW 844-762-8449
Building a fireplace mantel can transform the ambiance of any room, serving as the heart of your space where family and friends gather. Whether you’re aiming for a custom fireplace mantel with intricate designs or a simple faux fireplace mantel, undertaking this DIY project is within your reach. By following systematic steps, you can create a mantel that reflects your home’s character and your personal style.
Embarking on this project requires careful planning and a clear vision. Consider the style that best complements your space—perhaps a rustic beam mantel or a sleek, modern fireplace mantel shelf. Safety is paramount in both the building process and the subsequent installation. With the right tools, some woodworking know-how, and a dash of creativity, you’ll be ready to construct a mantel that’s both functional and aesthetically pleasing.
 Before you begin constructing your mantel, it’s critical to have your tools and materials ready. You’ll be using a combination of power saws for precise cuts and adhesives for a strong hold. Begin with building a sturdy frame, followed by adding aesthetic moldings and trim for a polished look.
 In this section, you’ll learn the exact steps to securely install your mantel and make those final adjustments that create a professional finish.
Key Takeaways
- Planning and designing a mantel involves choosing a style that fits your space and personal preferences.
- The construction of a mantel incorporates various woodworking techniques, ensuring structural integrity.
- Installation of the mantel must be executed with precision, adhering to safety standards.
Designing Your Fireplace Mantel
Designing your fireplace mantel is essential in achieving the desired ambiance and style in your living space. Your choice of materials and design style can transform a simple fireplace into the focal point of the room.Choosing the Right Materials
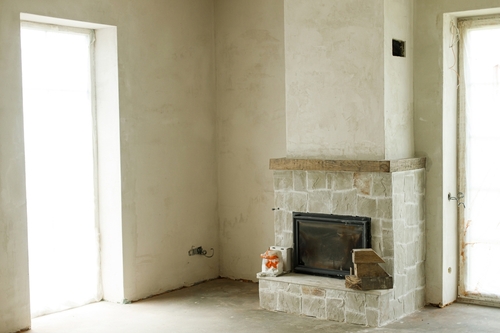
When selecting materials for your fireplace mantel, consider both durability and aesthetics. Wood is a traditional choice that offers versatility for different styles and finishes. For a more durable option, stone can provide a solid, long-lasting mantel that is perfect for a stone fireplace update. If you desire a rustic look, consider using reclaimed wood or finishing new wood with a wood stain that enhances its natural grain. For those looking for an economical DIY project, creating a faux fireplace mantel using lightweight materials like MDF that can be painted to mimic wood or stone is a feasible solution. Make sure to choose heat-resistant paint if the mantel will be near a source of heat.- Materials to Consider:
- Reclaimed wood for a rustic appeal
- Hardwoods like oak, maple, or poplar for durability
- MDF or other composites for a paintable and cost-effective option
- Stone or stone veneers for a sturdy, classic look
- Tiles for added decoration and heat resistance
Incorporating Design Styles
Your mantel should reflect the overall style of your room. For a traditional look, consider elegant moldings and a well-proportioned mantel shelf, while a contemporary space may call for clean lines and minimalistic design.- Design Styles:
- Traditional: Use classic lines and carvings with dark wood stains.
- Modern: Choose simple designs with sleek, straight lines and neutral paint.
- Rustic: Incorporate distressed wood, a robust mantel shelf, and natural finishes.
- Eclectic: Combine various textures such as wood with tiles to create a unique look.
Preparation and Safety
Before you begin building your fireplace mantel, ensuring you have the correct tools and materials at hand, and setting up a safe and precise workspace is crucial for the project’s success and your safety.Gathering Your Tools and Materials
Tools You’ll Need:- Measuring Tape: For accurate measurements.
- Level: To ensure mantel is perfectly horizontal.
- Stud Finder: For locating studs in the wall.
- Nail Gun: A faster, more efficient option than a hammer for inserting nails.
- Hammer: For manually driving nails if necessary.
- Wood Glue: For strong joins between wood pieces.
- Nails and Wood Screws: Various sizes for assembly and mounting.
- Sandpaper: For smoothing rough edges.
- Painting Supplies: If you plan to paint the mantel.
- Safety Glasses: To protect your eyes from dust and debris.
Measuring and Workspace Setup
Before any construction begins:- Measuring: Use your measuring tape to get the dimensions of the area where the mantel will be installed. These measurements are essential for cutting your wood to the correct size.
- Workspace:
- Clear an area that’s large enough to move around freely while working.
- Lay out materials and tools so they’re easily accessible but not in the way.
- Make sure that the level is used frequently to keep the mantel aligned during both the dry-fit and installation processes.
- Verify twice that your measurements are accurate to ensure the mantel fits snugly against the wall, leaving room for any crown molding or trim that may frame the mantel.
Building the Mantel Structure
Before you begin constructing your mantel, it’s critical to have your tools and materials ready. You’ll be using a combination of power saws for precise cuts and adhesives for a strong hold. Begin with building a sturdy frame, followed by adding aesthetic moldings and trim for a polished look.
Cutting and Assembling the Frame
Begin by measuring and cutting your veneer plywood using a circular saw or table saw for larger pieces, and a miter saw for any angled cuts. With your nail gun and wood screws, assemble the frame to create the mantel’s box structure. Use cleats to reinforce the inside corners. If you’re using MDF for a smoother finish, ensure your cuts are straight and clean. Secure the joints with pocket hole screws for added stability.Attaching Moldings and Trim
After your frame is assembled, attach baseboard trim to the bottom, using a nail gun and brad nails for a seamless look. Apply construction adhesive to the back of decorative molding before fixing it to the structure to give your mantel an elegant touch. The legs of the mantel can be adorned with astragal molding, attached with caulk and wood putty to fill any gaps. As a finishing touch, add shoe molding at the base to enhance the overall detail of your mantel.Finishing Touches
Once your fireplace mantel is constructed, the final steps are crucial to ensure a professionally finished look for your home improvement project. Properly executed finishing touches will elevate the aesthetic appeal of your faux, gas, or electric fireplace with mantel.Sanding and Painting
Before applying paint or finish, it’s essential to prepare the surface of the mantel. Begin with sanding; use 220-grit sandpaper to smooth out all flat surfaces, and pay attention to edges and finer details which may require a gentler touch. A smooth base is pivotal for a superior paint job. Choose a quality paint or finish that complements the style of your room. If you desire a natural look, a wood stain could be a suitable choice. Apply paint with a steady hand, and always follow the grain of the wood to maintain its integrity. Allow sufficient drying time between coats, which will depend on the product’s specifications.Applying Treatments and Decorations
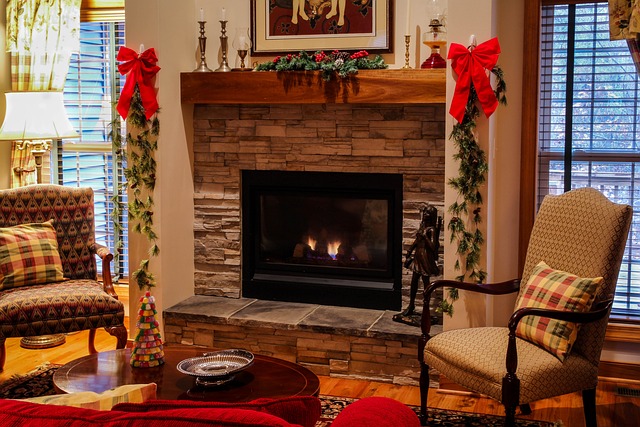
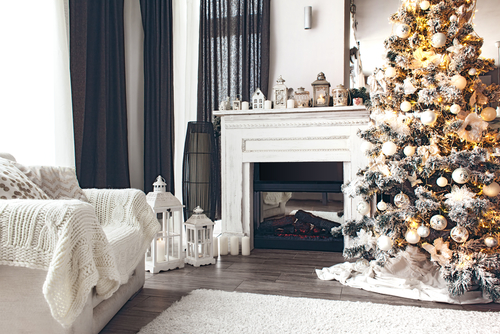
The durability of your mantel can be enhanced by applying treatments such as a sealant. Use a white bond polyurethane to protect the painted or stained surface and apply it evenly, following the manufacturer’s instructions. For any imperfections or gaps, putty is an effective solution to achieve a seamless look. When the mantle is dry and treated, you can focus on decorations. Whether it’s framed photos, art pieces, or seasonal decor, these are what personalize your mantel and make it the focal point of the room. For additional functionality or to scale the design up, consider a mantel extension which not only adds character but might offer a spot for extra decorations or storage. Remember, decorations should be chosen not only for aesthetic purposes but also with safety in mind, especially for gas and electric fireplaces. Keep it tasteful and inexpensive with DIY items that reflect your personal style.Installation Process
In this section, you’ll learn the exact steps to securely install your mantel and make those final adjustments that create a professional finish.
Securing the Mantel to the Wall
First, confirm the location where you want your mantel. Using a level, ensure that the area above your fireplace is even to prevent a slanted installation. Identify the studs in the wall where you’ll attach the cleats; these will support the weight of your mantel. If you’re working with a live edge wood mantel, which can be particularly heavy, using a French cleat system is an ideal choice due to its strength and stability. Once you’ve marked the stud locations, attach the corresponding part of the French cleat to the wall using wood screws. Ensure it’s perfectly level. Apply construction adhesive to the back of the mantel cleat for additional support. This is where a caulking gun comes in handy, allowing you to apply the adhesive evenly.Final Adjustments
Now that the cleat is fixed to the wall, you can hang the mantel. Before you set it in place, it’s wise to apply a bead of wood glue along the top edge of the wall cleat for an even stronger bond. Attach the mantel by fitting it onto the wall cleat and secure it with finishing nails if necessary. These provide extra hold and are easily concealed. Inspect the mantel to confirm it’s level once more. If you’re dealing with imperfections or gaps between the mantel and the wall, use caulk to fill them in, creating a seamless look. A paint touch-up on the mantel may be needed to cover any nail heads or to integrate the mantel with the existing surrounds and fireplace makeover. If you’re not confident with joinery or the process seems daunting, don’t hesitate to seek professional installation to ensure a safe and aesthetically pleasing result, especially if you’re working with a stove insert which requires precise clearances.Frequently Asked Questions
In this section, you will find targeted information on building a fireplace mantel, from materials required to detailed construction techniques and safety considerations.What materials are needed to build a DIY fireplace mantel?
To construct your own fireplace mantel, you’ll typically need wood for the mantel board, moldings for decoration, wood glue, nails, and a nail gun. This guide outlines how to assemble the mantel into a rectangular shelf.What are the steps for building a fireplace mantel from scratch?
Building a mantel from scratch involves measuring the fireplace, cutting the wood to size for the face, shelf, and sides, assembling the pieces, and securely attaching the structure to the wall. Detailed step-by-step instructions are available to guide you through the process.How do you construct a mantel shelf with crown molding?
To attach crown molding to a mantel shelf, you’ll need to cut the molding at the correct angles and affix it to the edges of the shelf, creating a more ornate finish. Gluing and nailing the molding ensures a seamless attachment.What are the dimensions for a properly sized fireplace mantel?
The size of a mantel should be proportionate to the size of the fireplace. It should extend at least three inches beyond the fireplace opening on each side. The width and the height of the mantel largely depend on the room’s size and the owner’s aesthetic preferences.What type of wood is best suited for crafting a wood beam mantel?
Durable hardwoods like oak, maple or cherry are ideal for a wood beam mantel because they are robust and resistant to wear. For a more rustic appearance, reclaimed wood is also a popular choice.How can I create a fireplace mantel surround that complies with safety codes?
To ensure compliance with safety codes, maintain adequate clearance from the firebox, use non-combustible materials for the surround, and consult your local building codes. This helpful resource provides insights on creating a mantel that’s both charming and compliant.RECENT BLOGS


Our Reviews

Glenda Lanier Prowell
1721758635
I have ordered an 11 yard dumpster to be delivered to my house.Lonier was extremely helpful and answered all my questions. The rate was very reasonable.

Cedric Smikle
1721660395
Amber was extremely professional and courteous. She answered all of my questions and even some that I didn’t know I needed to ask.

Cait Kaider
1721243051
I highly recommend Waste Removal USA for their responsiveness and how the staff work hard to provide exceptional customer service. They have done well by us and our clients. Thank you!

Easom Family
1721223306
Louiner Pierre-Louis Is awesome! Did a great job. Will definitely be using this same company for all my dumpster needs because of his awesome customer service! Thank you!!!

tabitha Vazquez
1720539988
Wonderful and fast customer service!
LATEST BLOGS
