May 17, 2024 - Benjamin Ehinger
How to Build a DIY Picnic Table: Simple Steps for Outdoor Fun
CALL NOW 844-762-8449
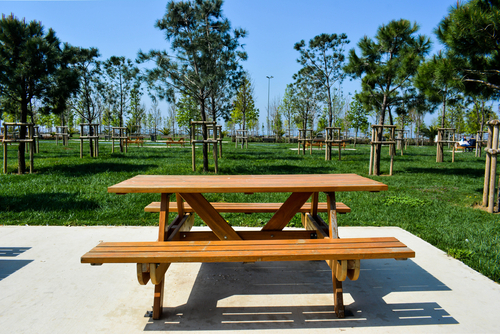
Learning how to build a DIY picnic table can be a satisfying project that not only saves you money but also allows you to create a functional outdoor fixture tailored to your space and style. A picnic table serves as the centerpiece for family gatherings, barbecues, or outdoor activities, making it more than just furniture—it’s the hub for social interaction and enjoyment during the warmer months. Before embarking on this DIY journey, it’s crucial to plan your project, understand the necessary tools and materials you’ll need, and familiarize yourself with the construction process.
Constructing a picnic table from scratch involves preparation, precise cutting of lumber, and systematic assembly to ensure strength and durability. From the tabletop and seats to the sturdy base, each component must be carefully put together to form the final product. Sanding, finishing, and regular maintenance will prolong the life of your picnic table, and safety should always be a top priority. With the right approach, you can customize your table to suit your preferences, troubleshoot any issues that arise, and enjoy the satisfaction of a job well done.
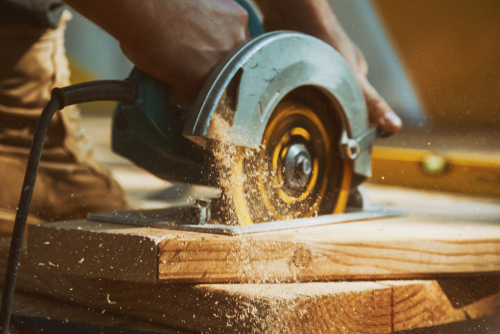 Building a DIY picnic table starts with the right preparation of your materials. Properly measuring, marking, and cutting your lumber is crucial for a well-assembled final product.
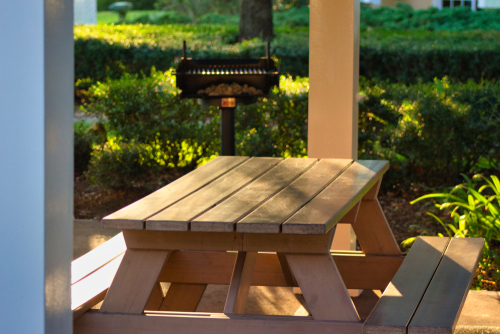 Once you’ve assembled the individual pieces of your picnic table, it’s vital to join the top and seats to the base securely using bolts, nuts, and screws to ensure stability and long-term durability.
Key Takeaways
- A DIY picnic table adds a personal touch to outdoor spaces and provides a setting for social events.
- Proper planning and having the right tools are essential for a successful build.
- Attention to detail during construction and finish work ensures a long-lasting and safe picnic table.
Planning Your Picnic Table Project
Before diving into the construction of your picnic table, it’s crucial to select appropriate materials and understand the design that best suits your needs. A solid plan ensures a balance between durability, aesthetics, and budget.Choosing the Right Materials
When selecting materials for your picnic table, you’re confronted with a variety of options, but not all are equal in terms of longevity and maintenance. Cedar is a top choice due to its natural resistance to rot and insects. However, pressure-treated wood provides an economical yet durable alternative, especially in moist climates. If opting for a wood picnic table, consider the environment it will be used in to make an informed decision. For those with an eye for quality and detail, red cedar offers a visually appealing, albeit pricier, option. Its rich tones provide a warm, inviting look but may require a larger budget. Consider the following aspects before making a choice:- Durability: How the material withstands weather.
- Maintenance: The level of upkeep needed to maintain appearance.
- Cost: Your budget versus the cost of the materials.
- Aesthetics: How the material fits with your desired look.
Understanding Picnic Table Designs
Your picnic table plans play a pivotal role in the project’s success. Classic designs often feature simplistic construction with a straightforward use of lumber, making them accessible for builders of all skill levels. To find comprehensive plans that fall in line with your skill set and vision, reputable sources like The Spruce Crafts provide detailed instructions and materials lists. On the other hand, websites like Ana White offer innovative designs that can cater to a more modern aesthetic or specific functional requirements, such as built-in seating or ice buckets. Here are key elements to consider when choosing a design:- Capacity: How many people it should seat.
- Space: The size of the table relative to where it will be placed.
- Features: Additional elements such as umbrella holes or integrated benches.
- Instructions: Clear steps and illustrations provided in the plan.
Essential Tools and Equipment
To build a DIY picnic table, you need a collection of specific tools and equipment to make accurate cuts, fasten pieces together securely, and ensure all your measurements are precise. The right tools not only make your work easier but also ensure that your picnic table is sturdy and durable.Cutting Tools
You will need a saw for the initial cutting of lumber to the correct lengths. A circular saw is versatile and can handle most of the cuts you’ll need to make. For more precise cuts or angles, consider using a miter saw. Always operate saws with care to avoid kickback and ensure that sawdust is managed to maintain a clean workspace.- Circular Saw: Best for straight cuts through boards.
- Miter Saw: Ideal for making precise angled cuts.
Drilling and Fastening Tools
For assembly, a powerful drill is indispensable. You will use it to bore holes for screws, which will join the wood pieces together. Your DIY picnic table will require various fastening tools, including:- Drill/Driver: To drill pilot holes and drive screws.
- A set of drill bits for different hole sizes.
- Screw Gun (Optional): For faster screwing, if available.
Measuring and Marking Tools
Accurate measurements and markings are crucial for a well-balanced and symmetrical picnic table. Before cutting or drilling, always measure twice to ensure accuracy. For this purpose, utilize:- Measuring Tape: For taking long and short distance measurements.
- Pencil: To mark your measurements and cutting lines.
- Speed Square: Useful for marking perpendicular and angled lines with precision.
Preparation and Cutting of Lumber
 Building a DIY picnic table starts with the right preparation of your materials. Properly measuring, marking, and cutting your lumber is crucial for a well-assembled final product.
Creating a Cut List
Before you begin, it’s important to have a cut list. This is a detailed inventory of all the pieces of wood you’ll need for your table, including dimensions and quantities. This list helps ensure you have all necessary materials on hand and can help you optimize the use of lumber to minimize waste.- Tabletop Slats: Five 2×6 planks, 72 inches long
- Bench Slats: Four 2×6 planks, 72 inches long
- Legs: Four 2×6 planks, varying lengths
- Supports: Multiple 2×4 planks, varying lengths for braces and crosspieces
Measuring and Marking
Measure each piece of lumber twice to assure accuracy before making any cuts. Use a tape measure for length and a carpenter’s square to mark perpendicular cut lines. For angle cuts, determine the degree of the angle and then mark the wood accordingly. Always ensure your marks are visible and lines are drawn where you will be making your cut.Making the Cuts
When it’s time to cut, use a circular saw for straight cuts or a miter saw for angle cuts. Clamp your lumber securely before cutting, and always follow safety guidelines. Cut along the outside edge of your line to keep the dimensions accurate. Remember, a sharp saw blade makes for cleaner cuts, so replace or sharpen your blade if it’s becoming dull.- Straight cuts: Use a guide to ensure the circular saw moves in a straight line.
- Angle cuts: Adjust miter saw to appropriate angle; typically, for picnic table legs, you’ll make 30-degree angle cuts.
Assembling the Tabletop and Seats
Building a sturdy picnic table starts with proper assembly of the tabletop and seats. This process involves securely attaching boards and ensuring a stable foundation for years of outdoor gatherings.Assembling the Tabletop
To assemble the tabletop, lay out the tabletop boards side by side. Apply a bead of wood glue along the edges and use clamps to hold the boards together, ensuring they are flush and aligned. Once the glue is applied, drill pilot holes and fasten the boards with deck screws for additional strength. Keep the screws evenly spaced and countersunk for a smooth finish.Attaching the Seat Boards
For the seats, position the seat boards on top of the bench supports, ensuring they are centered. If you have measured and cut everything correctly, they should fit without issue. Apply glue to the supports where the seat boards will sit to enhance adhesion. Secure them with carriage bolts, nuts, and washers for a reliable and durable connection. Tighten the bolts firmly but ensure you do not strip the nuts or damage the wood.Building the Table Base
Constructing a sturdy base is essential for your DIY picnic table. This will ensure that your table is stable and can withstand regular use. Pay attention to detail when connecting the table legs and braces, using durable materials and proper fastening techniques.Constructing Table Legs
Begin by cutting your table legs to length, ensuring each is identical to maintain evenness. You’ll generally be using 4×4 lumber for robust legs. Once cut, position the legs at the intended width of the table and secure them using galvanized carriage bolts, not forgetting to pre-drill the holes to avoid splitting the wood. It’s important to use construction adhesive between joints before bolting to reinforce the bond.Adding Support Braces
To connect the legs and add horizontal support, cut 2×4 lumber for the table braces. Place the table braces between the legs, approximately a quarter of the way down from the top of the legs. Secure them with deck screws and additional construction adhesive for extra stability. For more rigidity, add diagonal braces from the table legs to the table braces. These should also be attached with deck screws, and each connection point should be double-checked for firmness.Joining the Components Together
 Once you’ve assembled the individual pieces of your picnic table, it’s vital to join the top and seats to the base securely using bolts, nuts, and screws to ensure stability and long-term durability.
Attaching Top and Seats to Base
Begin by positioning the tabletop and bench seats onto the previously assembled base frame, ensuring that the cleat is centered and flush with the top boards. Align the bench supports carefully; they should be perpendicular to the tabletop and seats. To prevent the wood from splitting, it’s crucial to drill pilot holes where the bolts will go.Securing with Fasteners
After aligning all parts, secure them together with bolts and nuts, tightening them to hold everything in place firmly. Make sure to add a washer on each side next to the bolt head and nut for additional strength. For an even stronger bond, apply construction adhesive on the cleats before securing the top and seat boards. Remember to wipe away any excess adhesive that squeezes out during the joining process to maintain a clean finish.Sanding and Finishing
The final appearance and durability of your DIY picnic table hinge on proper sanding and finishing. Precise sanding ensures smoothness, while staining and sealing protect the wood from the elements, enhancing both the table’s look and longevity.Sanding for Smoothness
Begin sanding with a medium-grit sandpaper to remove any rough spots or mill marks. It’s critical to sand along the grain of the wood, progressing to a fine-grit sandpaper for a uniformly smooth surface. Use an orbital sander or sand by hand, especially on edges and hard-to-reach areas to prevent accidental gouging.- Initial sanding: Start with 80-100 grit sandpaper.
- Final sanding: Finish with 150-220 grit for a smoother texture.
Staining and Sealing
When choosing a stain, consider the desired color and compatibility with the wood type. Apply stain using a brush or rag, working in sections, and allow it to penetrate the wood. After staining, apply a sealant to protect against weather. A water-repellent finish or a sealant with UV protection is advisable for outdoor furniture.- Staining:
- Apply using even strokes.
- Wipe off excess to prevent uneven tones.
- Sealing:
- Choose between products like polyurethane, varnish, or an oil-based sealant.
- Apply multiple thin coats, rather than one thick coat, for best results.
Safety and Maintenance
Building a DIY picnic table is a rewarding task, but it’s crucial to prioritize safety during construction and ensure consistent maintenance afterwards to maximize the lifespan of your outdoor furniture.Understanding Safety Precautions
When constructing your picnic table, wearing the appropriate personal protective equipment (PPE) is vital. This includes safety goggles to protect your eyes from flying debris, a dust mask to prevent inhalation of sawdust, and gloves to protect your hands from splinters and cuts. Be aware of weather conditions which can affect your build. Wet or humid weather can make surfaces slippery and may warp wood. Ensure that your working area is dry and well-ventilated. Here is a safety checklist for your construction:- Wear safety goggles, gloves, and a dust mask.
- Use tools according to their instructions.
- Secure your materials to prevent shifting during cutting or assembly.
- Keep your work area clean and uncluttered to avoid tripping hazards.
- Check your materials for quality, avoiding warped or cracked wood.
Maintaining Your Picnic Table
Once your table is built, regular maintenance is required to keep it in prime condition, particularly as it will be exposed to the outdoors. Start with a proper wood treatment to seal and protect it from the elements. At least once a year, check for:- Loosened screws or bolts following changing weather conditions.
- Signs of wood rot or insect damage which can be exacerbated by outdoors exposure.
- Uneven surfaces that may need sanding to prevent splinters.
- Regularly inspect for wear and tear
- Clean with mild soap and water, avoiding harsh chemicals
- Protect with a weather-proof cover when not in use
- Re-treat the wood with a sealer or stain every few years
Customizations and Enhancements
Building your own picnic table offers a rewarding opportunity to tailor it to your preferences. The following ideas are designed to enhance both aesthetics and functionality.Incorporating Unique Features
Integrated Planters: Add a central trough to your picnic table for use as a planter. This can be a simple modification where you replace one of the tabletop boards with a small, box-like structure that can hold soil and plants. Built-In Ice Buckets: For those hot summer days, incorporate a built-in ice bucket into your tabletop. Just like the planter, replace a portion of the table’s center with a galvanized steel bucket, providing a convenient spot to keep drinks chilled.Adding Accessories
Hanging Side Tables: Maximize your space with collapsible tables that hang from the picnic table sides. They’re perfect for holding condiments during a barbecue and can be folded down when not in use. Seat Cushions and Umbrellas: Enhance comfort and shade by adding seat cushions and a hole in the center of the table for an umbrella. Custom tailor or purchase seat cushions that fit your seat dimensions for added comfort.Troubleshooting Common Issues
When building a DIY picnic table, you might encounter a few common problems. Here’s a quick guide to troubleshoot and solve them: Warped or Cracked Wood:- Inspect lumber before purchase.
- Store wood flat to prevent warping.
- Seal wood with a protective finish to prevent cracks.
- Check that all legs are even; if not, trim to equal length.
- Ensure all fastenings are tightened.
- Use angle braces for additional stability.
- Pre-drill holes to prevent wood splitting.
- Use wood glue with screws for a stronger bond.
- Choose the right length and type of screws for the material.
- Lay out planks and clamp before securing.
- Adjust for any inconsistencies before final assembly.
- Sand tabletop and bench surfaces with progressively finer grit.
- Apply stain or paint with even strokes, following the wood grain.
- Follow the detailed step by step guide for assistance.
- Label all pieces during the cutting stage for easier identification.
Final Review and Set Up
Before welcoming guests to enjoy your new DIY picnic table, conduct a thorough inspection. Carefully examine each component for stability and safety. Check the following:- Legs: Ensure they are even and the table sits level
- Seating: Verify seats are securely attached
- Fasteners: Tighten any loose screws or bolts
- Surface: Smoothness to touch; sand down any rough patches
- Stain: For a natural look that highlights the wood grain
- Paint: To add color and additional protection
- Sealant: Clear finish to prevent water damage and UV wear
- Positioning: Place your table on a flat surface.
- Orientation: If possible, align the table to complement your outdoor space.
- Spacing: Ensure adequate room around the table for movement.
- Grounding: If needed, secure the table to the ground to prevent tipping.
Frequently Asked Questions
In this section, you’ll find concise answers to common questions about DIY picnic table projects, providing essential information to assist you in building your own picnic table.What materials are required to construct a picnic table?
To build a wooden picnic table, you typically need lumber (2x4s, 2x6s, 2x8s), galvanized or stainless-steel screws and bolts, wood glue, and tools such as a saw, drill, sander, and measuring tape.Could you provide a comprehensive step-by-step guide for building a picnic table?
While this section does not delve into exhaustive details, comprehensive step-by-step tutorials can guide you through the process, from cutting the lumber to assembling the table. Here’s a detailed guide that can help you with the construction.Are there any free plans available for making a picnic table?
Yes, there are free plans available online that provide a range of designs from traditional to modern picnic tables. Bob Vila offers an assortment of plans tailored to different skill levels and style preferences.What is the estimated cost to build a picnic table by yourself?
The cost varies depending on the type of wood and hardware you choose. However, a basic DIY picnic table can typically be built for $100 to $200.How many 2×6 boards are needed to build a standard-sized picnic table?
For a standard 6-foot picnic table, you generally need five 2×6 boards for the tabletop and two for the bench seats. You may need additional 2x6s for the frame depending on your design.What type of wood is best suited for constructing a durable picnic table?
Pressure-treated lumber, redwood, and cedar are commonly recommended for their durability and resistance to outdoor elements. The Home Depot provides insights on choosing the right wood for your picnic table.RECENT BLOGS
Our Reviews
Glenda Lanier Prowell
1721758635
I have ordered an 11 yard dumpster to be delivered to my house.Lonier was extremely helpful and answered all my questions. The rate was very reasonable.
Cedric Smikle
1721660395
Amber was extremely professional and courteous. She answered all of my questions and even some that I didn’t know I needed to ask.
Cait Kaider
1721243051
I highly recommend Waste Removal USA for their responsiveness and how the staff work hard to provide exceptional customer service. They have done well by us and our clients. Thank you!
Easom Family
1721223306
Louiner Pierre-Louis Is awesome! Did a great job. Will definitely be using this same company for all my dumpster needs because of his awesome customer service! Thank you!!!
tabitha Vazquez
1720539988
Wonderful and fast customer service!
LATEST BLOGS
