April 10, 2024 - Benjamin Ehinger
Convert a Fiberglass Tub to a Walk-in Shower: A Step-by-Step Guide
CALL NOW 844-762-8449
Converting a fiberglass tub to a walk-in shower can be a transformative update for your bathroom, offering improved accessibility and a modern aesthetic. If you’re contemplating this renovation, you’ll need to start by evaluating your bathroom’s current layout, ensuring that there’s enough space for a walk-in shower and compliance with safety requirements. It’s important to establish a realistic budget, as costs can vary depending on materials, fixtures, and the complexity of plumbing adjustments required.
Careful planning and design are fundamental to a successful conversion from a fiberglass tub to a walk-in shower. You’ll want to select materials and fixtures that suit your taste and needs while also considering their longevity and maintenance. Once the planning phase is complete, preparing for the demolition of the old tub and the installation of the new shower is crucial. You should consider renting a small 10-yard dumpster from Waste Removal USA to facilitate a smoother clean-up and disposal of debris during the renovation process.
 When planning to convert your fiberglass tub to a walk-in shower, it’s crucial to set a realistic budget. Costs can vary widely based on size, materials, and labor.
Cost Factors:
When planning to convert your fiberglass tub to a walk-in shower, it’s crucial to set a realistic budget. Costs can vary widely based on size, materials, and labor.
Cost Factors:
 When converting your fiberglass tub to a walk-in shower, the installation process is critical to ensure both functionality and durability. You’ll need to prepare the area, ensuring that it is both level and clean, before the installation of the shower pan and walls. If you feel uncomfortable with any steps, it’s advisable to consult with a professional plumber.
Key Takeaways
- Assess your bathroom layout and determine the feasibility of a walk-in shower conversion.
- Establish a budget and decide on materials and fixtures for the walk-in shower.
- Prepare for the project with proper tools and waste management solutions such as dumpster rental.
Evaluating Bathroom Layout and Requirements
Before you begin the transition from a fiberglass tub to a walk-in shower, it’s critical to thoroughly assess your bathroom’s layout and plumbing. This initial evaluation sets the stage for a successful renovation, ensuring that the end result not only meets building codes but is practical for your everyday use.Measuring Space
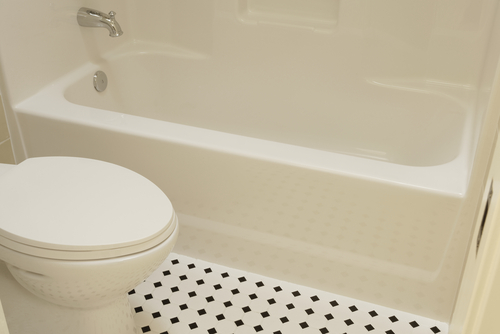
Your bathroom must accommodate the change without hindering functionality. Precisely measure the floor space that your current tub occupies; a minimum space of 30-by-30 inches is needed for a walk-in shower, with a height clearance of at least 80 inches. Additionally, ensure there’s enough clearance around the toilet—15 inches minimum, or 21 inches if the shower is in front of the toilet. Be mindful that shower doors should have ample room to open and close without interference.Assessing Plumbing Systems
The plumbing in your bathroom will likely require modifications. Evaluate your current water supply and drain lines to ensure they align with the intended design of your walk-in shower. It’s essential to consider the location of showerheads and faucets, as repositioning these may increase the complexity and cost of the project. Be aware that local building codes can influence your plumbing adjustments and may dictate whether you need permits for certain aspects of your bathroom renovation. Always consult a professional to discuss the requirements and implications of altering your home’s plumbing.Planning and Designing the Walk-In Shower
When you’re planning to transform your fiberglass tub into a walk-in shower, you’re not just upgrading your bathroom; you’re tailoring a new experience. You must select the right components and consider the dimensions to ensure the new shower fits your space and meets your needs.Choosing Shower Components
The components you choose for your walk-in shower are crucial to both its function and its aesthetic. For the shower base, options like acrylic or ready-made pans are popular for their durability and ease of installation. Regarding shower walls, materials like tile or solid surface panels offer a variety of design options while providing a water-resistant barrier.- Shower Base
- Acrylic
- Ready-Made Pans
- Shower Walls
- Ceramic Tile
- Solid Surface Panels
Considering Shower Dimensions
Layout dimensions impact not just the walk-in shower’s look but also its comfort and compliance with building codes.- Floor Space: Minimum of 30-by-30 inches, with 36-by-36 inches being ideal for comfortable movement.
- Height: Typically, showers are about 80 inches tall.
- Spacing: Ensure at least 15 inches from the center of the toilet to the shower, or 21 inches if the shower is in front of the toilet.
Budgeting for the Conversion
When planning to convert your fiberglass tub to a walk-in shower, it’s crucial to set a realistic budget. Costs can vary widely based on size, materials, and labor.
Cost Factors:
- Shower size and style: Larger showers or custom designs typically cost more. Prefabricated stalls are a budget-friendly option.
- Materials: High-quality materials like ceramic tiles add to the cost but ensure durability. Economy options can be cost-effective but may not offer the same longevity.
- Plumbing: Adjustments to existing plumbing lines may be required.
- Prefab shower kit: $1,000 – $8,000
- Tile work: $10 – $65 per sq ft
- Plumbing work: Can vary greatly
- Get Multiple Quotes: Approach several contractors to compare rates and services.
- Consider Long-Term Value: Investing in high-quality materials may be more cost-effective over time.
- Account for Extras: Don’t overlook the cost of fixtures, doors, and potential unforeseen expenses.
Selecting Materials and Fixtures
When converting your fiberglass tub to a walk-in shower, the selection of materials and fixtures is critical for creating a space that is both aesthetically pleasing and functionally enduring.Choosing the Shower Pan
For a walk-in shower, the shower pan is the foundation of your design. Acrylic is a popular and wise choice because of its durability and ease of maintenance. Most acrylic shower pans offer a sleek look and are resistant to scratches and stains. Be sure to select a pan that fits your space precisely to prevent any water damage issues. Pre-made pans, like those found at Home Depot, come in various sizes and shapes to match your shower enclosure.Picking Wall Panels
Next, consider the wall panels, which are crucial for enclosing your shower and defining its boundaries. Acrylic wall panels are a favorable option due to their long life and simplicity in cleaning, making them a practical choice for daily use. When picking wall panels, you might look for a shower kit that includes all the necessary components, ensuring they fit together seamlessly for a watertight finish. Fixtures should complement the style and function of your new walk-in shower. A high-quality faucet and shower door can elevate the overall design. For the faucet, aim for a balance between aesthetic appeal and practical functionality. There are myriad options available that are both stylish and equipped with water-saving features. As for the shower door, opt for a model that blends with your overall bathroom’s design. It should allow easy access while keeping water contained. Choices range from frameless to sliding doors, with various finishes to match your new fixtures. Considering products that are advertised as easy to clean can save you time and effort in the long run. Remember, when selecting materials, always prioritize durability to ensure that your new walk-in shower withstands the test of time.Preparation and Demolition Process
Before converting your fiberglass tub to a walk-in shower, you’ll need to undergo a careful demolition process to ensure the space is prepared properly for the new shower installation. This involves meticulously removing the bathtub and preparing the underlying space to support the new structure.Removing the Bathtub
To begin the demolition phase, you will first need to disconnect any plumbing attached to your bathtub. This includes turning off the water supply and draining any remaining water. Afterward, you’ll remove the fixtures and pry out the caulk sealing the tub to the walls and floor. Steps for Tub Removal:- Shut off water: Prevent any water flow to the tub to avoid spills.
- Disconnect drainage: Remove the tub’s drain and overflow cover.
- Detach fixtures: Take off any faucets or shower heads connected to the bathtub.
- Carefully cut along the caulk line using a utility knife.
- If the tub is freestanding, you may be able to lift it out. However, built-in tubs will require more demolition work to remove any surrounding materials.
Preparing the Space
Once the bathtub has been removed, you will see the subflooring and underlying materials that need to be readied for the tub-to-shower conversion. Inspect for any water damage and replace damaged sections with new plywood if necessary to ensure a solid base. Space Preparation Checklist:- Inspect subflooring: Look for rot or damages; repair as needed.
- Leveling: Make sure the subflooring is level to avoid future drainage issues.
- Support: Reinforce the area with additional plywood if the existing setup does not provide sufficient support for the new shower base.
Installation of Walk-In Shower
When converting your fiberglass tub to a walk-in shower, the installation process is critical to ensure both functionality and durability. You’ll need to prepare the area, ensuring that it is both level and clean, before the installation of the shower pan and walls. If you feel uncomfortable with any steps, it’s advisable to consult with a professional plumber.
Setting Up the Shower Pan
To begin setting up the shower pan, you must first remove the existing fiberglass tub. Ensure the floor is level and clean, then proceed to dry-fit the shower pan; this will help you confirm the correct size and shape. Apply a generous amount of construction adhesive to the area where the pan will sit, then place the pan down firmly to create a watertight seal. After the pan is secured and the adhesive has set, connect the drain to your home’s plumbing.- Checklist for Shower Pan Installation:
- Ensure subfloor is level
- Clean the area thoroughly
- Dry-fit shower pan to confirm fit
- Apply construction adhesive evenly
- Secure the pan and connect the drain
- Allow adhesive to cure based on manufacturer’s recommendations
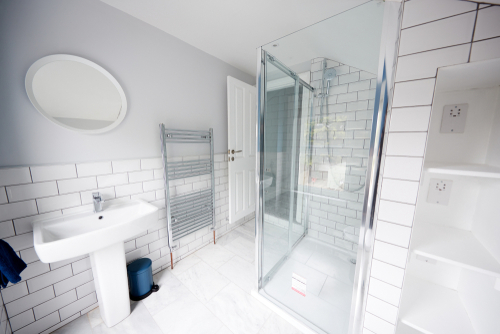
Installing Shower Doors and Walls
Once the shower pan is installed, next comes the shower walls. If using tile, apply thin-set mortar to adhere the tile to the waterproof backer boards, spacing them evenly, and use grout to fill in the gaps between the tiles once the mortar is set. For pre-fabricated walls, apply adhesive to the backer boards and press the walls into place firmly. As for the shower doors, follow the manufacturer’s instructions for installation, as this will typically involve securing the frame to the walls and ensuring the door is level and swings or slides smoothly. Seal all edges with silicone caulk to prevent water leakage.- Checklist for Shower Doors and Walls:
- If tiling: apply mortar, set tiles evenly, and apply grout
- If using pre-fabricated walls: apply adhesive and set walls firmly
- Install the shower door frame and doors as per instructions
- Use silicone caulk to seal and waterproof edges
Enhancing Accessibility and Safety
When you convert your fiberglass tub to a walk-in shower, you are not only modernizing your bathroom but also significantly improving its accessibility and safety features, particularly for individuals with mobility issues.Incorporating Grab Bars
Installing grab bars in your new walk-in shower is a vital step towards a safer bathroom environment. These bars provide stability and support as you enter and exit the shower, reducing the risk of slips and falls. It’s important to ensure they are properly anchored and placed within easy reach for maximum benefit.Installing Curbless Showers
A curbless shower, also known as a zero-threshold shower, eliminates the need to step over a barrier, thus offering a seamless transition from the bathroom floor into the shower. This type of shower is especially beneficial if you use a wheelchair or walker, as it allows for easier and safer accessibility. Constructing a curbless shower involves specific floor modifications to create a slight slope towards the drain, ensuring that water is contained without the need for a threshold.Ensuring Proper Plumbing and Waterproofing
When converting your fiberglass tub to a walk-in shower, handling the plumbing and waterproofing correctly is crucial to prevent water damage and leaks. Your approach to plumbing renovation will vary based on whether you select a curbless shower or a standard walk-in model. For the Plumbing:- Inspect current pipes: Check for any signs of existing damage and ensure compatibility with your new shower design.
- Relocate the drain: The center of the shower floor may require repositioning the drain.
- Install new valves: Add pressure-balancing valves to avoid sudden temperature changes.
- Use waterproof membranes beneath the shower floor and around the shower to prevent water seepage.
- Ensure the shower floor has the correct slope to direct water to the drain effectively.
- Seal all joints and corners with a waterproof sealant to barricade potential leak points.
Final Touches and Quality Check
After the main construction phase, it’s crucial to ensure that your new walk-in shower is both aesthetically pleasing and functionally sound. Applying precise finishing touches and conducting a thorough quality check can avoid future water damage and repairs.Sealing and Grouting
Carefully apply silicone sealant around the edges where the shower base meets the walls and floor. This is a critical step to prevent water leakage. After your walk-in shower is in place, use waterproof grout for the tiles, if applicable. You’ll need a smooth, even application to avoid future mold and mildew. Monitor the grout and sealant as they dry to address any shrinkage or gaps that may occur.Inspection and Repairs
Before adding accessories like glass doors or a shower curtain, inspect every component of your newly installed walk-in shower. Ensure that all fixtures and fittings are secure and that shower doors operate smoothly. If you’ve opted for easy to install features, double-check that they are properly fitted according to manufacturer instructions. Should you find any issues, make the necessary repairs immediately to avoid complications. Remember, the quality of the final touches directly affects the longevity and safety of your walk-in shower.Frequently Asked Questions
In this section, you’ll find detailed answers to common inquiries about converting a fiberglass tub to a walk-in shower, from costs to specific design considerations that ensure safety and accessibility.What is the typical cost range for converting a bathtub into a walk-in shower?
The costs for converting a bathtub into a walk-in shower can vary widely depending on materials, size, labor, and any additional features. Typically, prices can range from a few hundred to several thousand dollars. Factors impacting cost include wall material, fixtures, and whether you’re opting for custom tiling or prefabricated units.What are the necessary steps to remove a bathtub and install a walk-in shower?
To remove a bathtub and install a walk-in shower, the first steps include disconnecting and removing the existing tub, which may require demolition. Next, adjust plumbing to fit your new shower and install a new shower base. The final steps involve fitting the shower enclosure with walls and doors, followed by the installation of fixtures and finishing touches.How difficult is it to convert an existing tub into a walk-in shower?
The difficulty of converting a tub into a walk-in shower can range from moderate to challenging, depending on your DIY skill level and the complexity of the project. If the conversion involves adjusting plumbing or other major structural changes, it may be best handled by professionals.Are there conversion kits available for turning a tub into a walk-in shower, and if so, what do they typically include?
Conversion kits to turn a tub into a walk-in shower are available and can simplify the process. These kits typically include a shower base, wall panels, and sometimes doors. The contents of a kit depend on the brand and can vary but generally include the necessary components for a basic setup.Can a fiberglass bathtub be safely cut to create a walk-in shower, and what are the considerations?
A fiberglass bathtub can be converted into a walk-in shower by cutting it; however, considerations include ensuring structural integrity, proper sealing to prevent leaks, and a professional finish to maintain aesthetics and safety.What are some design ideas for converting a tub to a walk-in shower to ensure safety and accessibility?
When converting a tub to a walk-in shower, incorporate design elements such as non-slip flooring, grab bars, a bench seat, and a handheld showerhead for safety and accessibility. Good lighting and barrier-free access are also important for a functional design.RECENT BLOGS


Our Reviews

Glenda Lanier Prowell
1721758635
I have ordered an 11 yard dumpster to be delivered to my house.Lonier was extremely helpful and answered all my questions. The rate was very reasonable.

Cedric Smikle
1721660395
Amber was extremely professional and courteous. She answered all of my questions and even some that I didn’t know I needed to ask.

Cait Kaider
1721243051
I highly recommend Waste Removal USA for their responsiveness and how the staff work hard to provide exceptional customer service. They have done well by us and our clients. Thank you!

Easom Family
1721223306
Louiner Pierre-Louis Is awesome! Did a great job. Will definitely be using this same company for all my dumpster needs because of his awesome customer service! Thank you!!!

tabitha Vazquez
1720539988
Wonderful and fast customer service!
LATEST BLOGS
